 This article features a technique that turns ordinary looking plastic bases into simulated weathered brick. The actual hobby work shown in this article was done by a friend of mine named, Dave. I think it looks terrific and I hope you will as well.
I noticed him working on this a few weeks ago while painting models together at the Games Workshop Bowie Battle Bunker and immediately thought it would make a great hobby article. So I took out my camera and grabbed a few work in progress snapshots presented here in this how-to article on model basing.
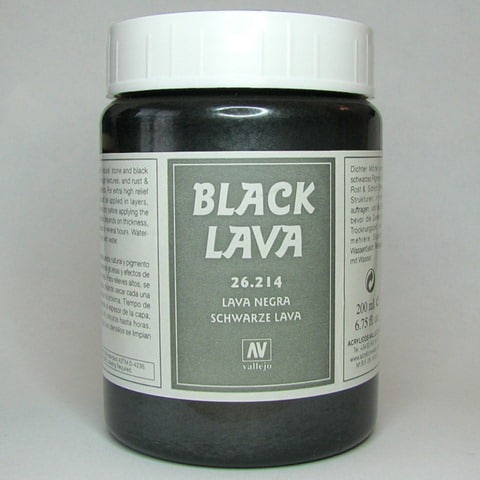 Materials needed for this project include a plain model base, brick pattern plastic card, modeling knife, hobby clippers, plastic cement, sculpting tool, and Vallejo Black Lava textured paint. This technique will work on just about any size or shape base. Simply adapt the shapes cut from the plastic card accordingly.
If you want to do clean, undamaged brick bases you can do without the Black Lava and simply cover the bases entirely with the patterned plastic card. In this example we’re going to simulate a damaged, worn brick promenade. Gluing sand to the base with white glue or super glue in place of using the Black Lava will also suffice.
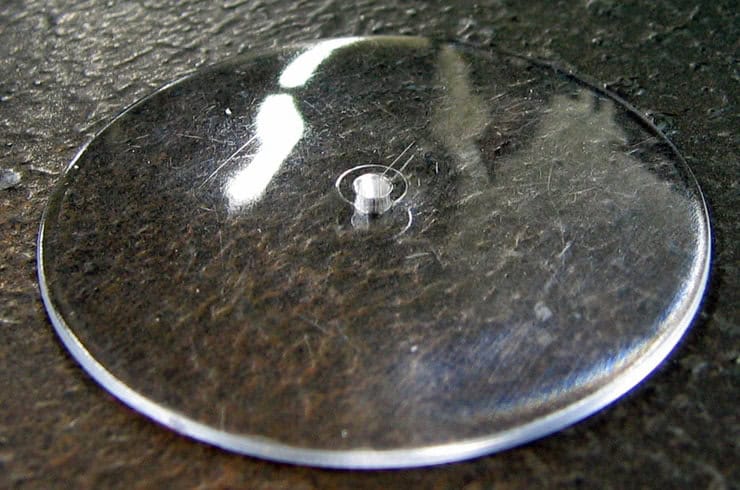
Start with a plain base. A Games Workshop large flying stand was used for this example. For bases with a smooth surface scuff them up with some sandpaper or a modeling knife. The textured paint and non-plastic cements if you use them adhere better to a coarse surface. The photo below shows the plain base before anything has been done to it.
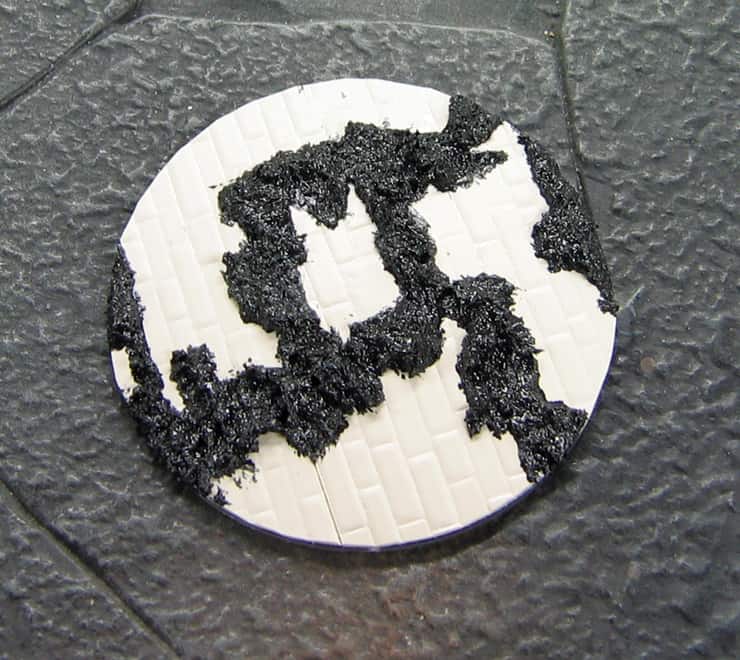
After scuffing the surface of the base cut some irregular edged shapes from the brick pattern plastic card. Use a sharp modeling knife to cut the card so that there are distinct breaks in the brick. Trim any excess from around the base edges carefully with clippers or a modeling knife. In the photo below you can see the scuffing on the base in between the pieces of plastic card. The card overhanging the edges of the base is in the process of being trimmed to follow the round edge of the base.

Now use a sculpting tool to add some Black Lava to the breaks in the brick pattern. Overlap the edges of the brick so that they mostly do not show. Let this dry for an hour or more till it’s completely dry before painting.
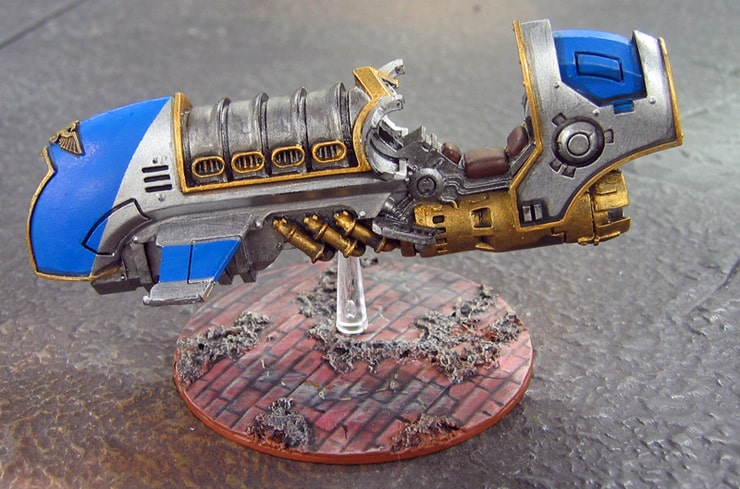
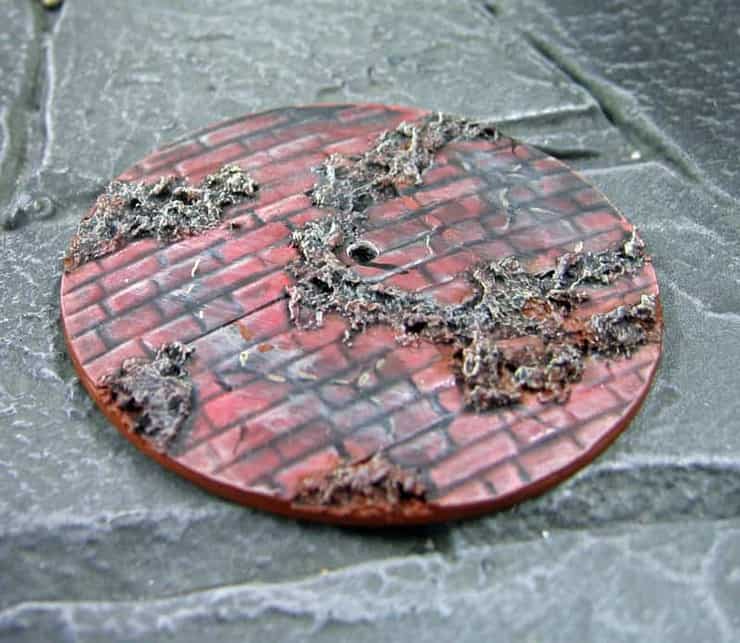
Next, prime the whole thing black and paint using the color scheme of your own choosing. The photo below shows a finished base. The brick and simulated debris sitting in the breaks have all been fully painted. The hole in the middle has been drilled out through the plastic card from below using a pin vice. All that remains is to add the stem to the middle and sit a model on top of it.
The photo below shows three bases together through start, mid-step and fully finished. As you can see this wonderful basing technique is yet one more method that transforms a plain, unadorned piece of plastic into an attractive display base.

Here’s a photo of the finished base with a model on top of it. The model is a Pre-Heresy Space Marine Jetbike by Forge World. It is not quite finished being painted and the weapon in the nose and rider have yet to be added, but it’s almost done. My friend is painting a squadron of three of these models for his Astral Claws collection. You can see a good sized sample of his fantastic Astral Claws army on display at the Games Workshop Bowie Battle Bunker in Maryland if you have a chance to stop by.
This is just one of a few articles for Spikey Bits I’ve done recently covering the topic of basing exclusively or as part of a larger hobby article. Comments so far seem to indicate people are enjoying these and even making use of them. I hope people find the model bases featured here fun and inspiring as well. The number of basing themes and techniques possible is limited only by the imagination and numbers of people creating them, making this topic virtually limitless. Do you have a favorite basing method or theme of your own?