Johnathan Ho entered this amazingly done conversion for our FREE Wraithknight contest, and while he didn’t win this one, he did win the last one we did!
After a little coaxing (not much) Johnathan sent over this article on how he made his “Justicar Weiss”. Now if we can just get him to share more models with us! -MBG
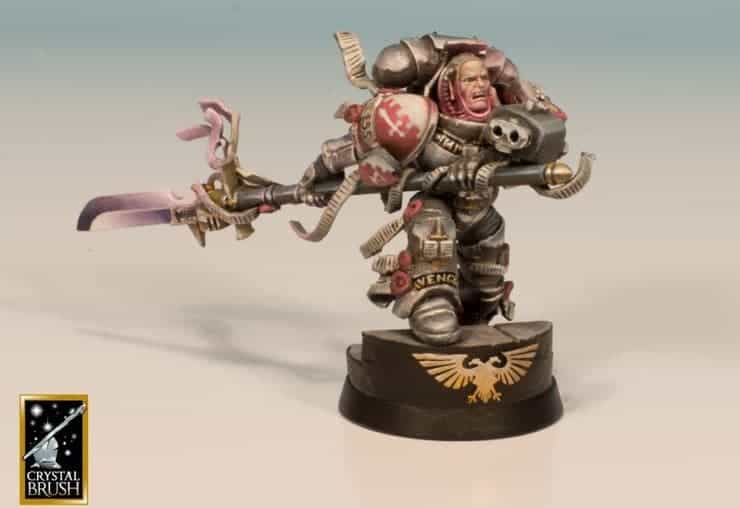
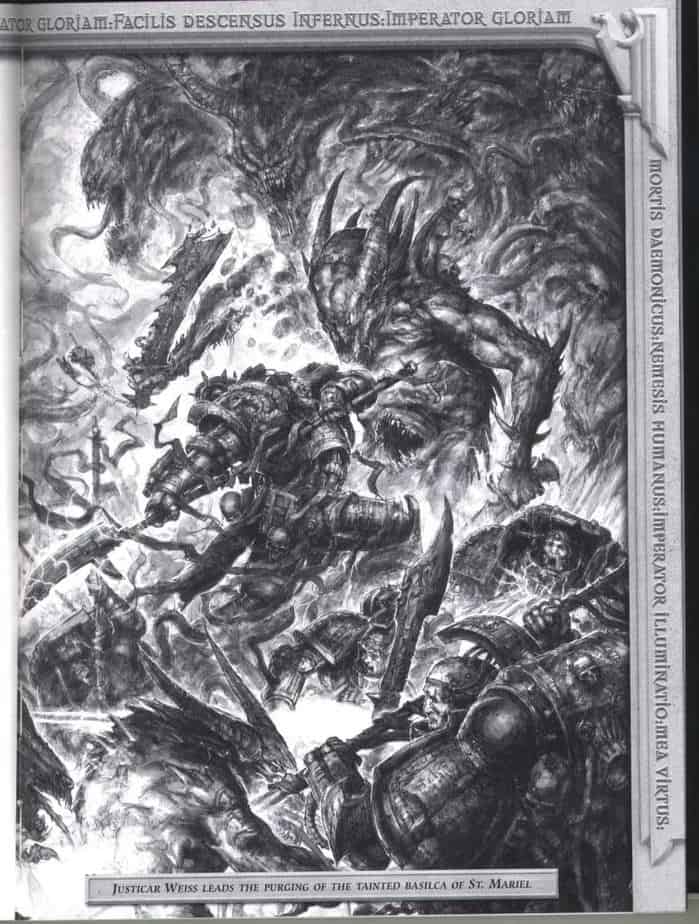 The project was inspired by the artwork of Justicar Weiss from the original Codex: Daemon Hunters (there is a full page spread on him, leading the charge up the steps of a Basilica).
This model uses parts from the Grey Knights Space Marines and Grey Knights Terminator kits, as well as a part from the old plastic Dark Angels Veterans kit.
The head, torso and backpack are straight out of the kits (head from the Terminator box, torso and backpack from the Marine kit). The censure attached to his belt is from the Dark Angels Veterans kit. I kept the head separate during assembly and painting so I could reach every angle of the head (in particular his hood), as well as paint the inner lighting glow properly. To hold the head, I just glued a pin into the underside and secured it with a pin vice.
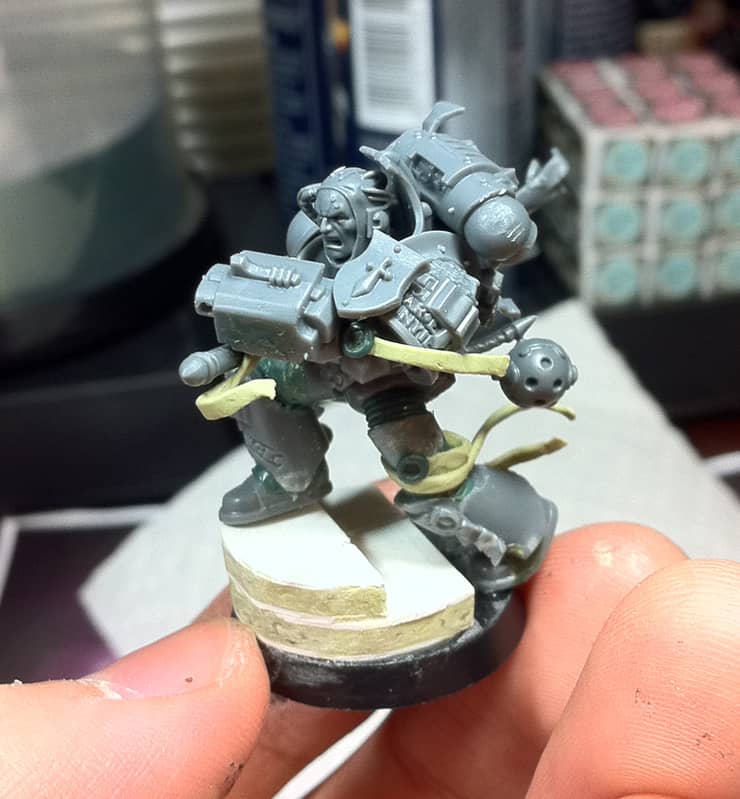
I started the project by first creating the base, because that would determine how the model would be posed (charging up the steps). The steps were sheets of plasticard cut to shape and glued on, with spacers made with scrap pieces of plasticard used as filler. The gaps were filled with 50/50 mix of Green Stuff (which was a 50/50 mix of blue and yellow) and Milliput (which was a 50/50 mix of white and grey), and once cure, was sanded smooth. I added an Imperial Eagle from the Forgeworld Brass Etch sprue to complete the base. The edges of the stone were carved in with a sharp blade.
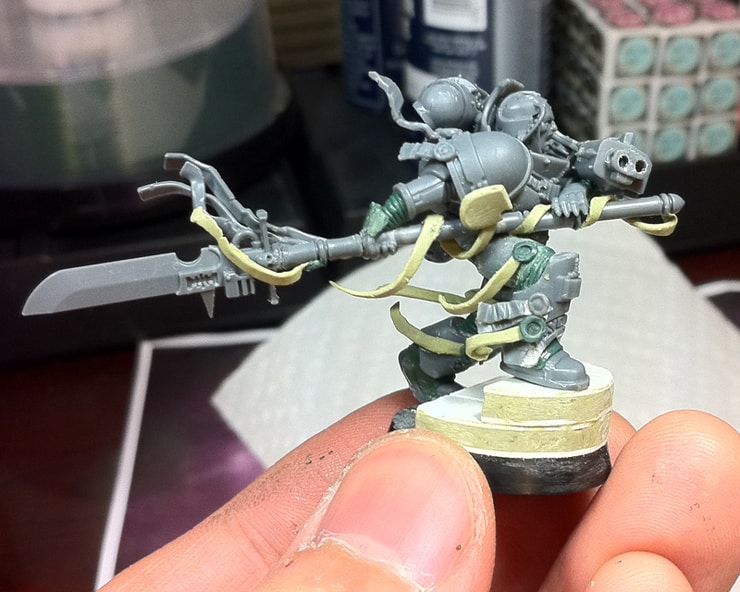
The arms and legs are from the Grey Knight Marine kit, but heavily modified. A neat trick I discovered when converting marines is to make clean precise cuts at all the joints. Once you carve out the ribbing, you can pin the limbs through from top to bottom to form a “skeleton” that allows you to (within reason) bend, adjust, alter and pose your model with ease (bend too much or too forcefully and the paperclip will snap, though, so some caution is required). Once you’re happy with the pose, glue the pieces and green-stuff the gaps. Any mistakes or over-cuts into the armor are corrected and allowed to cure, before new ribbing is sculpted in (which is simply a smaller cylinder, the lines added with a sharp knife). Make sure you keep your tools well lubricated as you sculpt! (I use water).
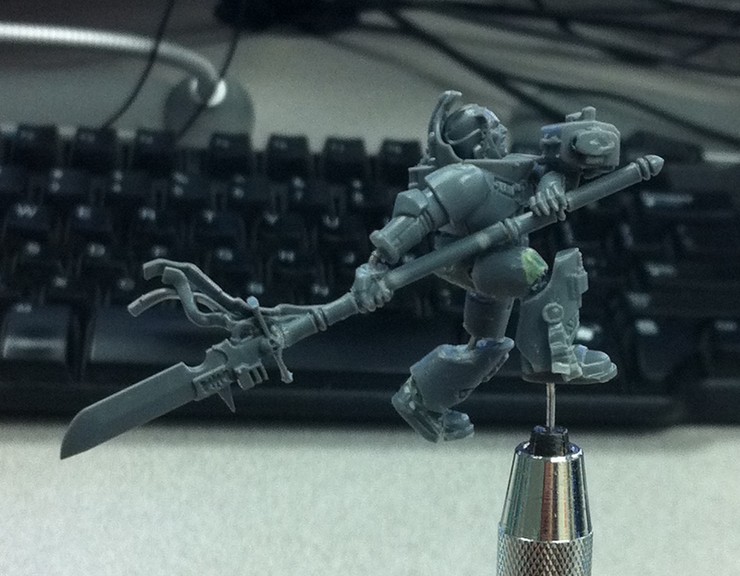
The halberd was another tricky piece, requiring no less than 3 halberds complete (one piece from the Terminator kit for the blade (it had some nice purity seals I wanted to keep), one for the upper portion of the haft (had the appropriate hand required), and a third for the haft’s lower portion (which had no hands). The sculpted purity seals are made with a 50/50 mix of Green Stuff (which was a 50/50 mix of blue and yellow) and Milliput (which was a 50/50 mix of white and grey). These were flattened, cut to shape, and allowed to try on a piece of spare plastic (I used a bit of Vaseline to make sure the seals didn’t stick) and allowed to cure slightly before being glued onto the model. A toothpick was then used to gently shape the purity seals into position. This step was the most laborious, as the purity seals had to constantly be readjusted (the weight would cause them to sag) until they cured properly.
A new heraldic shield was sculpted, as I wanted a shape similar to the Terminators, but smaller, and without rivets or skulls.
The full model was then put together (save the head) and ready for painting! We’ll feature the painting tutorial next week for you all- MBG