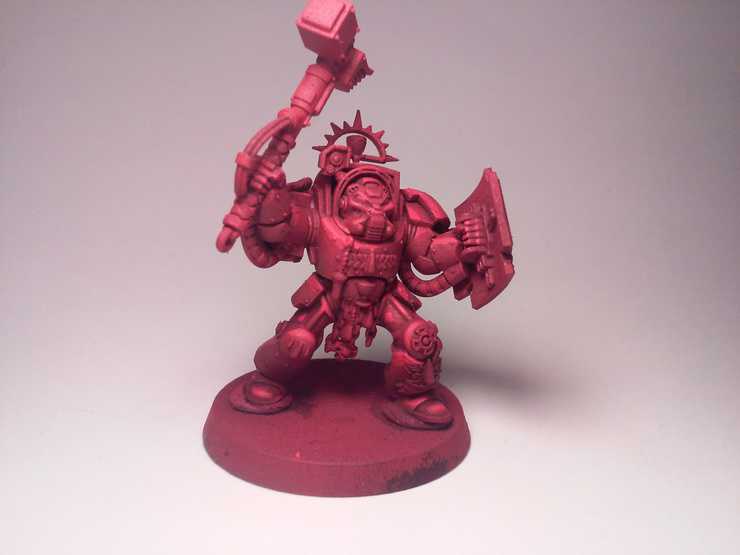
Fancy yourself some shiny new Blood Angels? Checkout this quick and easy receipe to paint some great looking Angels of Sanguinius in NO time!
Hello Everyone, Josh here again with another how to paint article. Todays article will be on painting Blood Angel Terminators. Well lets get right into it. To start with you will need these paints.
1. Army painter Fire Dragon Bright Primer
2. Carroburg Crimson
3. Khorne Red
4. Mephiston Red
5. Evil Sunz Scarlett
You will want to start by priming all your blood angels with the Fire Dragon Bright army painter primer. This will save you tons of time on painting them all red. Then wash them all with carroburg crimson. Once the wash is dry rehighlight the armour using khorne red. Now you could stop at this last step. But if you want the armour to look more natural go ahead and highlight all the areas light would hit with mephiston red. Then follow that by just hitting the edges with evil sunz scarlett.
Next up is the golds for these you will want the following.
1. Brass Scorpion
2. Agrax Earthshade
3. Sycorax Bronze
4. Runefang Steel
To start the gold go around all the models and basecoat any spots you want to brass scorpion. After the basecoat is done you will want to wash it agrax earthshade. Once the wash is dry go ahead and highlight it with sycorax bronze, leaving the lowest creases the agrax shade. Now go around and just hit the highest edges of the metal with runefang steel.

After that well do the metal.
1. Leadbelcher
2. Nuln Oil
3. Runefang Steel
For the metal go ahead and basecoat all the areas using leadbelcher. Then do a wash of nuln oil. Now go ahead and drybrush leadbelcher back over the areas u washed. Then do one final drybrush/highlight of runefang steel over the area.

For the next part we will be doing all the rope and fabric, you will need the following.
1. Rakarth Flesh
2. Seraphim Sepia
3. Ushabti Bone
4. Abbadon Black
Start by basing all the fabric areas with Rakarth Flesh. Then wash them with seraphim sepia. Once the wash is dry reapply the rakarth flesh leaving the deepest recess’s the color of the wash. Now do the same with ushabti bone. If doing ropes then you can stop here. However if your doing scrolls then take some abbadon black and make little lines on the scrolls to make the impression of words. Then next two pictures are to show how this was done all the way around the model.


For the last two steps I am going to go over the colors as I do them as there are to many to list. The leaves were done using sybarite green, followed by a wash of biel tan green, and then finished with moot green on the tips. Then do the eyes and lenses. To do this just hit them with macragge blue, followed by a touch of bahharoth blue. And lastly the blood drops. For these I basecoated them naggaroth night, then put a spot of dechala lilac at the bottom,followed by a spot of pallid wych flesh at the top.

Now to finish the model all thats left is the base. This was easily accomplished after all else was done by laying down a base of astrogranite texture paint. Then apply a wash of nuln oil. After the wash is dry, drybrush the base using celestia grey. Once thats done just glue some grass or rocks in place and your done.

Well thats it for now everyone, hope you enjoyed painting along. Until next time, and as always HAVE FUN!!!