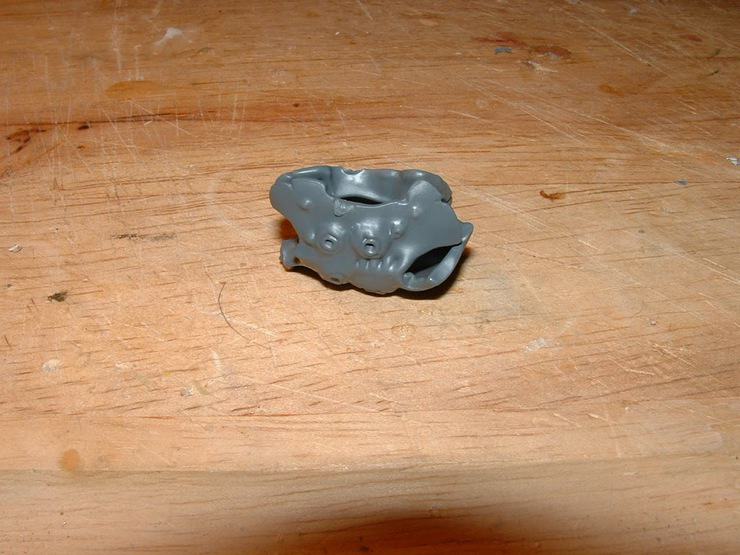
Today we have a guest post by Caleb over at White Metal Games, on some custom Mieotic Spores!
These things are pretty neat in game, and honestly I think every ‘Nid player should own three. But they’re a tad bit pricey from Forge World (what isn’t right?)
Checkout his article on how to make some on the cheap!
From White Metal Games’ Blog:
So now that things are settling down back at the homestead after our recent move, i’ve had a little time to get back to doing what I like to do best.. . . conversions. I went through a bit of a budget crunch a few weeks ago and had to let some older models that I didn’t use on a very often basis go, including some FW Mieotic spore mine clusters.
But now that FW is being offically sanctioned at more and more tournaments, I thought ‘Well, s%$t, what if I want to USE some of these? I can’t just buy more” So I started rooting around my bits box for a good way to convert them.
Firstly, let me point out this is a bits heavy conversion and I can only do it because the community has been so good to me over the years, with harpies and flyrant conversion and malanthropes and the like that I have literally hundreds of the feeder tubes for the venom cannons, and well as the seed tubes for the barbed stranglers and the carapace bits I use for hte main part of the model. Add a little grey stuff, some plasticard tubing, and voila!
What you’ll need for this conversion:
One carnifex carapace bit, preferably a Spikey or Spore cyst bit
5 venom cannon tubes
1 Barbed strangler tube (monstrous creature size)
2 barbed strangler tubes (tyranid warrior size, or if you dont’ have these, 3 of the MC’s sized BS tubes)
a 40mm round base
Glue
2 part epoxy (i used grey stuff, but green or any color would be fine)
a heat gun (mine is 1500 watts, but really it’s a matter of preference).
Some 1/4″ plastic tubing, about 1″ should be enough
A trygon breast plate (the spares from the Trygon kit)
Here’s how it works:
Get an old shoe box or the like. Lay a carnifex carapace piece (the spare plating from the carnifex kit) in the box. Then, using a heat gun, heat the understide of the plate until it start to bow, around 10 -15 seconds on low heat. Once this hapens, quickly bend the sides together (width wise, not length wise) and crimp the tips as well. It should come out sort of in a ball shape.


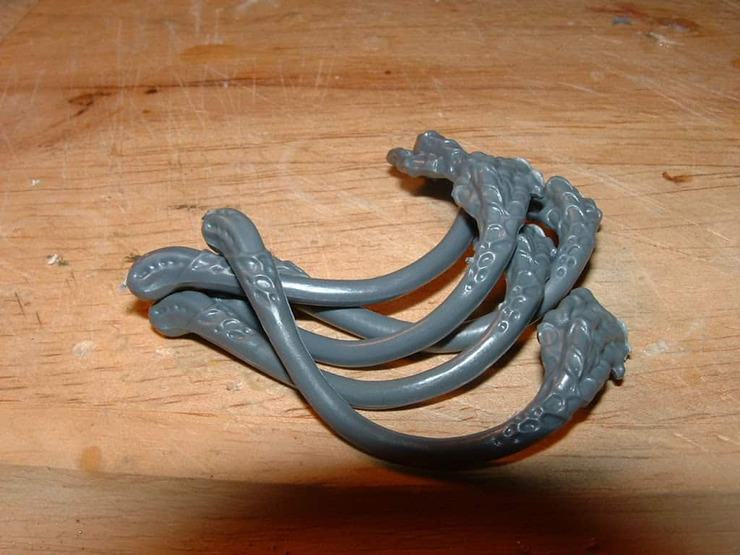
Now, grab 5 (THAT’S RIGHT, FIVE) venom cannon tubes and clip off the hand joints, so you just have the tubing. Lay them side by side and use the heat gun to get them all warm. This will take about 10 second. Once they get hot they start to crimp and curl, so work fast. Grab the clump and bend them your trying to twirl hot spagetti. Any pattern will do. I tend to simply wrap them around each other clockwise, rolling the bottom of the tubes one way and tops of the tubes another way. Be sure to apply a great deal of pressure at the tops of the tubes, so they kind of stick together, but leave the rounded ends (the ends that traditionally go INTO the venom cannon) lose. it should look a little like this.


Glue glue the top half to the bottom half. Don’t worry if it’s not perfect, just get it close.

Clip the barbed strangler sacs off the arms so that just the ‘sacs ‘ remain.

Glue the larger, MC sac to the rear of the chitin plate and the smaller sacs to the side (or, if you only have the larger sacs, glue them to the sides as well).

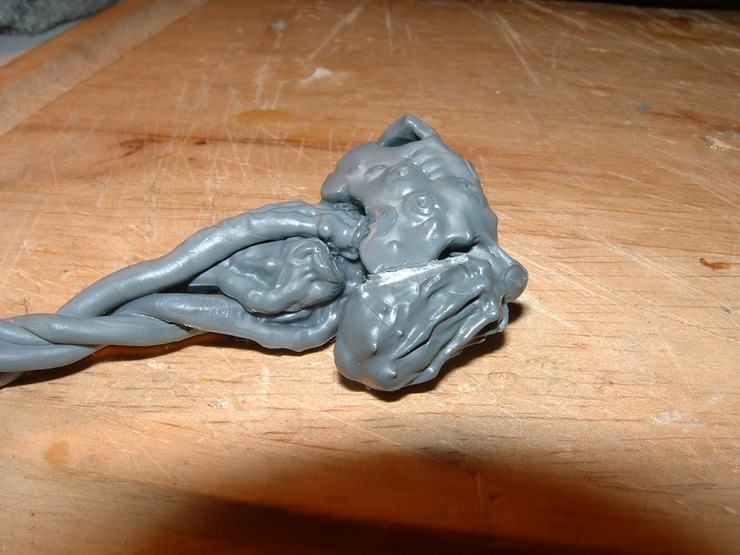
Now, using 2 part epoxy, fill in the gaps as needed. Use sculpting tools like clay shapes to get the general shape you like. Try for something organic and fleshy at the back, like with muscle contoured like bits of sinew or pussy sacs. It’s really up to you. Just be sure the front is a little rounded.


Let the epoxy dry, usually within an hour or two depending on the brand you use. In the mean time, cut the tubing into about 6 1/8: long pieces. Really length is up to yo. Mine never line up perfectly.
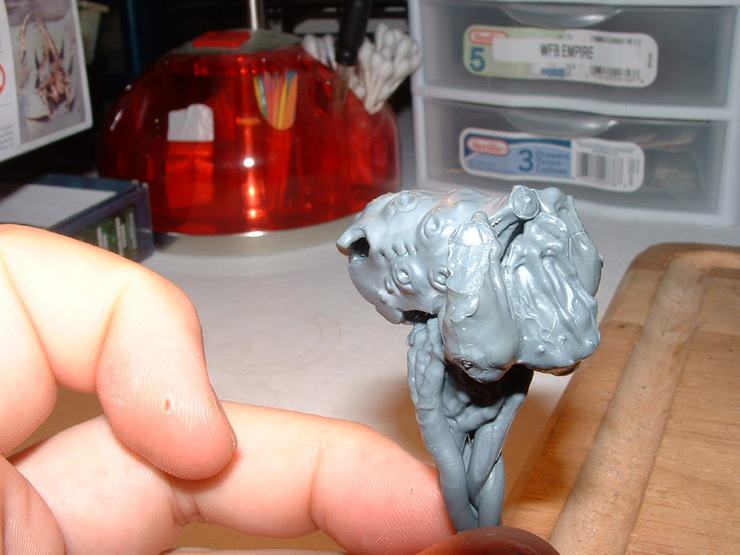
glue these onto the side of the spore pod, usually smaller up front and longer towards the rear of the model. Once the glue dries, use a small rstrand of putty to go around the tubes and sort of lock them into position while at the same time making them appear to blend into the model. You may want to apply a few lines here to make it look like jowls of flesh.


Using the heat gun again, apply the same tecnique you use on the carapace place, but this time use it to soften up the trygon plating. Once soft, quickly attack it to the front of the spore and bend the plate so that it runs along the contoured fron to the model. If the plate gets too hard, just heat it up again. You can do this a few times without risking too much warping to the original bit. if you have a Bio-acid spore mine laying around, use that as a guide. This big guy is really meant to look sort of like a giant one of these.

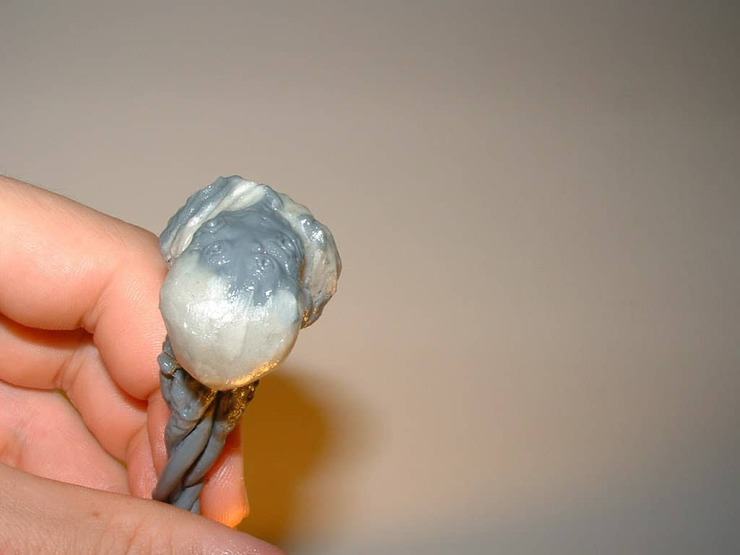
Finally, attach the model to the 40mm base. I do this by using a small glob of epoxy and pressing the model into the grey stuff mountd. Then later I flocked over it to make it appear like a small bit of raised earth.


And there you have it! A mieotic spore mine in about an hour. Or less once you get use to them. ( I can build abotut 2-3 an hour, depending)
These are tournament okay, since they use ALL GW bits and they look great! The scale is right too!


As a model, they are only 35 points each and broods of three only fill up one FA slot. So you can field 9 of these for only 315 points! And for that you get 9 Strength 5 AP 3 large blasts that deep strike! If they miss, you get d3-1 spore mines out of it, for free! So it’s a win win! And since neither raveners nor shrikes are terribly cheap, and there aren’t models for Harpies for Flying Rippers yet being sold by GW, then these are a great way to get some much needed low AP Tyranid weaponry on the table!
Seem like a lot of work? It is. So, on that, if you don’t have the time or bits to build one, buy them from me!
I’ll be selling these until they’re gone! I have a limited number in stock so enjoy them while they last!
My name is Caleb and I am a conversion artist for hire. Reach me at caleb@whitemetalgames.com if you are interested in setting up a commission. Until next time, happy wargaming!
Caleb