Did you ever realize, that no matter where you are (for the majority of the US and similar climate ranges) one can quite easily use this hobby tool quite effectively? Rather than spending a few hundred dollars getting a good, reliable setup for an airbrush (airbrush, compressor, and any other miscellaneous needles and additions necessary) or resorting to brush on primer to get a figure large or small primed, why not just use a reliable aerosol primer (Army Painter, Board to Pieces, P3 or other brand that has a large temperature tolerance) to achieve perfect results.
It is possible to utilize these cans regardless of the weather as well, which will debunk the popular myth of some locations being impossible to prime in without resorting to an airbrush or brush on primer. I live in Louisiana, and can honestly tell everyone reading this article that I have primed during a hurricane, outside, without any problems what so ever. I just pay close attention to what the weather is doing, and how the models are handled prior to priming.
Here are some tips and tricks that help me get the perfect primed model time and time again:

1. Pay attention to the time of day and the weather. This can’t be stressed enough really. With some practice you can easily prime in a covered location even while it’s raining to beat the band outside. It’s all about knowing the tolerances of the primer you choose to use, and when it’s best used. Dry, hot days can be some of the worst priming weather ever; no matter what you may be lead to believe. Ideal conditions are an afternoon of warm weather, average to moderately high humidity (humidity can go as high as 85% without being too much of an issue as long as it was a warm day) and preferably once the sun has started to set. This gives you a good temperature that will slowly cool, rather than the AM variant which would see the temperature going up.
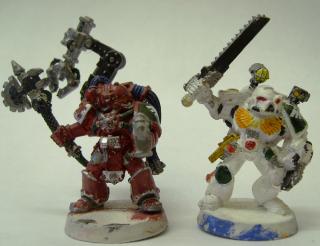
2. Where your models are stored before priming. Don’t take the models that have been stored in cold locations directly outside and start to prime them, metal/pewter models especially. Metals will sweat with a temperature change, and this will react poorly with the primer, causing your primer to be spotty, with large sections of it rubbing off. Let the models adjust to room temperature at the very least, or if you have the AC unit running, take them outside and place them in indirect sun for about an hour or so to allow them to adjust to temperature, and dry off any condensation that may have been present.
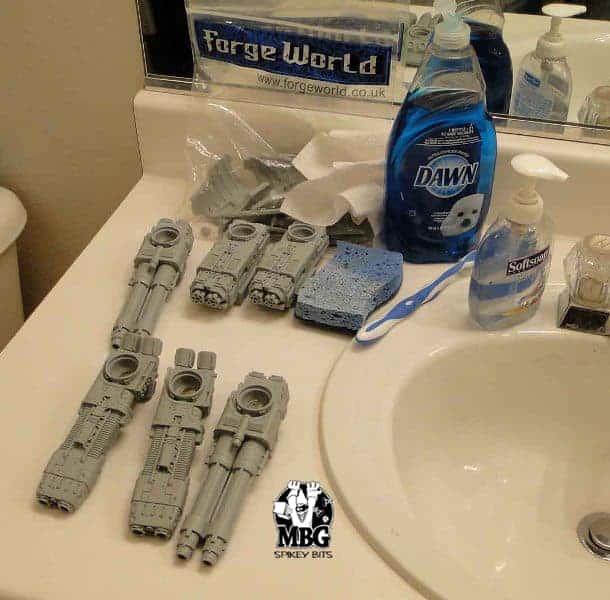
3. Model condition. This is a broad category here, but needs to be addressed. Make sure that: if the model is resin it has been scrubbed with warm soapy water and dried adequately, if the models have been stripped recently there is no loose paint and they have been washed with soap and water to remove any potential residue from the stripper, if you’ve done a lot of filing/trimming with a knife that all the shavings are removed, if you’ve chosen to base before priming that the basing material is securely attached to the base, and last but not least, the models are given a once over before priming to make sure they are securely assembled with the proper glue. While these may seem trivial, they have been the frustration of many a new hobbyist to realize they forgot one of these, and it caused them to need to strip the model and start over, and some of them have just become frustrated and given up.
4. Check your paint. This is a twofold note of caution. Check the age of your cans of primer, ensure the bead is loose and rattles so the paint will mix well. Secondary, check the nozzles of any paint you are planning on using on the models. Make sure the nozzles are clean, and free of paint, that they aren’t covered over in paint, or potentially spray chunks of dried paint onto your project by not being thoroughly cleaned. Regardless of the contents, when you are finished with an aerosol paint can, make sure you turn the can upside down and spray it until it’s clear (even varnish has a slight foggy colour to it and will spray clear in a couple of seconds) to prevent the nozzle or upper portion of the can clogging, and destroying the entire can of primer, as it isn’t cheap.
5. Use a test model. Always, always do this, especially if you’re questioning the weather. Make sure this model is subjected to the same conditions as your project pieces if at all possible, so it is as of a test figure as possible. At the very least make sure it’s the same component (resin, plastic or metal). It’s far easier to strip one model than strip a dozen.
As always, if you’ve got any questions on using aerosol primers or priming models, feel free to email me. I try to answer any hobby related questions sent to me in a timely fashion. Maybe one day I’ll have an “Ask RedStickStudio” session via blog or other location!
Be sure to checkout my blog Red Stick Studio, for more articles on the artistic side of miniatures!
Editors note- Be sure to checkout Spikey Bits’ “Which Primer is the Best” article from back in the day for even more on this magical yet essential topic!