 Hey everyone, it’s CJ again. Since having done the tutorial for a Krootichan there was something I noticed that isn’t out there on the internet too much, and I want to rectify it.
 Recently here we built a Tyranid army and we started with a set of alien invasion shale bases which went off the market mid build. Instead of trying to track them down on the internet we decided to build them ourselves. Looking online though I couldn’t find too much about it, so we learned through trial and error and here I want to show you the best way to make these bases and mount the models to them yourself.
I was planning on using Bob the Krootichan, but I had an urge to build a Koldun Lord for my Khador army. I decided to use him to perform this tutorial for a couple reasons. One is he would work better in that army on a shale base, and of course since he is metal and is made for a slotted base I can show some pinning needed for heavier models, though I recommend it for any models being based this way.

The first step doesn’t even have to do with the base, but the base this would have gone on. So the first step is to cut off the metal tab which would hold our Koldun Lord in the slotted base.

Now you should have a flat footed Koldun Lord, Perfect for adding our new pin which will secure him to the base beneath the “rock” which will give him his new imposing stance.

Drill a hole in one of his feet and insert a pin in his foot. I personally prefer Jumbo Paper Clips for this as they are cheaper then brass rod and cost much less.

After we have a pin in his foot and he is ready to secure to the base we have to find the right rock for him.
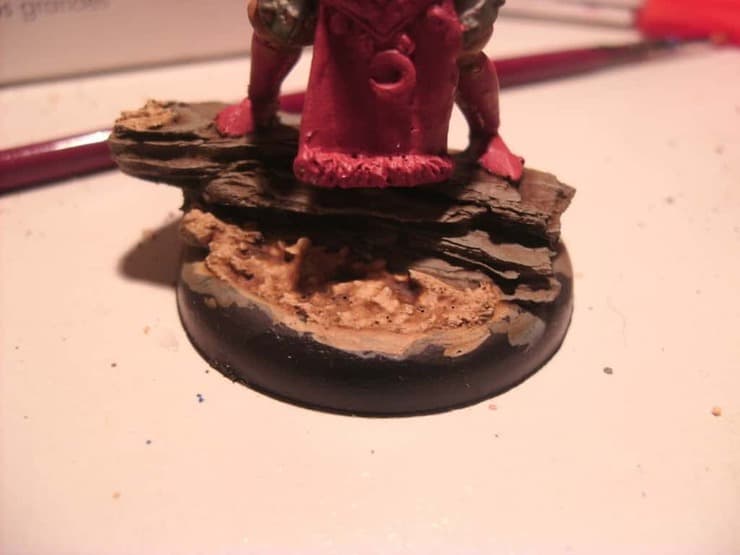
I use pine bark for my shale. A bag of it can be purchashed for about 5 dollars from Lowes or Home Depot, just dry it out first before you try to use it. Select a piece which wil have a little overhang, you may need to break it, this can be done with yoru fingers and to level it you can use a hobby knife to shave off layers until you have the desired thichness.

Once the pine bark has been glued to the base use a pin vise to drill a hole through the pine bark and the base and run the pin through it. You may need to cut the pin to get the right length then glue the pin at the hole to secure the model to the base. You can also put a small amount of glue on the flat foot of the model to secure it to the pine bark as well.

The next step is to put flock down on the base and a little on the pine bark itself. This helps to pull the terrain up to bark and give it a look of having been in the ground for a while.

After putting down your flock put down your base coats. I have a paint on primer for the lower torso of the Koldun Lord and used craft paint for the base color on the base.

Next we have the dirt color, this is also another craft paint.

The last step for the base itself is to apply a brown wash to the rock and to the sandy colored dirt to give it a muddy look. This will give the sand and the faux shale depth and an aged look.

Finally we have the fully finished model on the base. He is standing next to a standard Greylord Ternion to give you an idea of the difference that a scenic base can make.
CJ
Guest Blogger – Spikey Bits
Blogger – Gamer’s Pair-O-Dice
If you buy something from
a link on our site, we may earn a commision. See our ethics statement.

About the Author: Rob Baer
Virginia Restless, Miniature Painter & Cat Dad.
I blame LEGOs. There was something about those little-colored blocks that started it all... Twitter @catdaddymbg