Whitestagg’s Ork Rok Bases Part 2 Painting

Aloha all ye bored-on-the-Internet! I’m Whitestagg and I have the Zeus-infuriating hubris to think my words might entertain you.
When not angering the Gods I am an old hat gamer (been in the GW bog since ’98) who currently resides in the table top wargaming wasteland that is greater metropolitan Kailua-Kona.
Today I’d like to break down how I paint my ‘Ork rok boarding action’ bases. How to make the bases themselves has already been explained, in the future, by a me from the past, but I frequently forget that not everyone is a 4th Pillar Time Lord like myself so you’ll have to wait for that article to align with this plane. (you all should have attended first day syllabus lectures all through college, that unlocked the Time Lord Door)
(I think what he means is, he hasn’t copied over part one from his blog to Spikey Bits yet, and that he likes Doctor Who? -MBG)
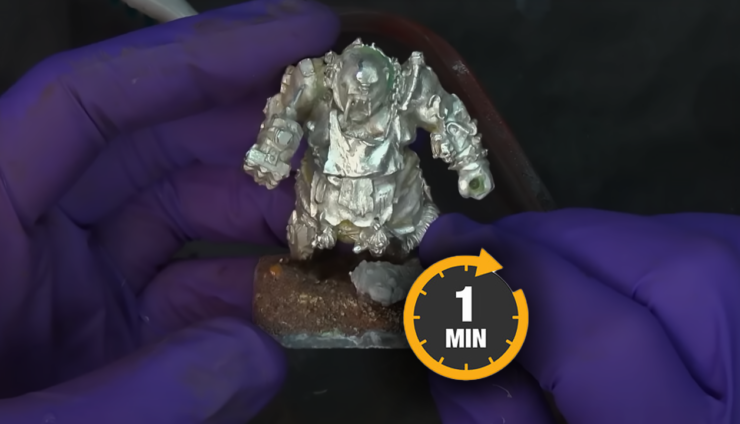
So, first off, we start with the primed, finished, unpainted base.

|
| You’ll notice that it is dripping with awesome, just wipe it off with something appropriate (a piece of Caesar’s cloak, an original copy of the constitution of The United States, etc.) |
We are going to do the rock bits on the bottom first. Always start with a good foundation, it’s the source of power. (push through the soles of your feet! #brodoyouevenlift) Check and make sure your priming was complete (mine always is but your user experience may vary) If you missed any spots then hit it with some black, make sure you get a good even coat and the primer hasn’t been rubbed off showing bare plaster.
 |
| all craggy like the crotchety old man I’m trying to develop into |
Do a HEVVY dry-brush of Reaper Black mixed with Reaper Rainy Grey (about 1:1)
 |
| I thought you said ‘dry-brush?’ That’s basically another base-coat you tool. |
You don’t have to be too careful at this stage, just try to leave SOME of the black in the crevasses (now read that sentence again but do it with style by saying it ‘creh-VAHSS’ in your head) Next, add more Rainy Grey to the mix and go over it again with a proper dry-brush (don’t friggin’ quote Snatch at me!)
 |
| it’s beginning to look a lot like Chriiiiistmaaaas |
And finally, before you lose interest, add a bit more rainy grey (almost pure, unfiltered rainy goodness at this point) and go extra light on the last pass (paying the most attention to the edges and any bits that jut out a lot- that’s what she sa…nevermind)
 |
| Now that ‘pops’, Big Nasty B would be proud! |
Now on to the deck plating, or the main course if you like your analogies food-centric. I have chosen Reaper’s Aged Pewter. I love the metallic properties and the muted color of this paint. You can use Boltgun Metal or any of it’s analogues, but then it’ll be awkward when you come home for Thanksgiving. Don’t be that guy. Since it’s Orks, I’ve added a bit of Reaper Old Bronze to the AP and painted one or two deck plates with the mix to break up the color monotony. Variety is the Spice of life…and it must floooooow…..
 |
| Duke Atreides would be rolling in his grave at such am uneven floor. |
Next up is a quick wash or two with a suitable black wash (I used a really watered down Vallejo black (If you just read that vah-YAY-ho then go jump off a bridge)) paying particular attention to the cracks between the plates. Don’t worry about any clouding from too heavy a wash, you can clean it up in one of the next steps. After the wash is dry, go back over some of the flatter, larger areas with the metallic color of your choice again.
 |
| it’s mascara is running so bad I can almost hear The Cure |
Next is a quick coat of a brighter metal on any piping or girders you have added to the base. I used Vallejo’s Chainmail though anything will do. If you are short on paints then the same metal you used for the decking is ok, but it would be better if you switched to Coors Light for a week and just got yourself some more paints (I’m just joshing you, don’t ever drink Coors Light, find a better way.)
 |
| contrast is like capsaicin, a little bit goes a lon…AGH IT BURNS! |
Having finished the clean bits of the base, now we’ll move on to making it appropriately ‘Orky.’
GW’s Typhus Corruption is awesome, but if you don’t have any (see above) then mix some fine grit sand in with a light brown. Slather this on anywhere you think there would reasonably be rust in a giant metal hulk full of sweaty murder fungus that don’t care about proper vehicular upkeep.
 |
| Did you get the fungus joke? No? Need to get yourself a Time Lord degree and have had started the hobby sooner son. |
Once that is completely (COMPLETELY) dry then apply a drybrush of GW’s Ryza Rust everywhere there is Typhus Corruption. Don’t worry too much about straying off of the TC areas, but pay attention to how much paint is on your brush because if you paint it on instead of drybrushing it then it becomes too bright and looks awkward…just like Thanksgiving was after you came despite not receiving an invite… After the drybrush go back and put a dot of Aged Pewter on top of the rivets (I feel the foot traffic would keep at least the rivets rust free, that or the ghost of Billy Mays is haunting me)
 |
| rust grows like bacteria in a petri-dish right? |
And our final touch, a bit of GW Nurgle’s Rot to represent whatever nightmare fluid would leak from the pipes in an Ork bio dome. Focus on areas where you have sculpted breaks in the pipes, areas where pipes join, or just whatever. Also looks cool and realistic to have the goo flowing down the channels, even on to the side of the base!
 |
| the 15 second rule does not apply to Ork roks |
After that is all dry, slap some GW Mournfang Brown on the plastic part of the base (oh man, if you are one of those people that bases their stuff with bright green I will know and I will hex you) and hit it with a few shots of matte varnish. I use Army Painter. (if you paint it on avoid the Nurgle’s Rot, if you spray then do another coat of NR after the varnish has dried to bring that freshly excreted shine back)
Next time, or in ages long past depending on your level of devotion to mighty Kronos, I’ll discuss how to actually make the bases themselves. -Whitestagg
If you buy something from
a link on our site, we may earn a commision. See our ethics statement.
Virginia Restless, Miniature Painter & Cat Dad.
I blame LEGOs. There was something about those little-colored blocks that started it all... Twitter @catdaddymbg