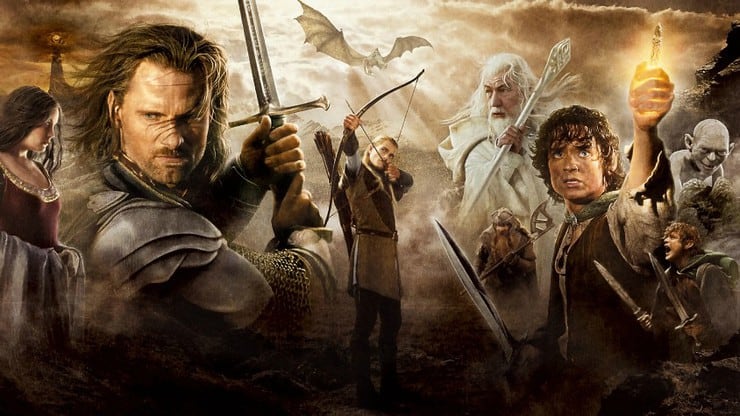
Hello! Captain Morgan here with a special feature on an end of year tradition over here, the Ring of Power game, hosted by Gajo Games in Sandy UT.
A tradition over 10 years in the making, at the end of every year we put on a big Lord of the Rings themed game, whether it be a giant battle such as the siege of Minas Tirith or the battle at the fords of Isen using the GW rules, we go big or go home and try to use the maximum models for maximum carnage with the maximum number of players.
This year, we did our classic game version that started it all, which features the entire map of the Lord of the Rings built and condensed to fit on three tables (it got too big for just one, unfortunately) to fully include the conflicts mentioned in the books, such as the war in the north. Before I get into the battle itself, I have broken down the features of the game briefly to give some context as to what you can expect to see.
The Models
The majority of these models are from the Games Workshop Lord of the Rings range of miniatures, with a few exceptions.
The Terrain
The terrain is custom-made from a variety of materials, but mainly Styrofoam cut with a hot wire cutter. Some carving and etching with a wood burner is also done, and it is built to evoke not just the imagery of the movies, but also from the books since much of the content of the game comes directly from the books and wasn’t featured in the films.
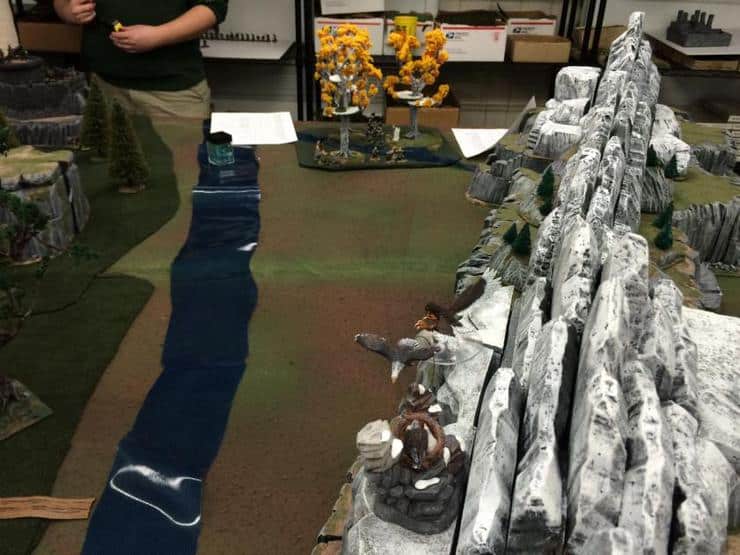
The terrain is incredible. Most of it opens up to show secret caverns and nooks and crannies (such as Gollum’s cave and Shelob’s lair). Most of it was built by one person, who has become a terrain guru in the process. Here are a few pics to show the terrain and the scale of the game, covering three large tables.
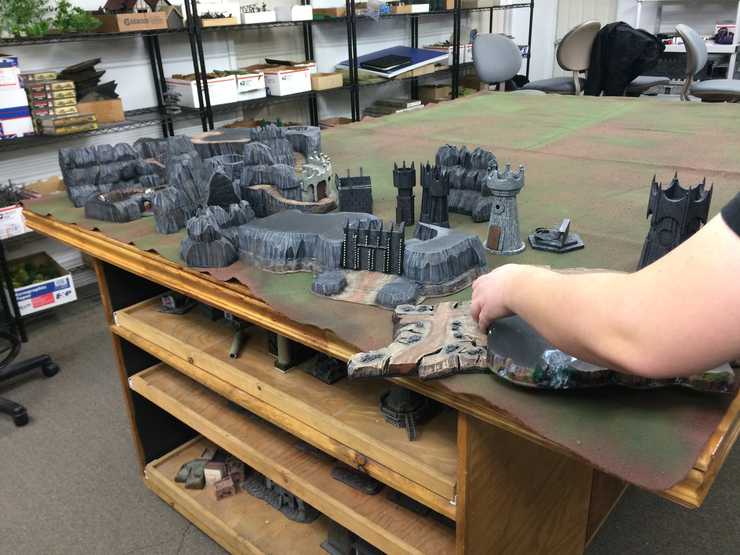
Mordor ready to be set up
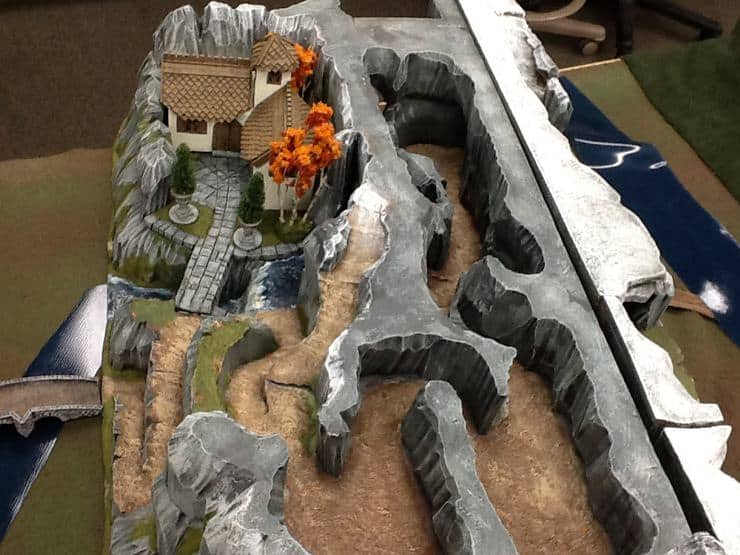
Rivendell and a drop down view of the goblin caves of Goblintown
A top down view of the Mines of Moria insert that fits into the lonely mountain
An argument can be made that a trebuchet that big should be able to reach Mordor…
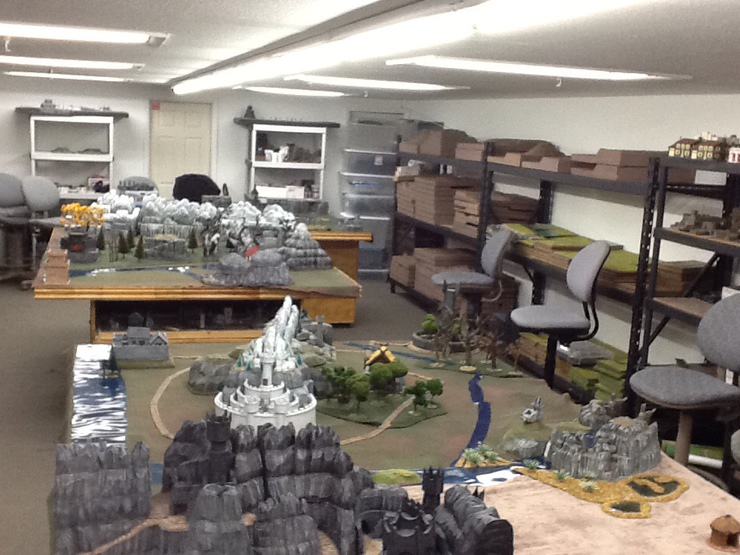
Three times the tables, three times the fun!
Also check out the quick tour video we made of the setup process and the table at the start of the game!
The Rules
Due to the size of the game, doing the GW rule set was not practical, so a new set of rules was drafted under the name “Ring of Power.” The general idea is that each faction has a base that generates reinforcements during the game, with the armies of evil “declaring war” and receiving a massive surge of reinforcements to kickstart the wars in their respective areas. While the armies are battling it out on the board, the Fellowship of the Ring is sneaking through the map trying to deliver the Ring into the fires of Mount Doom. The fellowship will have events as the turn counters move forward, with the events from the books replaying with the possibility of deviance from the story through lucky dice rolls.
Since the tables are on separate timeframes, a separate fellowship is on each table is operating behind the scenes to keep the game moving. Combat is simplified as well, with the goal to get as many guys in the melee as possible, and the rolling of the dice is only slightly more complicated than risk. General units will be fairly simple, while characters and generals will add a bonus to combat resolution, with additional losses to the retreating army. Victory points were awarded for sacking enemy bases, and ultimate victory awarded to the good guys if they managed to reduce the Ring to slag.
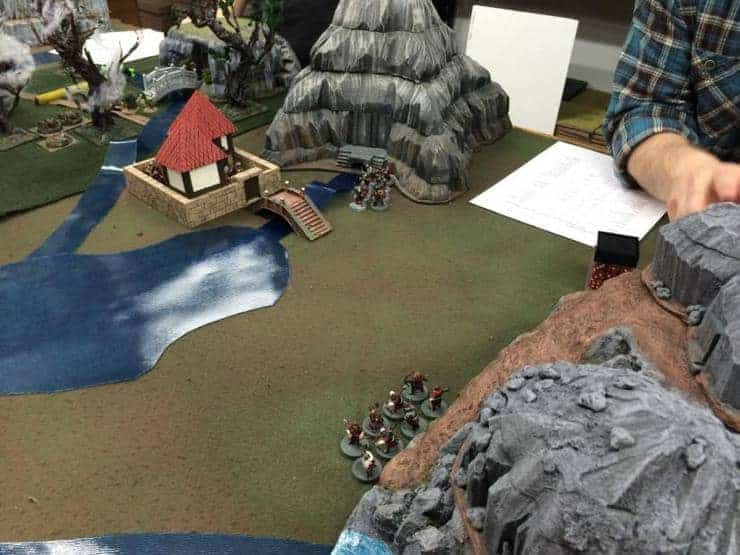
The tables are divided between the War in the North, the War in the South, and the War in the West.
The War in the North encompasses the battles between Dol Goldur, the Easterlings, Moria, and Goblintown against the Dwarves of Erebor and the Iron Hills, Rivendell, Thranduil’s Hall, and Lothlorien.
The War in the South features the forces of Isengard, Mordor, Harad, and the Pirates of Umbar against Gondor, Rohan, and the men of Pelargir.
The War in the West is the armies of Angmar against the hobbits of the Shire, The Grey Havens, and the Dwarves of the Blue Mountains.
With that out of the way, let’s get to the game!
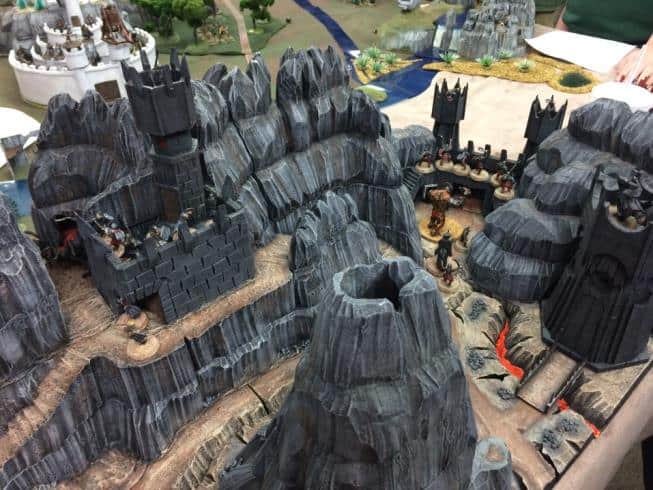
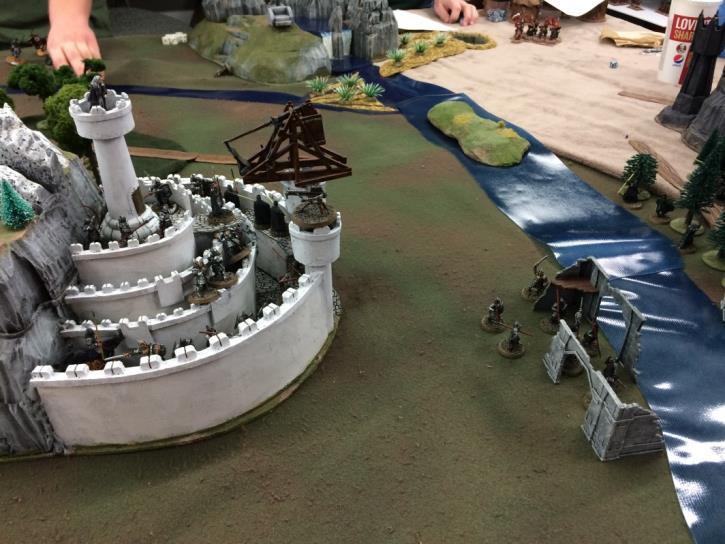
Mordor, with Black Gate and Cirith Ungol
A view from Thranduil’s Hall in Mirkwood as the Elves venture into the forest.
It wouldn’t be the same without everyone’s favorite plot device…
Erebor, Dale, and the Iron Hills

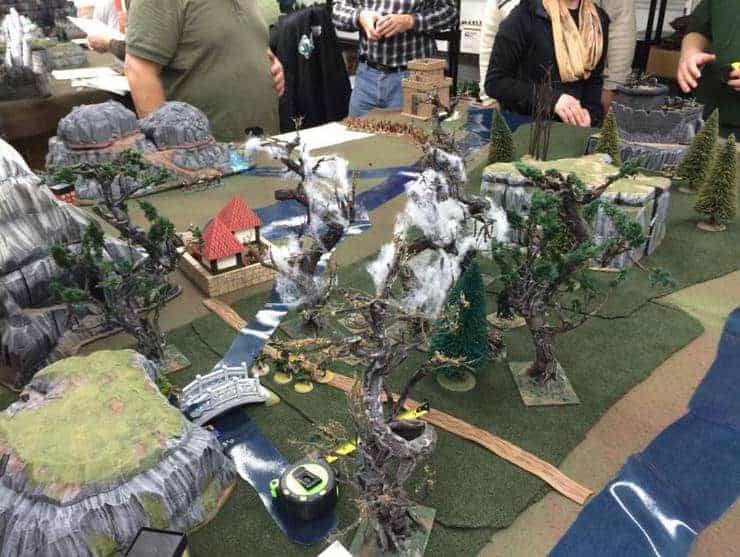
Lothlorien in the Fall
The First Few Turns
The War in the South: Many angry stares and growling between the players aside, the first few turns remained mostly quiet, the opening turn heralded by the unsurprising death of Boromir. Isengard positioned itself for a battle at the fords of Isen, while Rohan’s reinforcements were siphoned off by the trickery of Grima Wormtongue.

Sean Bean does us proud again
The War in the North: The armies of the north moved into position. The Dwarves prepared for an Easterling assault, while the Elves took an aggressive approach and began the assault on Goblintown in an effort to quickly cut off the Goblin’s ability to reinforce either Moria or Dol Goldur.
Down, down to Goblintown…
The War in the West
The Hobbits fled their homes as the forces of Angmar sacked Bree and Hobbiton, scoring the first two victory points of the game. The Grey Havens and the Blue Mountains joined forces to march against the growing might of Angmar, which was poised to strike the relatively undefended Rivendell as the elves had left to fight the Goblins.

Burning Hobbiton to the ground would prove the least of their concerns…
The Middle Turns of Middle Earth:
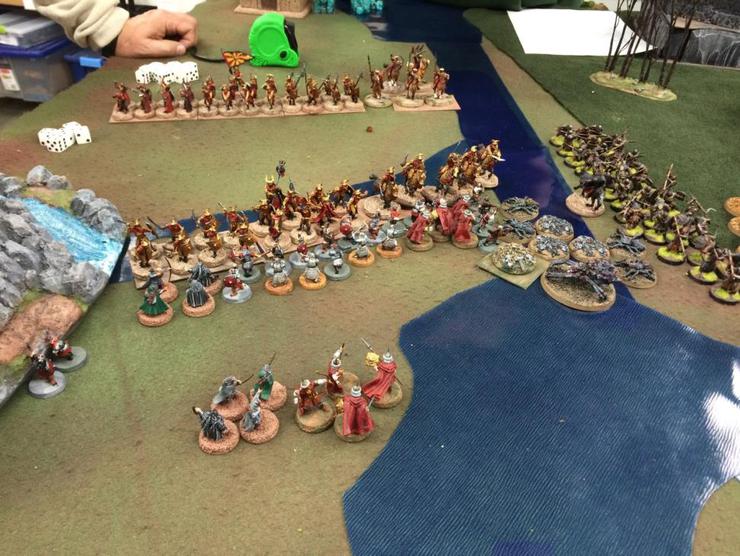
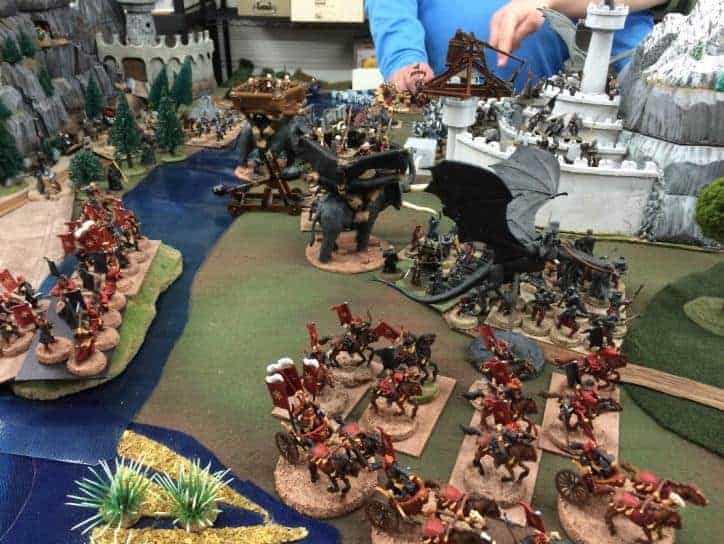
The War in the South: The bubble burst as Isengard unleashed itself against the forces guarding the Fords of Isen, and for a few turns the Rohirrim were able to hold off the snarling tide of Uruk-hai. Finally they were pushed back from the ford and grimly prepared to meet the Uruks in battle. Luckily, the Fellowship was able to find Merry and Pippin and send them to wake up the drowsy Ents, while Gandalf pulled King Theoden free of Grima’s foul spell and the Rohirrim were able to rally against the advancing Uruks. The Corsairs of Umbar unleashed themselves against the defenders of Pelargir, who were struggling to hold back the tide of evil men. Gondor attempted to ambush the reinforcements to Mordor, but despite their best efforts they were unable to do enough lasting damage to hold off the inevitable unleashing of Mordor’s Horde.

Well this looks… bad…
The War in the North: The fighting really kicked off in the North, as the threat of invasion from the forces of Angmar temporarily forced the Elves out of Goblintown to defend their home. Ultimately, Angmar was forced to set up a defense as a large force of Grey Havens Elves, Dwarves (and a few intrepid hobbits) marched to meet them in battle. The dwarves of the Northern Blue Mountains split off to force some of Angmar’s armies to hang back and defend their camp. With the threat of invasion ended, Rivendell once again formed up and assaulted the still-reeling Goblintown, which was pressed by a fresh army of Elves from Rivendell, with some support from their forest kin of Mirkwood, who made a long journey to support them from the other side. Goblintown fell to the might of the Firstborn, and the forces of Good scored 2 victory points to bring the War in the North to a tie.
Meanwhile, the Easterlings declared war and brought a massive warhost supported by the orcs of Dol Goldur to assault the Dwarves and Men of Dale defending the fords south of their strongholds. Things were looking grim for the Dwarves.
Battle at the fords, and the Dwarves are forced back
As that transpired, the Fellowship was denied passage through the pass of Caradhras, and sought a darker path through the mountains. During their journey, they were ambushed by a pack of wargs, who despite much clawing and biting, were unable to wound a single member of the fellowship (The only girl there rolling several armor saves and not failing a single one; she was later solicited as a commission dice roller).

These ferocious Wargs were powerless to stop the incredible power of the Fellowship’s armor saves…
The War in the West: The west remained largely quiet as the combined forces of good prepared themselves to strike against the armies of Angmar. With Rivendell free from the threat of Goblintown, the Elves sent a strike force to the other table to assist the Elves, Dwarves, and Hobbits who were poised to charge across the Brandywine River. The only skirmish happened in the north edge of the table, as the first batch of outflanking dwarves were temporarily repulsed as they presented a threat, drawing away some of Angmar’s forces from the Fords to give the other army a fighting chance to take the riverbank.
The Final Turns:
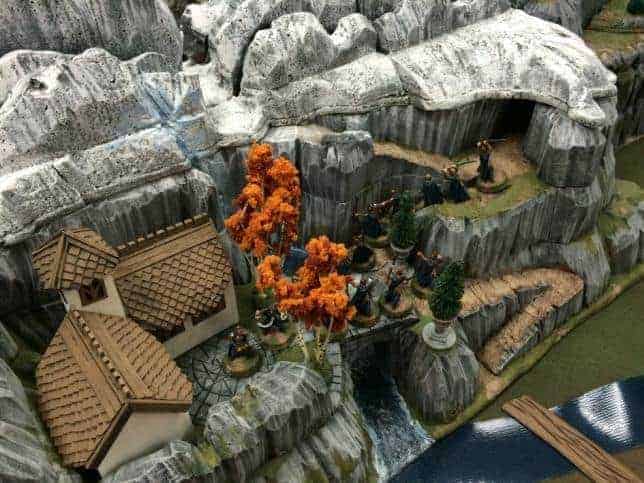
The War in the South: Things got really busy here as the forces of Mordor decided it was better to attack now while Rohan was preoccupied with Saruman, and flooded the lands of Gondor with hordes of evil minions. Meanwhile, the hobbits Merry and Pippin were finally able to rouse the Ents from their slumber, and ransacked Isengard with the help of the now liberated Rohirrim. Unfortunately, Edoras was left exposed and the forces of Harad swooped in for an easy sacking of the base, scoring some victory points to counteract the ones scored by the sacking of Isengard. Pelargir fell to the corsairs, and the survivors sallied forth to reinforce a now very concerned Gondor. Frodo and Sam snuck up into Shelob’s lair, surviving the spider. Alas, it was too late to go much further than this, and while grim looking, the fate of Gondor was left up in the air.
Interestingly enough, GW doesn’t have a “burning and screaming Denethor” model available…
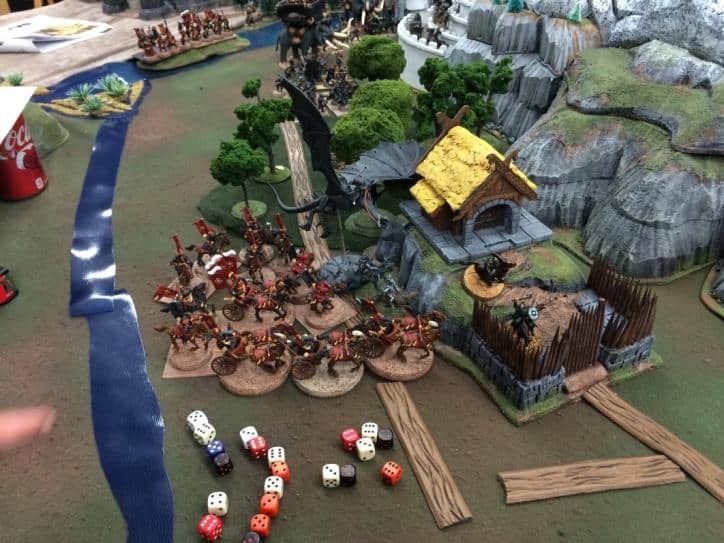
Edoras will burn…
They were Huorny to say the least, but it was Ent-ertaining to the last…
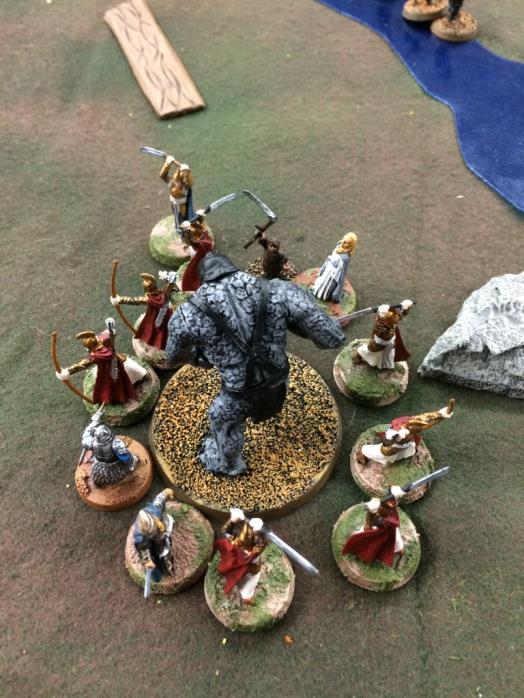
The War in the North: The combined might of Angmar and the Easterling Warriors drove the Dwarves and Men of Dale away from the riverbanks. Most of the Dwarves fled for the Iron Hills, harried mercilessly by the Easterling Cavalry, while Erebor and Dale prepared for the worst as the main force of Orcs and evil men prepared for a massive assault against the newly-restored city of Dale. As the game drew to a close, all armies met at Dale for a massive battle that was saved by the determination of the defenders and the strength of their armor (Dwarves getting a 2+ save inside a fortress). Many men of Dale died and not a few dwarves, but ultimately they were able to inflict enough damage to rout the forces of evil. Meanwhile, the fellowship fought their way through Moria, with Gandalf making the ultimate sacrifice to defeat the Balrog , with the Fellowship again proving undefeatable as their armor never failed them once (not even the hobbits!). The fellowship took refuge in Lothlorien, which was threatened on both sides by Orcs of Angmar, and Goblins from Moria determined to take revenge on those cheeky elves.

Spiders? Check. Orcs? Check. Evil shiny humans? Check. Beard clippers? uncheck…
Calamari, anyone?

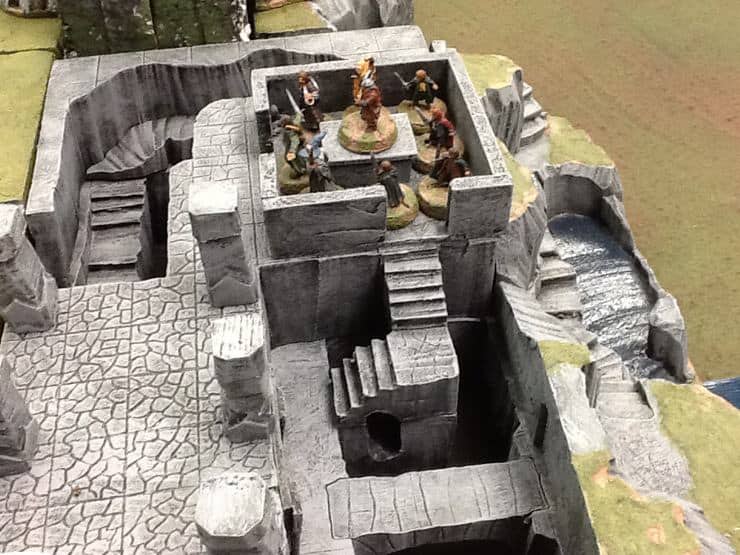
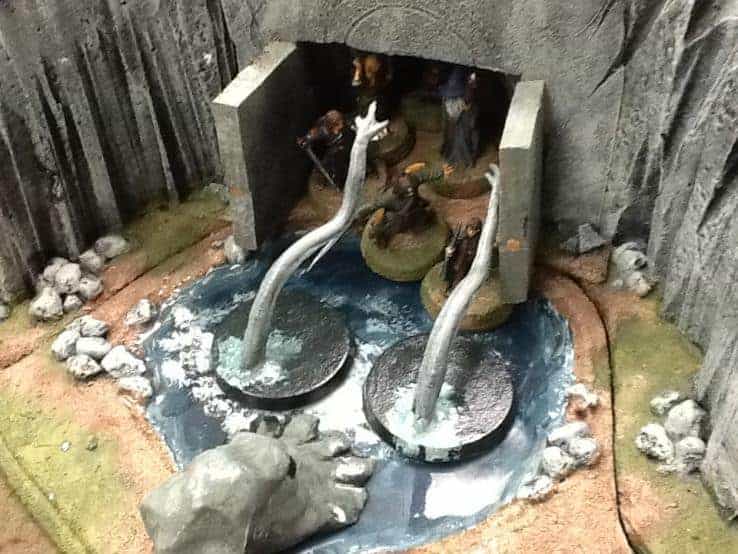
You shall not pass! No, really, you couldn’t even fit through the door. I wouldn’t bother with it, really…
The War in the West: With time running out, the forces of good started their push into Angmar’s base of operations. The Dwarves flanking the north dispatched the orcs sent to delay them, and with reinforcements from Rivendell on the Horizon, the combined Elf, Dwarf, and Hobbit army that marched from the Grey Haven’s assaulted across the river. The leadership of Cirdan the shipwright was the only thing that turned the fight to their favor, as the forces of good pushed across the river and met up with the other forces for a combined fight that slowly whittled down the Orcs and eradicated them, though at the cost of many lives. Using Cirdan’s power, the ruins of Angmar were cleansed of the ghosts that haunted them, and the forces of good secured a solid victory on that table. Only one Dwarf and one Hobbit survived from their respective forces to return the tale of victory home (or burnt out hobbit holes); their dead beyond the count of grief.

The final battle for the West, as the bad guys are penned in from all sides
At this point, he’s just trolling…
The Conclusion:
Final victory was hard to determine, due to the large and unresolved state of the War in the South and the final fate of the Ring up in the air, it is hard to say where the final victory would have landed. Things in the North could have gone either way, and only the War in the West was a resounding victory for the forces of good. Either way, fun was had by all with an excellent game, excellent terrain, and good company. Next year we will be doing the Battle of Five Armies, which presents its own challenges for terrain and models, but it should be exciting nonetheless.
An extra special thank you to Gajo Games for hosting the event, and to all of those who provided time, terrain, and miniatures to help make the game another success!
Thank you all for taking the time to visit Middle-Earth today. With any luck, I’ll be able to convince someone to do another game with me soon, but either way it was a great way to end the year. See you again soon!
Captain Morgan