 Brett from Phalanxforge here! Over the last week I have been talking with Rob about what I’ve been up to on my blog for the last couple of years.
I’ve been a Horus Heresy nut for about three years now after a friend introduced me to it. That was it I was instantly hooked.
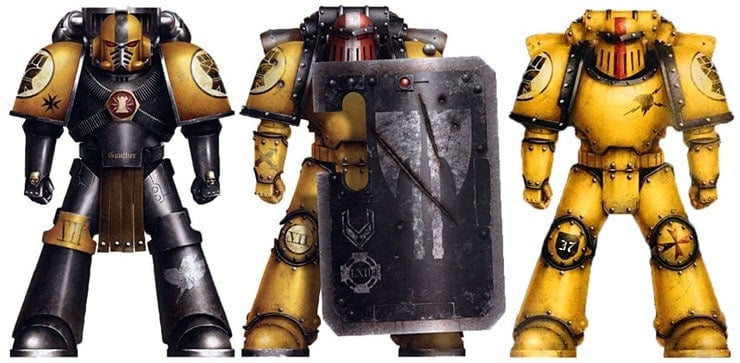
I had been collecting the Crimson Fists for years, and with book three having my Primarch it was easy to jump in and start painting yellow. I like the big stuff, heavy support, Lord of war all the way up to the massive titans.
I’ll be posting my artwork up over here regularly but if you’re keen to see more there’s plenty to check out at phalanxforge and over the next 12 months I plan to have a couple of new armies on display, one most definitely will be on aligned to the traitors.
Shameless plug over, here’s what I’ve been up too.
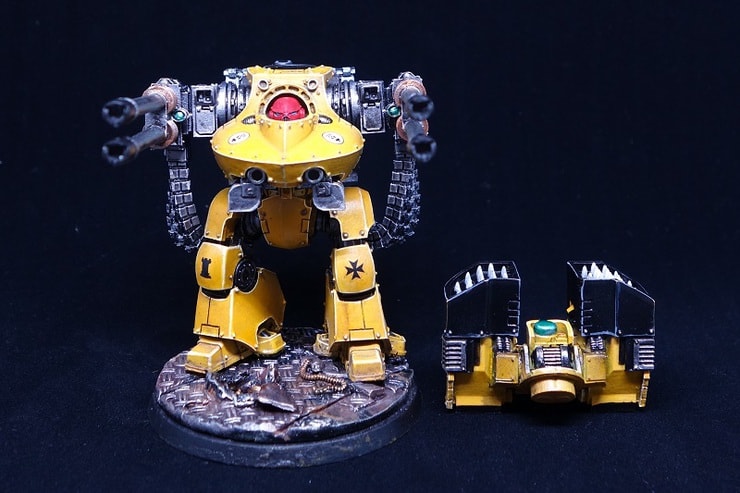
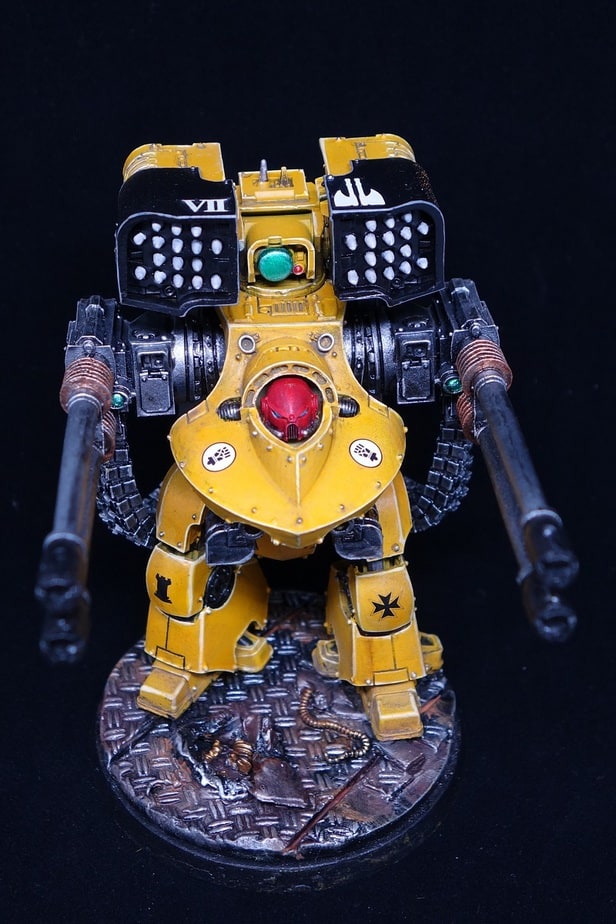
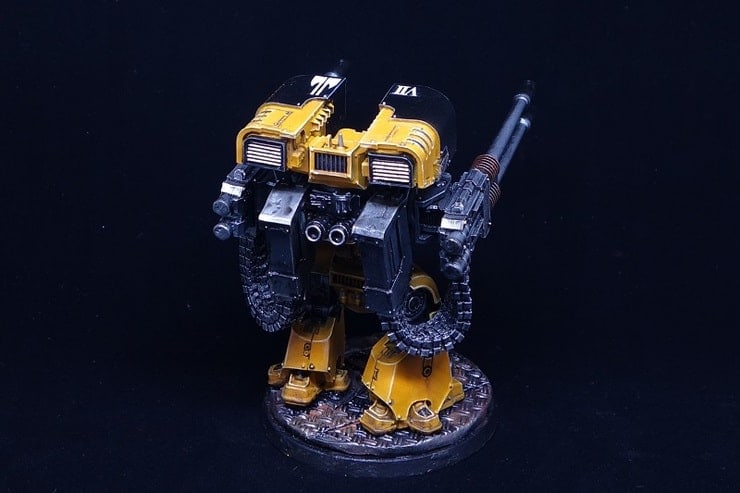
Deredeo Dreadnought Project
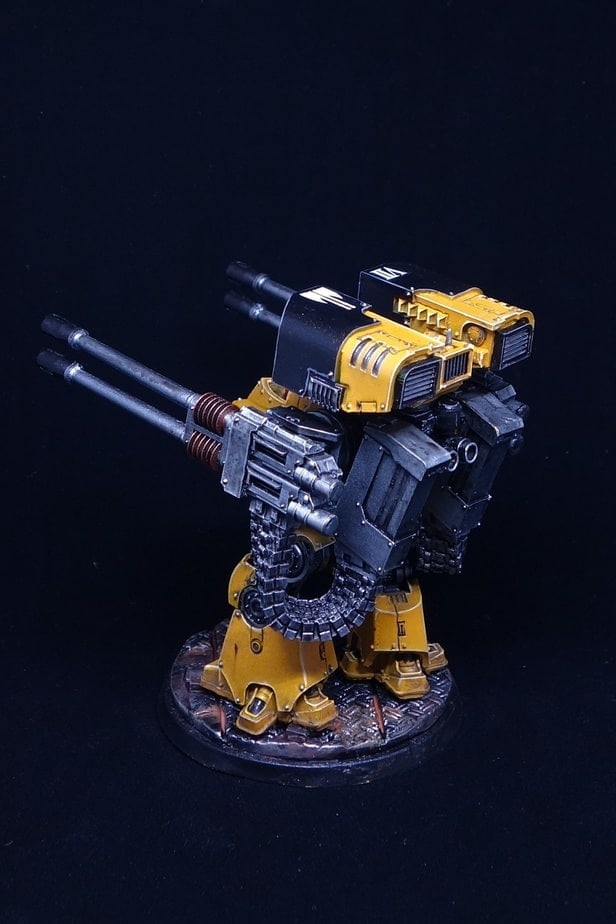
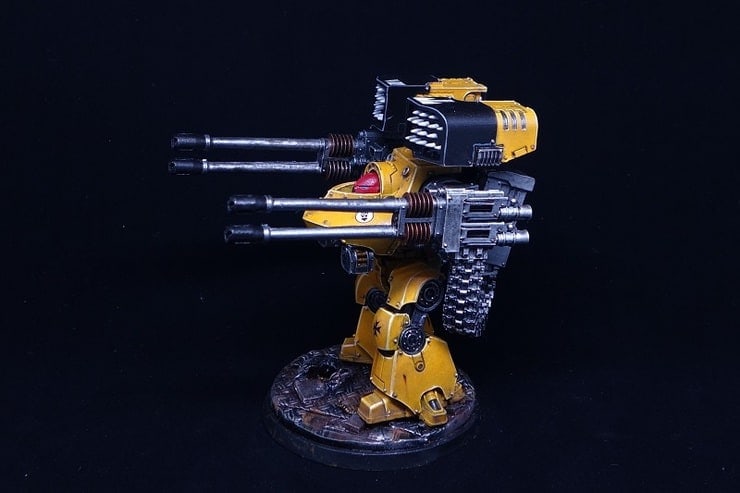
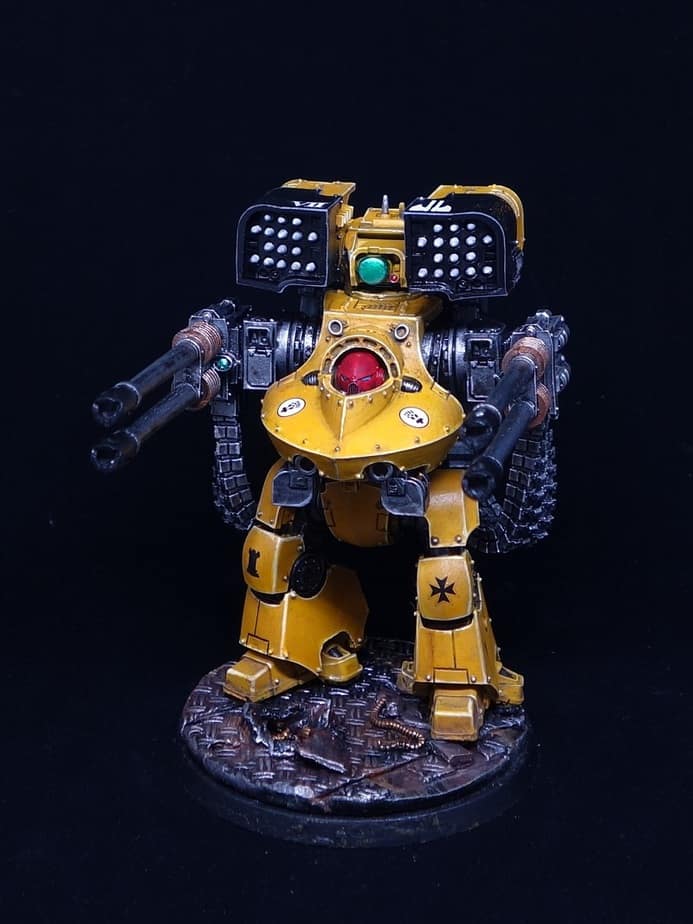
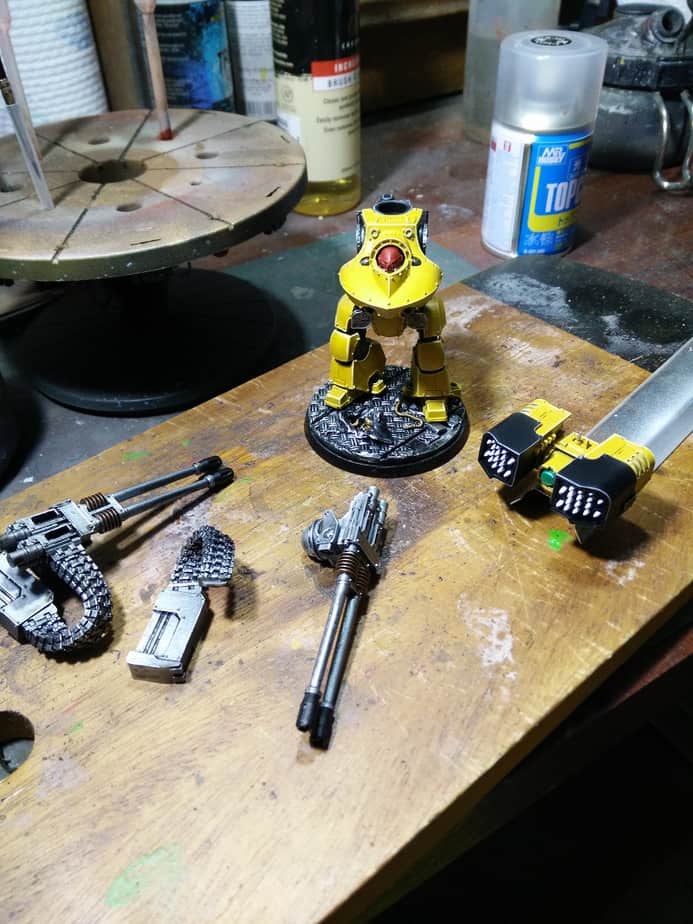
The last model I have been working on is the Deredeo dreadnought. Unlike a lot of the Forge World sculpts I took a bit of time to warm up to this model, It was the torso that was the initial shock as it looks like a speedboat rather than a deadly mobile artillery dreadnought. It got me in the end, and the weapons it gets access to are pretty nasty.
This was also the first time I had used the Forge World Imperial Fists decals. The description and photos on the sales page don’t do these decals justice they are very pretty in person, and some images and words are metallic, I was not what expecting that at all. Also, they are very simple to use and look great!


Painting
I have tried many different ways of doing Imperial Fists yellow, but for the Deredeo, I used a combination of the GW Air range and AK-Interactive paints and weathering products.
- AK Interactive Dark Yellow Primer
- GW AIR Averland Sunset
- GW Air Flash Gitz Yellow
- GW Edge Dorn Yellow
- AK Interactive Dark Yellow Enamel Wash
- AK Interactive Streaking Grime Enamel
All the black areas and the weapons were primed using the
- AK Interactive black primer
- Vallejo Gun Metal,
- Null oil gloss
- Vallejo steel highlights.
Model Base
I’ve been theming my Imperial Fists Legion to be fighting through a ruined industrial complex, that way I get to use loads of all the great tools for building the narrative. Things like diamond checker plate, concrete rubble and cables are all great fun to make, they paint up quickly and weather to a distressed or ruined finish easily.
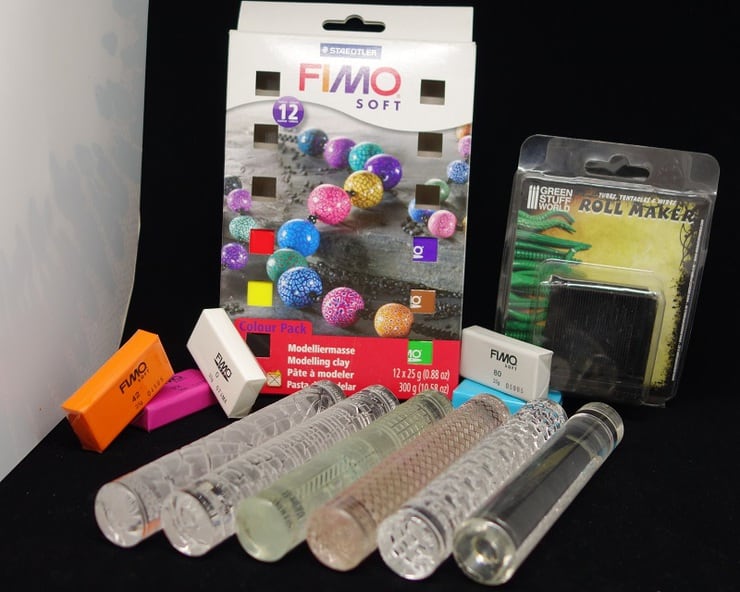
I make all of these bases at the moment using Fimo soft modelling clay and some of the rolling pins from Greenstuff world. Making the base details allows me to all add simple features like line markings door bolting points and battle damage. For the Deredeo’s base, I carved a hole in the middle and added some ruined cables and bent up deck paneling; he’s also crushing some rubble under one of his feet.

The base is dry brushed with dark metal colours like Vallejo chainmail washed with Nul Oil and highlighted with a lighter dry brush of Vallejo steel. This effect is perfect for that rugged distressed look to a bombed out facility; the last step is to coat it in all manner of weathering enamels and powders.
Construction
The Deredeo went together nicely, if you’ve ever built a Forge World Dreadnought, then you will know the joy of deciding on the many thousands of possible poses, this one is the same. I like to think of this one as defending a fixed position or advancing impeccably as a shield wall crushing the enemy; he’s posed in a solidly braced stance, on a firm foundation ready to deliver some heavy-hitting support.
As the weapons link back to the main chassis, I opted to glue the arm guns in place rather than magnetise them.
I found this kit simple to build; everything went together beautifully, the two points worth mentioning is
- The Aiolos Missile Launcher is designed to move freely; this did not sit level with the dreadnought’s hull and angled down at the front. I added a small offcut in the recess under the central targeting lens to get it sitting at the correct level.
- The ammo belt feed will require heating to line up and position correctly with the hopper and the weapon.
Checkout what Brett’s been up to over on his site below: