Ready for more Jstove and Necromunda? Well, he is back with tips and tricks to make the most of your campaign strategies!
Jstove here, and today I’m talking tips and tricks for maximizing campaign strategy.
Always Sandbag your Gang Rating, never give away Underdog Reputation.
You always want your gang rating to be the result of hardened and experienced fighters, not just guys with a bunch of fancy gear. A tough gang with a high rating from killer models will always be a better bet than a green gang with bigger guns. You’ll never get to shoot that unwieldy big gun while you’re pinned from a veteran lasgun sniper that hits on a 2+ every turn! More importantly, denying underdog Reputation gain is EVERYTHING. In Necromunda, when your gang rating is higher than your opponent’s, he gets +1 Reputation for every 100 points of GR you have over him. Reputation is a big deal because, for every 10 points of Reputation you have, you can recruit another Champion.
Champions are the strongest models in the game, on and off the battlefield. They are functionally equal to Leaders in almost every way. They can activate friendly models like a Leader, have access to every item on their roster, and can perform every post-game action. The more Champions a gang has, the more group activations they can make, the more big guns they can bring to a fight, and the more rare equipment, doc escorts, and other post-game actions the gang can take. A gang that has more Champions has more firepower and economic opportunity than a gang that doesn’t.
Therefore, you always want to be keeping your gang rating artificially low. Got a model that can kill people with a power weapon? Power weapons are expensive and add lots of rating. If he’s so good he can kill with a power weapon, I bet he can kill just as well with a cheaper weapon like a chainsword or a flail, and not give up a bunch of Gang Rating.
It doesn’t really matter if you think you can out-kill and out-economy your opponent because you can’t. Once a gang has more Champions it starts a snowball action that creates advantages across the board. Even though Champions are expensive to recruit, and you might think that it will take your opponent a long time to arm them up with heavy stubbers, bolters, or plasma guns, you must always remember that if a gang member dies on a trip to a doctor, or if there was at least one living model on the table when the gang bottled out of the fight, the gang KEEPS all the dead guy’s gear. This means that even if a gang takes heavy losses, it’s not down and out yet and can still rely on its stockpile of bloodstained dead guy gear to hand down to new recruits. In this way, an underdog gang can eventually fight it’s way uphill by recycling dead guy gear and hiring Champions.
So always remember – Sandbag your rating by buying cheaper gear and making sure any rating advantage you have comes from experience, not toys. Beat your opponent’s head in, but not so bad that he farms you for Rep and you beat more Champions into his roster.
Taking Captives, the Gentleman’s Agreement.
As a general rule, it is never worth it to sell a captive, and it is incredibly dangerous to attempt a rescue. First of all, the value of a captive is half his rating, rounded up to the nearest 5 credits. Selling him off in the middle of a campaign if his buddies don’t rescue him is what we refer to in bird culture as “a dick move.” I don’t think it’s ever appropriate to sell your buddy’s model into slavery so that he can’t use it anymore. Moreover, it’s not even the best option. I’ll go over that in a moment. Rescues are also almost always not worth attempting because, in a rescue mission, the defender has free reign to place his sentries and his captive anywhere on the table.
This means that you could easily place your captive on top of a giant tower overlooking a bottomless pit or a huge drop so that any model that attempts to free the captive could just get shot into a death drop or another similar terrain hazard from pretty much anywhere on the table. Since the defender can set up anywhere, it’s very easy for them to turn a rescue mission into a death trap. (And they should because holding a captive is very advantageous.)
There are 3 reasons you should never sell a captive in the middle of a campaign, and they are very important.
- At the end of a turf war, all captives are automatically freed, and you are automatically paid their ransom from the bank. This is the most diplomatic option as it allows you to get paid without having to actually be a dick. The best part is, you still get to hold the enemy fighter hostage for the length of the turf war without being a jerk.
- Captives can be traded for other captives in a prisoner exchange, and used for slave labor in the Mine Works territory if you have it. Since you’re probably going to be paid out for your captive at the end of the turf war anyway, just sit on him and put him to work if you can. Just keep him as leverage in case one of your fighters suffers a similar fate.
- The big one. Captives can be ransomed for equipment. Since all captives are worth half their gang rating in ransom, this means that Juves are worth basically nothing, and even well-equipped gang leaders might only be worth a hundred credits or so. However, big guns are always expensive, and even a relatively simple weapon like a heavy stubber still costs 130 credits! This is the best option for ransoming a captive – Make your opponent trade you fancy new toys that you may or may not be able to get yourself for the captive, then turn around and shoot them with your new toys. They get their man back, you get new toys, you shoot them, and everyone wins. But you win the most.
This is also the only way to get a unique house weapon from outside your house. (assuming they ever make any worth using.) The best part about this deal is that if you convert a model up to actually be using that weapon, you’ll get to use it forever since Necromunda actually has rules for recruiting retired models from previous campaigns.
Always Sandbag your Juves
Juves are a big deal. They are either the future of your gang, or they are sacrificial bullet catchers. The difference between them usually comes down to whether or not the Juve was horribly wounded into being useless the last time he caught a bullet. If he’s fortunate enough to not be crippled by the time he gets good at fighting, he’ll be the future! If he’s stuck in a wheelchair for life, well then at least he’s still a bullet catcher. Every gang needs a future and some bullet-catchers, and destiny will decide who is which. Your strategy for growing your gang should always be to buy a Ganger, then a Juve, then a Ganger, then a Juve. Unless there’s a death or a career-ending injury in the gang that requires that you hire a new Champion, then you should always be putting yourself in a position to pay the ganger tax and add Juves to the roster.
The most important thing you can do with Juves is trying to keep them Juves as long as possible by sandbagging their XP. Once a Juve has 5 advancements on his card, he will automatically promote into a Champion at the end of a turf war. Once he is no longer a Juve, he will have to pay the XP tax for his future advancements.
Therefore, it makes sense to get a Juve up to 4 advancements in a single turf war, sandbag him, and bank all his remaining XP. That way, when the next turf war starts, he will still be a Juve, and you can spend all his XP for another turf war without paying the advancement tax.
Primary Priority Rolling
Champions and Leaders start the game with a free skill from one of their primary skill tables. Throughout the game, when a Champ/Leader/Juve gains a new skill, they can choose to learn a primary of your choice at a premium cost, or take a random skill at a lower cost. When you’re building your gang, keep this in mind, because you should build towards knowing which skill tables are good to roll on, and which tables are garbage and must only be cherry-picked. Random priority rolls are the lowest XP cost skills in the game.
As an example, almost everything in Shooting and Ferocity are good as primaries. Anything that allows you to shoot more often or more accurately is always effective, and Ferocity has a skill that allows you to escape pinning, and 2 skills that mitigate injuries. If you random roll a skill that your fighter already has, you reroll, increasing the odds that you’ll get a desirable skill. This means that if your Leader/Champ starts with your top pick in a skill category that he has primary, you have very good odds of landing decent skills on future rolls, and you should always consider taking the lower cost random roll.
This is especially devastating for any Champ or Leader that has shooting as primary and takes Gunfighter with a pair of bolt pistols or autopistols, as they’ll already have the best skill for their kit, and everything they random into afterward will be useful. Ferocity is the second best as primary because it is the least random in terms of benefits. The utility and survival skills in Ferocity are always useful, and the melee-focused Ferocity skills are at least melee-useful.
Cunning is a junk skill table to roll on and should always be cherry-picked, as Cunning skills are pretty much all situational. Agility is also basically “Sprint is great and everything else is meh.” Brawn and Combat are “Your mileage may vary.” Savant is always useful, but is divided between support, medical, and post-game economy skills. Therefore it is only recommended to veteran players who understand the post-game as well as the in-game.
Models that can’t shoot get blast weapons
As a general rule, Juves can’t shoot, but they also can’t buy grenades because Juves aren’t allowed to have nice things. But, for any model that can’t shoot for crap because he’s a dumb-as-a-post Goliath Ganger or just an unlucky jerk that loses a point of Ballistic Skill to a bad injury roll, the path to redemption is always through blast weapons.
Blast weapons in Necromunda are phenomenally forgiving to use because they have the highest chances of mitigating bad hit rolls. Here’s why.
- When you shoot a blast weapon, you roll to hit, and if you hit you don’t scatter. You only scatter if you miss, but missing and scattering is still better than not hitting at all.
- When you shoot a blast weapon, you do not have to target a model. You may select any point on the table. This means you will always roll on your normal BS unmodified as long as you don’t center the target directly on an enemy fighter in cover and make the hit roll against them.
- When shooting a blast weapon, it only scatters D6 inches, not 2d6 like in older editions of 40k.
- There are no partials. Everything the template touches, partial or full, is a hit.
- When shooting a blast weapon, if it scatters, the scatter is arrested if the marker contacts a closed door or wall. This makes blasts especially accurate in confined spaces like Zone Mortalis where you can effectively guarantee accuracy by shooting down choke points and narrow corridors.
- Keep in mind that when you use a blast weapon that has knockback, models that contact terrain objects or other models due to knockback movement take +1D. This makes even otherwise mediocre weapons like the frag grenade more dangerous when you are chucking them down holes where enemies are sitting in cover or hugging walls.
- Grenade weapons don’t need to be modeled and are assumed to be stuffed into pockets (or bras, codpieces, fetish gear? Goliaths and Eschers get weird on that stuff) so you never have to chop your model to give them grenades and save their shooting career.
Bowling for Gangers
Knockback is very situational but very strong. Weapons that can knockback are the Goliath spud-jacker, the 2-handed hammer (GW2) salvo, slug and executioner shotgun shells, frag grenades, and demo charges.
Although knockback is situationally useful, setting up a knockback correctly is guaranteed to be devastating. Knockback can be used to push enemy fighters off of cliffs if they’re foolish enough to stand on naked ledges, but more importantly, as mentioned above, if a fighter is knocked back and their movement is arrested by an object or another model, they take +1D. This means that if you splatter an enemy against a wall with a shotgun shell, or push him into another model, he takes a massive 3 damage on a successful wound! That makes hunting for Knockback totally worth it.
Keep in mind that with Knockback, there is no collateral damage if you push one model into another, the bowling pins cannot knock each other down, only the model that is hit by the weapon takes damage, the other guy just kind of stands there and shrugs. This means that if you are planning on building a combat gang, or you find yourself in a melee with a combat gang, it’s time to rely on the shotgun. Since the models are already in base contact, it’s going to be easy to just use your move action to get an angle, then take the risk for shooting into combat (which will be easily mitigated by a shotgun’s short-range bonus) and then just splatter the bad guy against the model he’s fighting.
This is an especially important consideration for Goliath gangs, and for gangs present and future that are considering melee-focused builds. (Speed melee Escher, Ferocity-focused Orlock and Cawdor, Genestealer Cults with Zealot melee) Goliaths have the 15 credit spud-jacker, which has +1S and Knockback. Using 2 spud-jackers, a Goliath Leader or Champion can slam a path of destruction through his foes in a flurry of S5 hits. All other gangs have access to the two-handed hammer through the trading post, which is an unwieldy beast with +1S and a massive 3D, 4D if you get the knockback damage! (see gangs of legend and GW2)
Cheap Melee is almost always better than Expensive Melee
Lots of gangs like the Eschers, Goliaths, and Genestealer Cult have access to devastating and expensive melee weapons that are more or less guaranteed kills if they connect with their target. Unfortunately, many of these weapons simply just cost too much to be useful and add a massive stress on your gang rating. This can allow smarter, sneakier, leaner gangs to farm your gang for underdog Reputation and come out ahead of you. After all, a Goliath with a power weapon or a Genestealer Acolyte with a mining saw is only as good as the fight he can get into, but the extra cost of that weapon padding your gang rating will always give your opponent free Reputation whether he uses that weapon or not. It’s always a safer bet to buy bigger guns that you can always shoot, rather than buy big melee weapons that you may not get to use.
More important than giving up gang rating padding though, is the fact that the best melee weapons in the game, in terms of cost-effectiveness, are the vanilla melee weapons that can be easily bought in the trading post and handed out to every ganger on your roster. A bunch of Gangers dogpiling a target with lead pipes and baseball bats will always do more work than one Leader with a power sword. As I mentioned above, the 2-handed hammer is a monster of a weapon that swings for +1S and does 3 damage a hit. 4 if you splatter a guy against a wall. As I write this, the only model in the game that has 3 wounds starting out is the Orlock Leader. That means that every successful wound with a big hammer will always produce at least 1 injury roll on every model in the game.
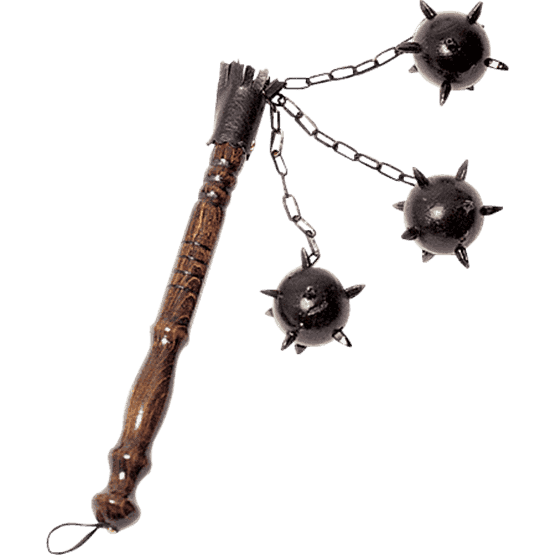
Axes and flails are also reasonably priced and phenomenal. The disarm trait on the ax makes your opponent only fight back with unarmed attacks if you hit on a 6. If you get unlucky with your wound rolls, you can still survive the reprisal. The flail can’t be parried, and if you hit with a 6, the opponent’s reprisal is at a -2 to hit. It also has +1S and +1 to hit. It might just be the best all-purpose melee weapon in the game. Both of these weapons are great for models that plan to get in melee and stay there and will be susceptible to enemies piling in on them and fighting back.
If you’re interested in weapons that aid your hit roll and make you more likely to connect, there’s the sword, chainsword, and flail. All of these weapons are trading post generics and have a +1 hit bonus, turning even a chump ganger into a decent fighter, and a competent Leader or Champion into a guaranteed killer.
