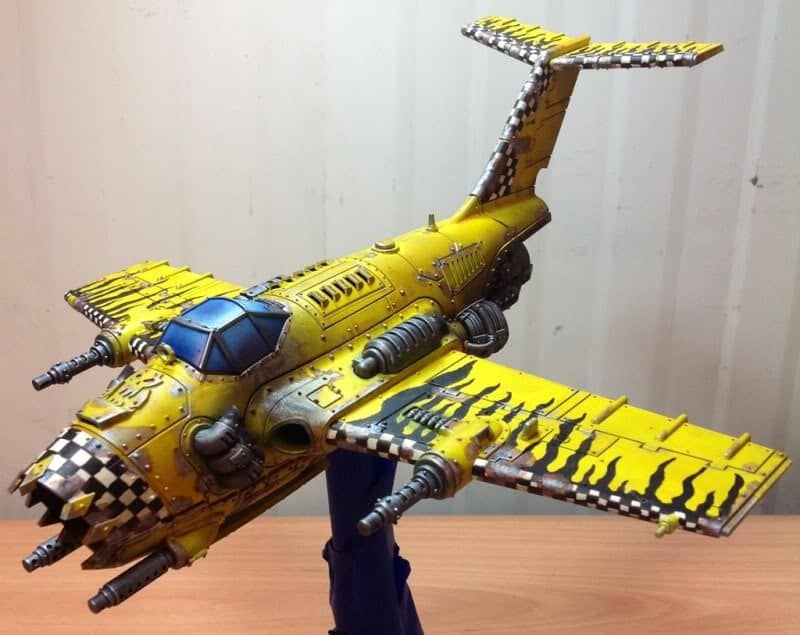
I’m a huge fan of Orks, Bad Moons to be specific. The yellow and black with the green skin is super striking and eye catching and a well painted Bad Moon army looks amazing on the table.
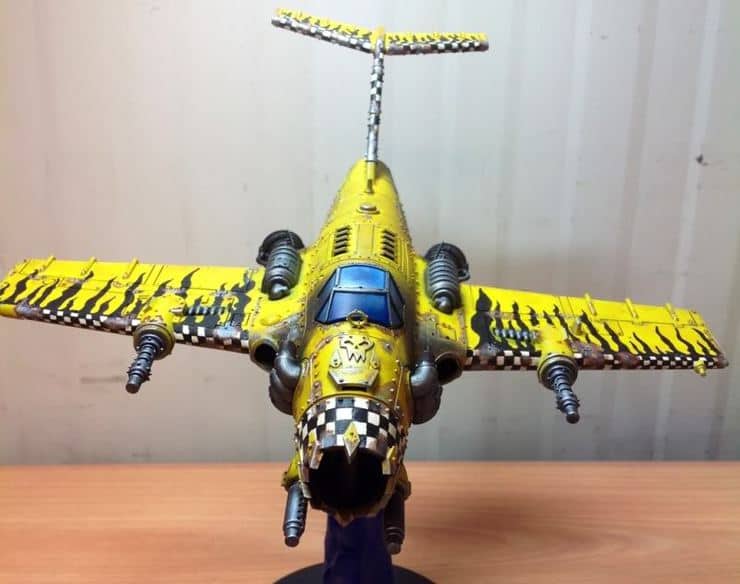
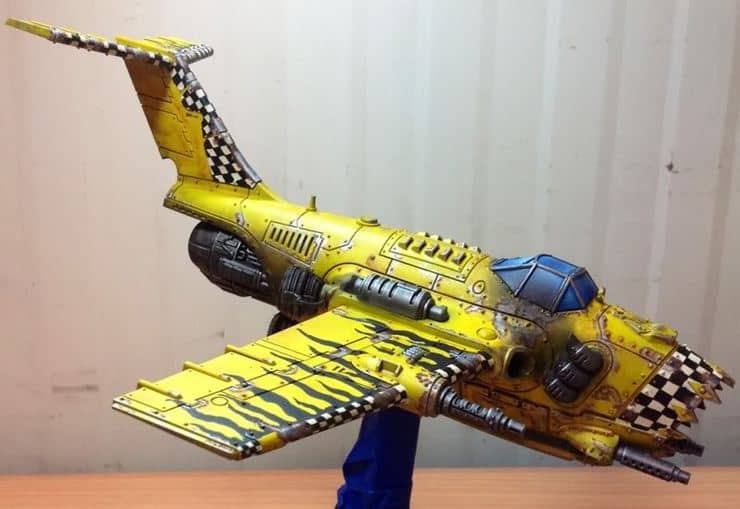
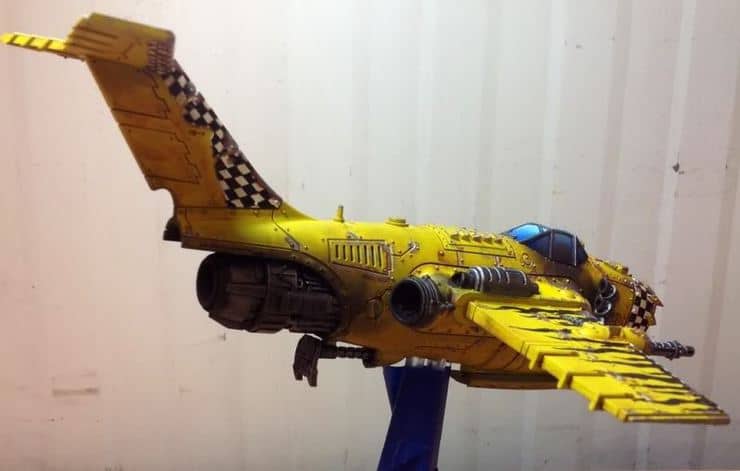
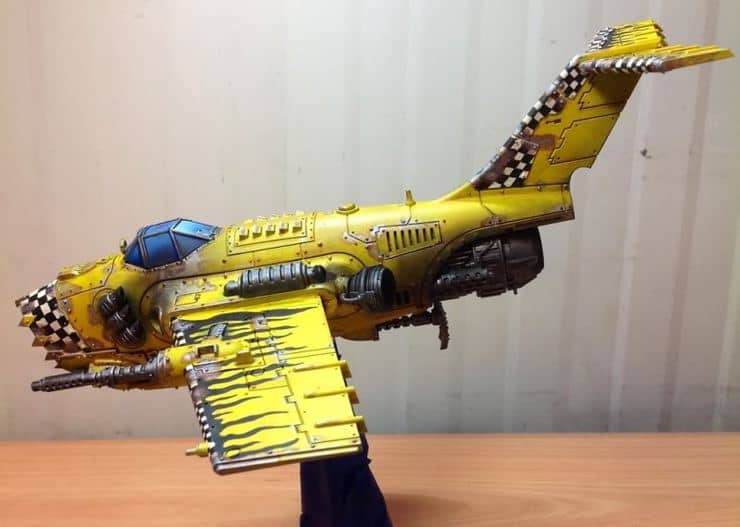
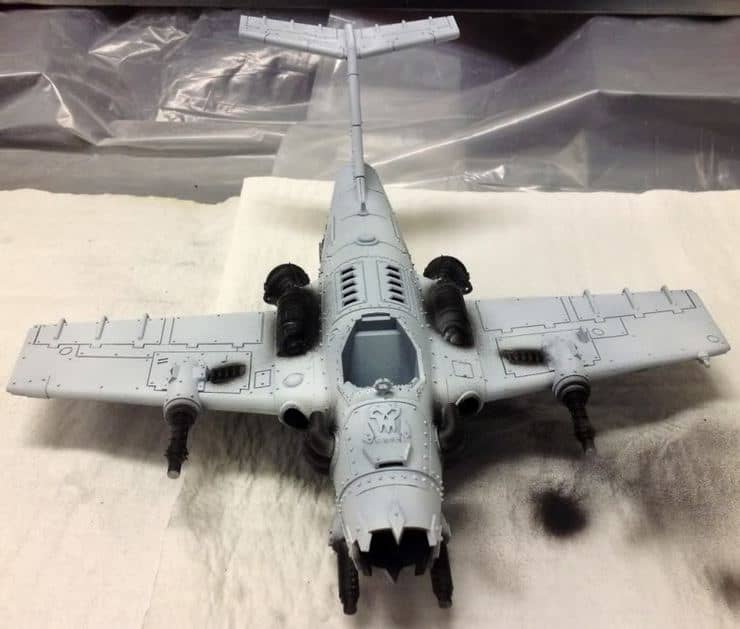
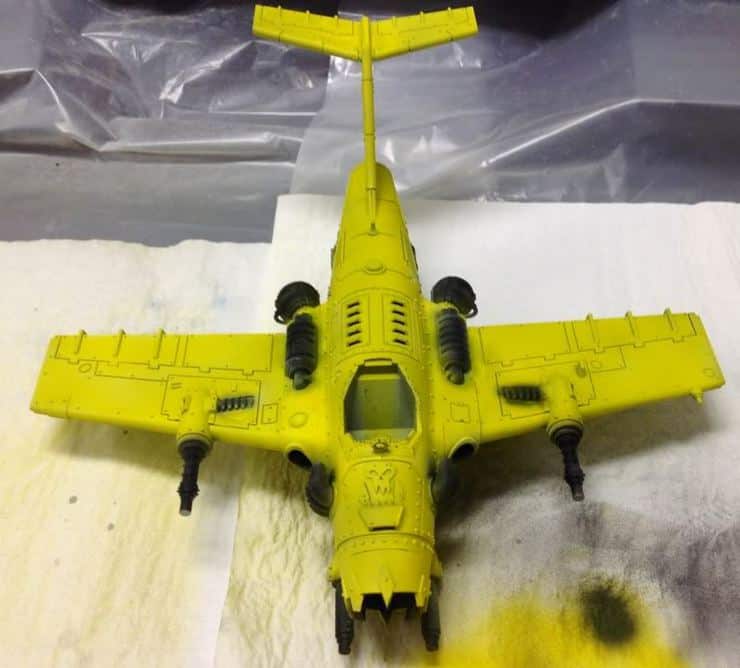
Back in July I bought the brand new Ork Flyer while I was in the States on leave from deployment, boxed it up and shipped it back to the desert. When it got to me I wasted no time in building it as a Dakka Jet.
Then Hobby ADD kicked in and it got put aside in favor of other projects. In March I pulled it out and got started. This is my first Bad Moon model for the Orks I’ll eventually get to and as such it was kind of a test model.
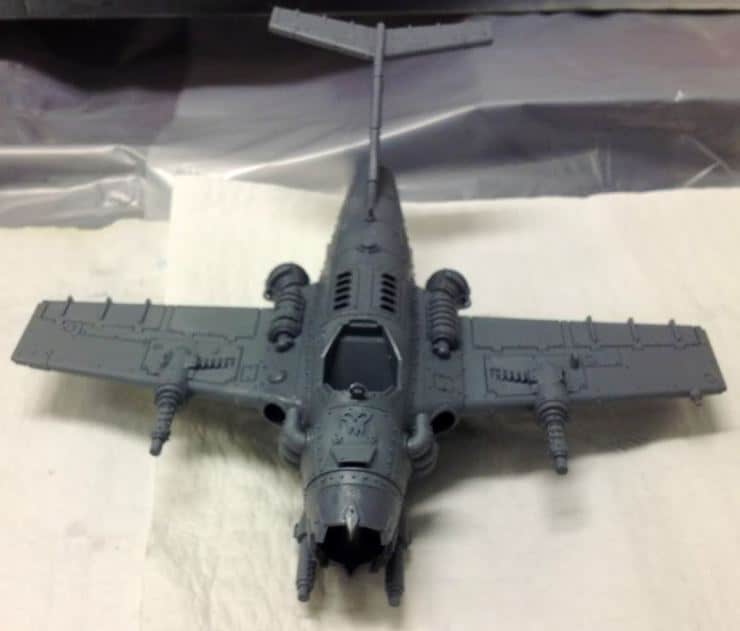
First I primed it using Vallejo White Airbrush Primer (can’t ship spray paint to the desert) then using the Vallejo Airbrush Black Primer I hit the areas that would be metal and did some pre-shading.
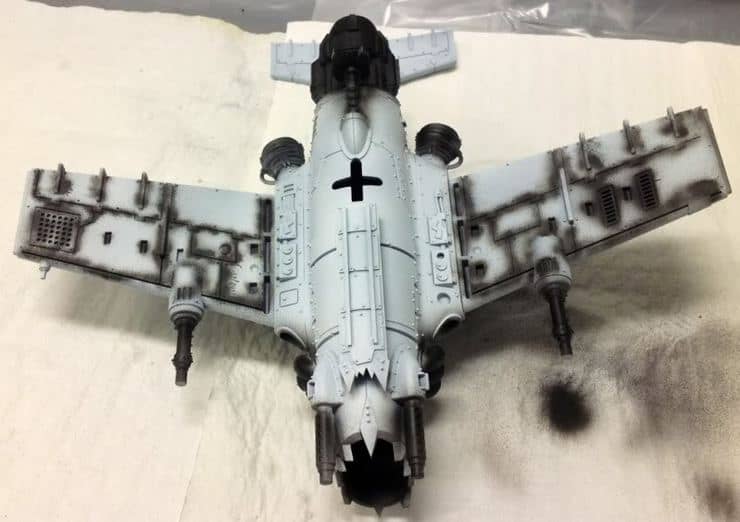
After two coats of Vallejo Air Yellow, I knew I had a problem. The yellow wasn’t covering the black pre-shading at all.
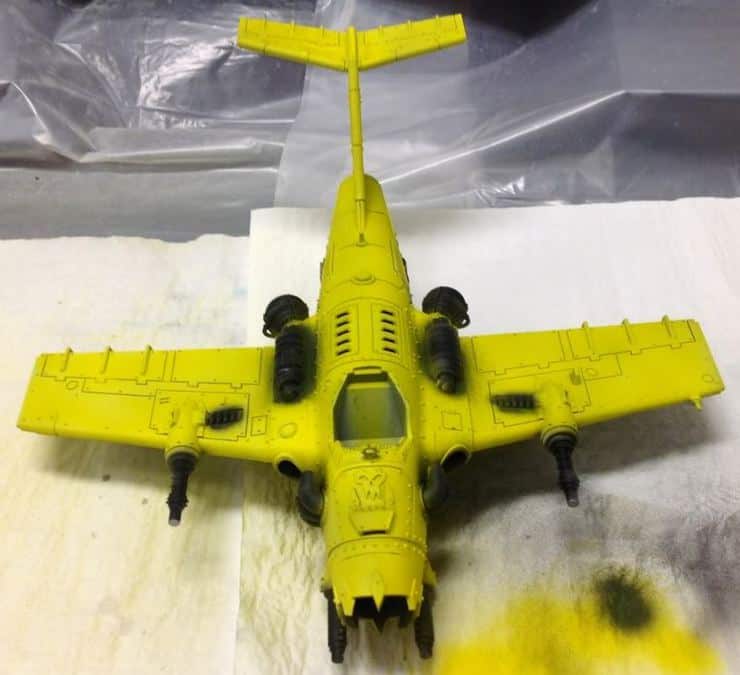
I was forced to forego the pre-shading, covered the pre-shaded areas with white primer again and then applied a few more coats of yellow.
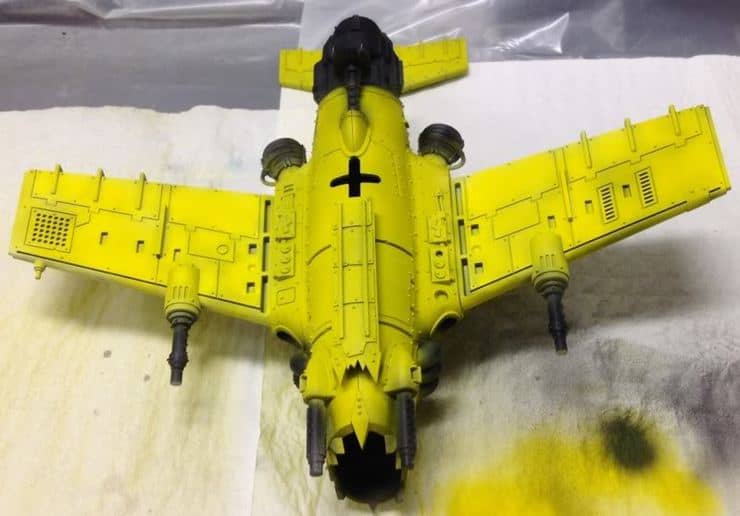
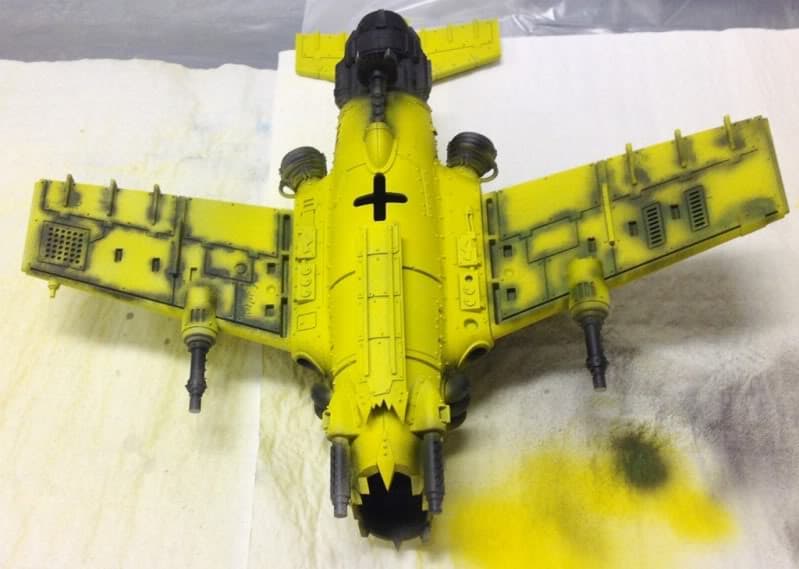
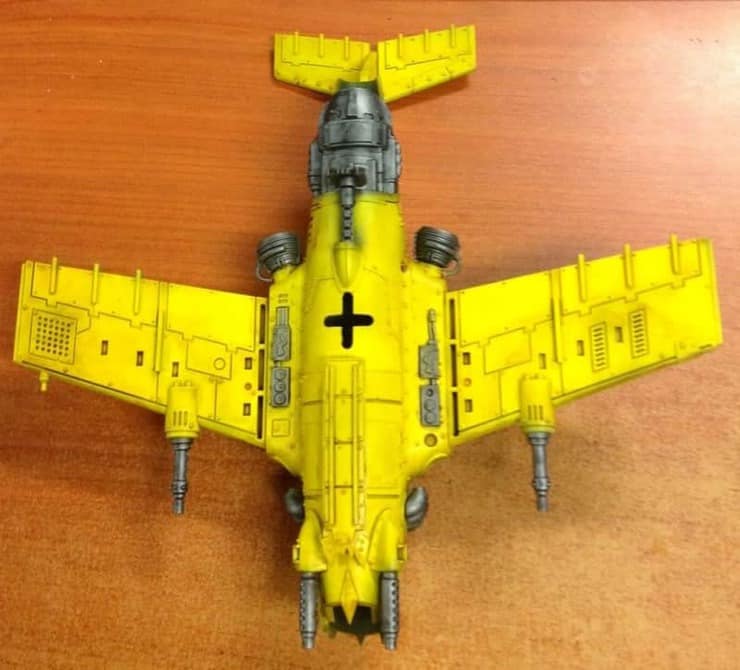
After letting the model sit overnight I brushed on Vallejo Air Steel on all the metal areas because masking would have been a bit of a pain then gave the yellow a wash of GW Seraphim Sepia and the metals a wash of GW Nuln Oil. I let that sit overnight and then I got creative. Using a pencil I drew out some flames on the wings and tail fins and then used a fine tip marker pen to trace out the lines and used a broader pen to fill in the flames. I also airbrushed the canopy with Vallejo Air Blue.

The next step was to mask the areas I needed to paint white in preparation for checker patterns. I airbrushed those areas and let then sit while I worked on the canopy. I did a little wet blending with white and blue to create a bit of a highlight to the canopy. After that was done I used a pencil and the markers to do the checkers. My hand was totally cramped after a few hours of this.
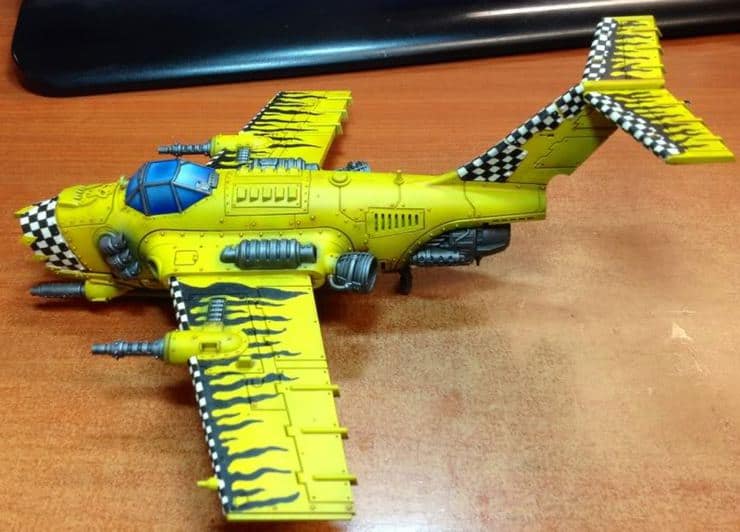
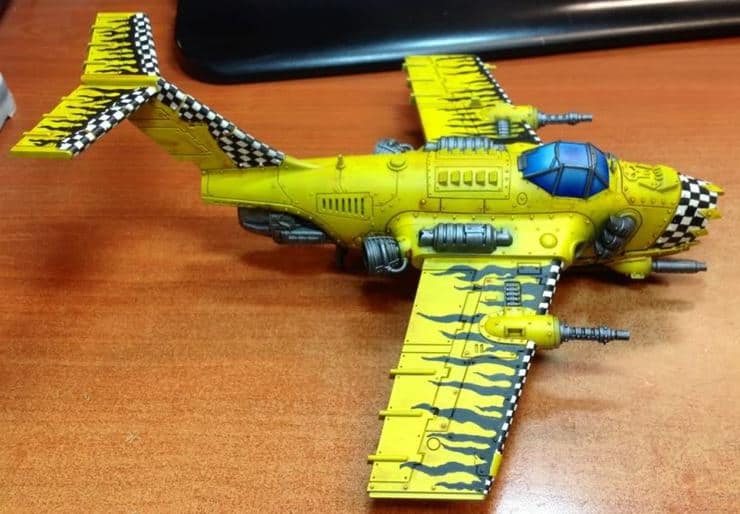
While I was happy with how this turned out overall I realized it really needed some weathering. I used a sponge with Reaper Honed Steel to add chips and worn areas and then sponged a little Reaper Rust Brown. I gave the areas a bit of a wash using Secret Weapon Armour Wash which adds a bit more rusty look to it. Using a soft, dry brush I applied some Forge World Soot Weathering Powder to the areas the exhaust would hit and applied a little to the exhausts themselves. With that I called the model itself done.