Rage of Khorne here from The Order of Chaos.
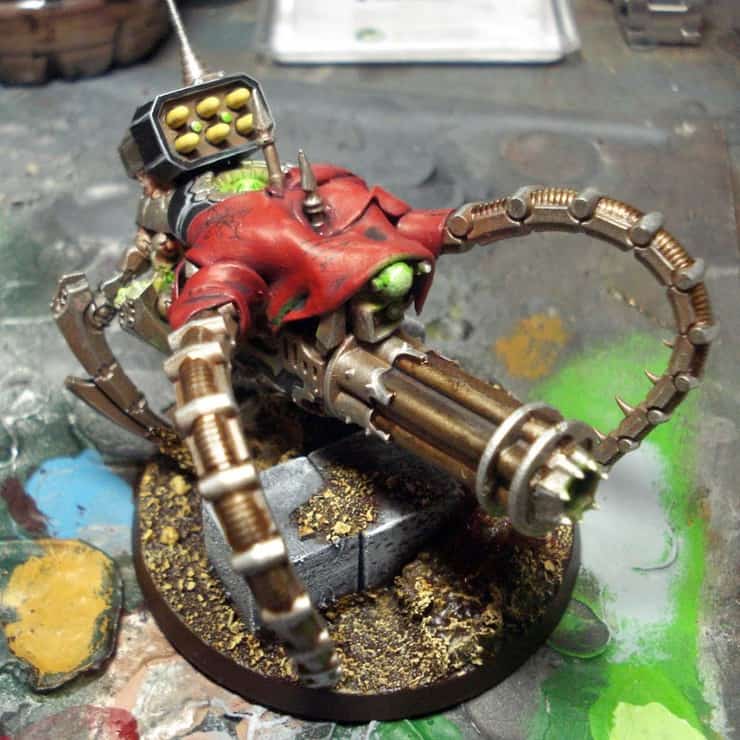
Today I will be kit bashing and modifying a count-as broadside (Roach Gun Servitor) for my WIP mechanicum allied force.
The kits I used were as follows:
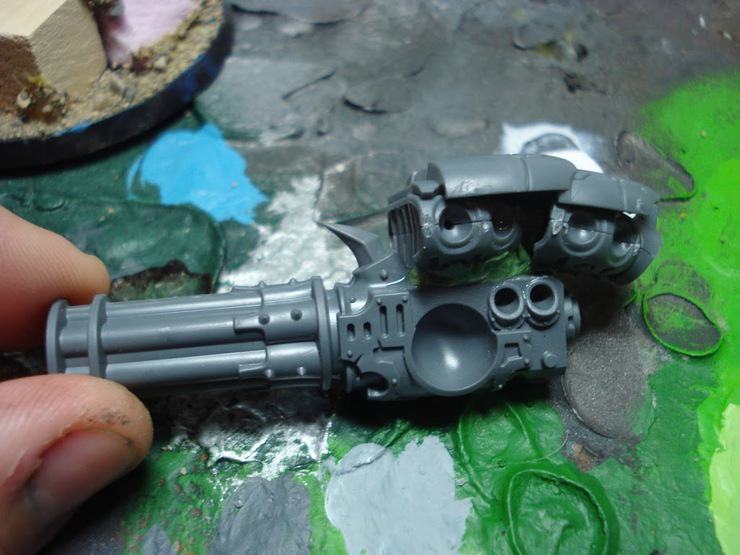
Forge Fiend/ Mauler Fiend – Mostly the tentacles and cannons
Necron Wraiths – The lower torso, claw arms, and assorted small bits
Space Marine Vehicle Upgrade Sprue – The targeting system from the hunter killer missil
Imperial Guard Vehicle Upgrade Sprue – The antennae
Dark Angels Vehicle Accessory Sprue – The missile pod from a land speeder typhoon
Chaos Space Marine Vehicle Accessory Sprue – The spikes are clipped from one of the decorations in the sprue
Large Base
I also used a selection of different materials to help affix all the pieces together in a way that would create a strong enough bond to prevent the more delicate legs from breaking off the base. The basing material was also a little unconventional but worked fairly. The materials I used were as follows:
Two Parts Epoxy Putty– Green works fine but almost any brand of high yield sculpting putty will work
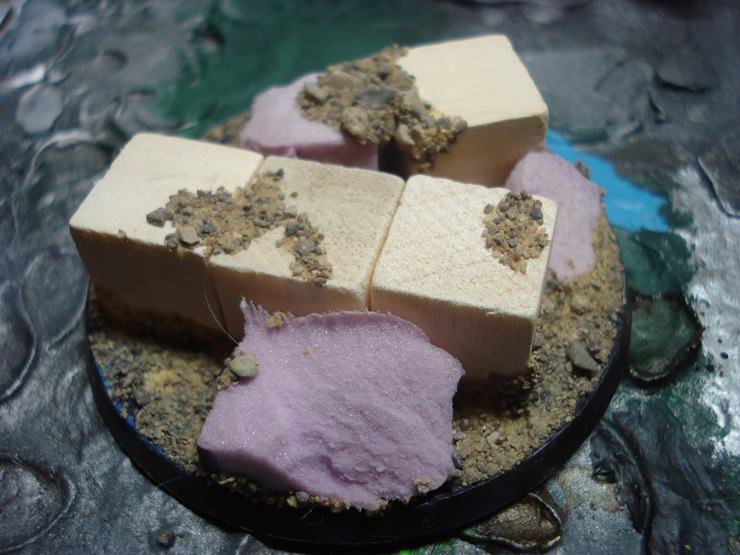
Pre-cut Wood Blocks– I found these at the dollar store and they make for fairly good cube bricks
Wood Glue – PVA glue works well for affixing sand but the wood blocks will stick better with the right glue
Quick Dry Super Glue– Most brands of super glue will work but I prefer a quick drying glue because a modification like this requires a bit of a balancing act and the less you have to hold the pieces in place the better
Plastic Glue – I use plastic glue for the joints because I really needed the legs to be affixed solidly so they don’t just break off in transportation. I find using super glue is great sometimes but arms joints don’t seem to work out as well
Pink Insulation Foam – This material is ultra-cheap and works really well to imitate ground matter and rocks. The one thing to be careful about is when it gets sprayed with primer it will usually melt at least a bit
Plastic Card – I only used a very small piece of plastic card as gap filler but I found using a square patterned plastic card made it very easy to break off the right shape and size.
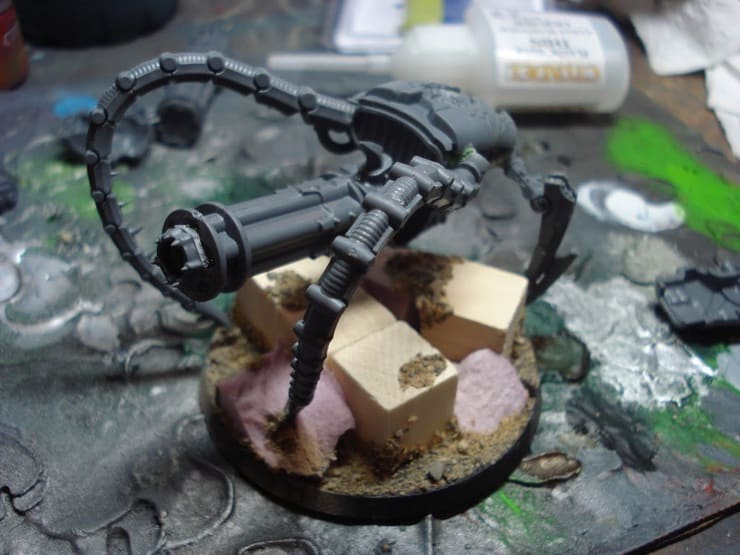
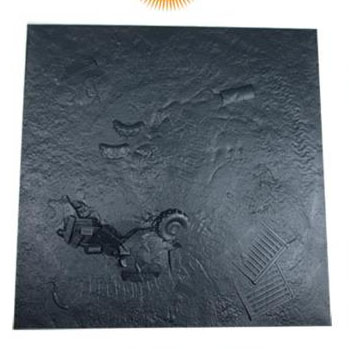
Step #1: When building this model I started with the base and worked my way up. The base was made by gluing the wood cubes down and then gluing the sand down around it. I also mixed in some pink foam which after painting would look like natural earth detail. This ensure that I had something solid to affix the legs to which would hold the whole figure in place while it dried. The base was left to dry before actually building anything on top of it.
Step #2: I then built the main body of the figure which was made from the lower torso section from the Necron Wraith kit and then stuck it to the cannon from Forge Fiend kit. I used green stuff and super glue for this as the fit left a noticeable gap and I wanted to have a fleshy looking combination of metal and skin connecting the pieces. I went back in later and cleaned up the green stuff work using a sculpting tool, stretching the putty across the gap to make it look like stretched skin.
Step #3: The next step was to glue in the load bearing legs which were two tentacles from the Mauler Fiend and two claws from the Necron Wraiths. This was a bit tricky because they were glued in using plastic glue but had to be held in the same pose while they dried. Because of the awkward shape there was no easy way to prop the model up while it dried. I ended up letting the joints dry and then adding some green stuff and super glue to further reinforce the legs. Where the legs met the base I used super glue where the legs touched sand and wood glue where they met wood or foam.

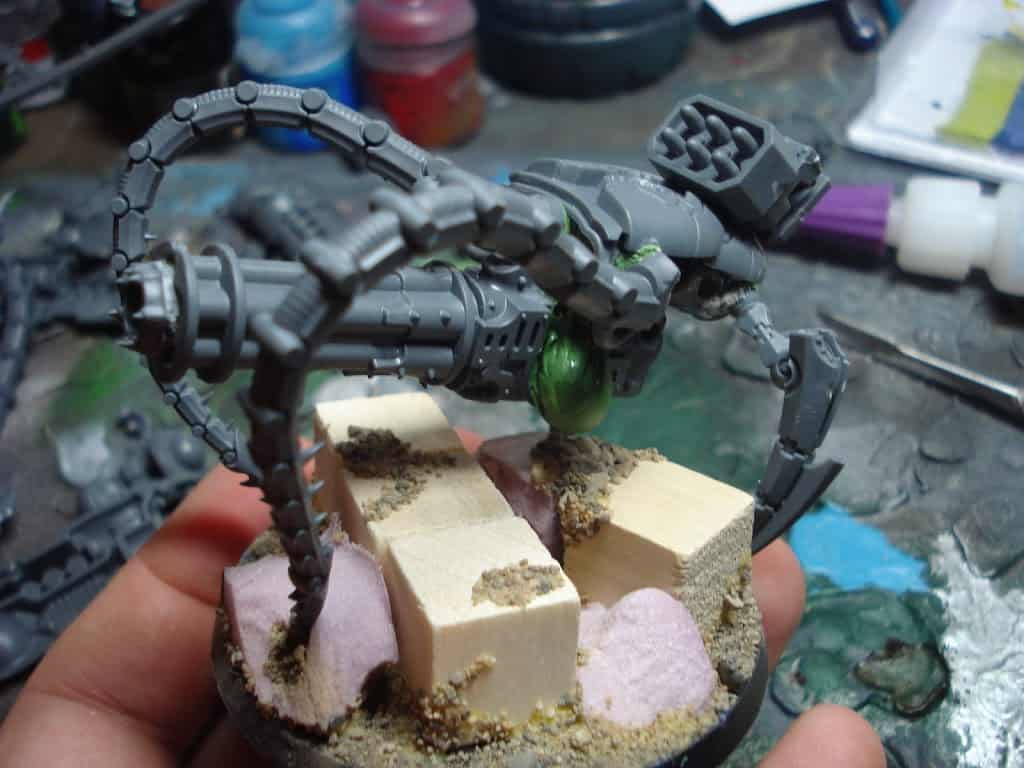
Step #4: Some small green stuff work was applied to the underbelly of the gun because there would be legs covering some of the model later in the build and this was the last stage it would be open enough to sculpt. Other details like the missile pod and gun barrel we added at this stage as well.
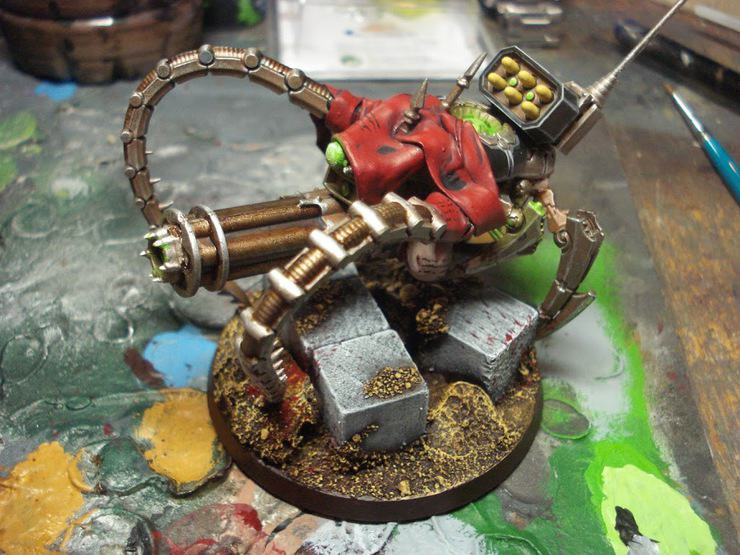
Step #5: The final details were applied including the antennae, legs, spikes, plastic card, and cloth.


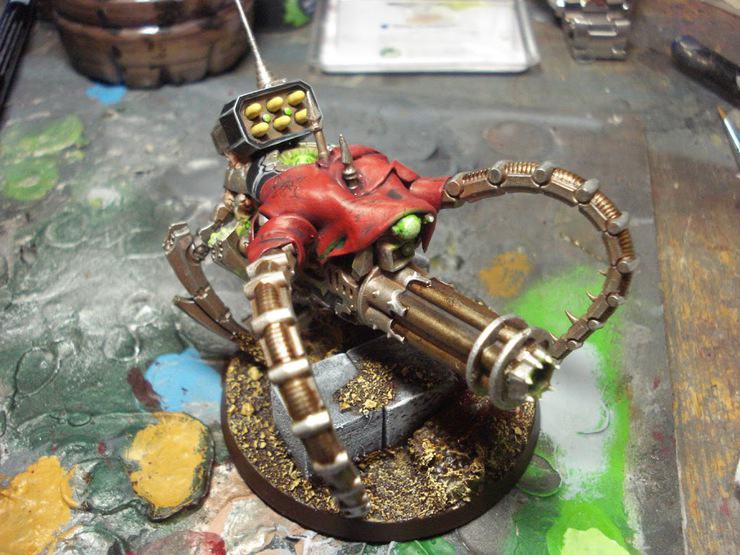
I’m pretty happy with the way the model turned out but I might be applying some small changes to the colour scheme for the rest of my models. I have added a size comparison to show the size of the model as it is consistent with the height of the old broadsides but comes out to be substantially wider.

I hope you enjoyed the article and I will be adding another one soon on how I built my counts-as Riptide (Giant Robot). Cheers and Good Gaming J
If you buy something from
a link on our site, we may earn a commision. See our ethics statement.
About the Author: Rob Baer
Virginia Restless, Miniature Painter & Cat Dad.
I blame LEGOs. There was something about those little-colored blocks that started it all... Twitter @catdaddymbg