Check out how to paint this super sweet Necron green glow with our Object Source Lighting (OSL) Effect Tutorial and make your minatures POP!
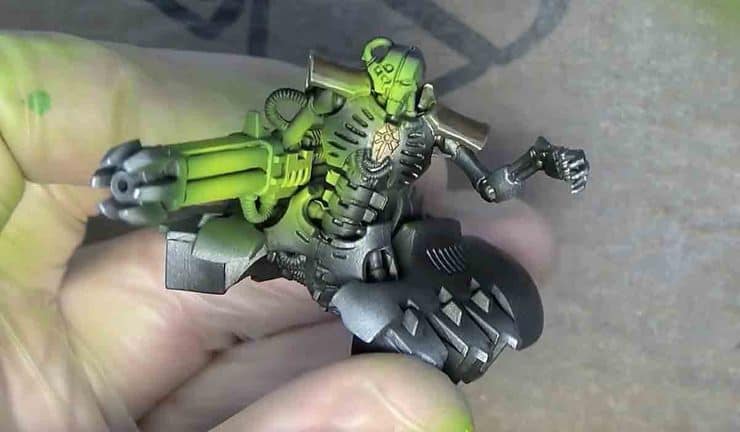
With all the new Necrons floating around, it only makes sense you know how to paint their weapons all glowy!
Today, Rob takes us through all the steps to make it easy (well… not as hard, at least!). If you’ve been struggling with your Necron Weapons, you have to check this out! Let’s go.
How To Make Your Weapons GLOW! – OSL Effect Tutorial
 Fact: Metal is Metal; it’s tough to make it pop!
This green glow helps make your model pop from about 4 feet away! Oh, and you can also use this for things like Nurgle and maybe Salamanders.
Today’s show is brought to you by P3, no, not really… but we’re using P3 Iosan Green and P3 Necronite Green with Citadel’s Flash Gitz Yellow, which is a super bright yellow and really amazing to get that top-level glow effect.
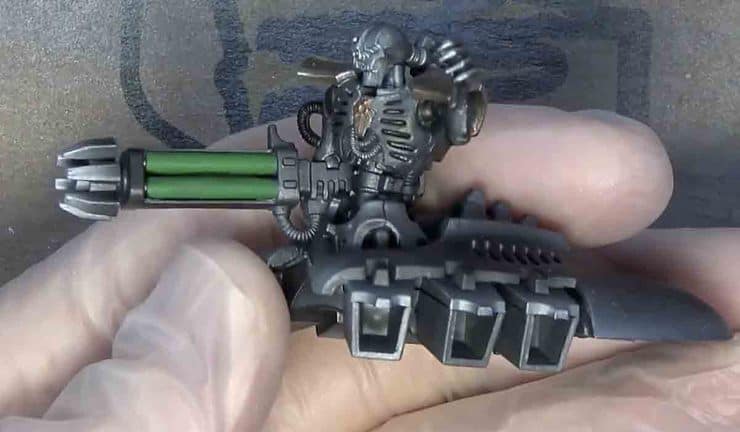
Step 1:
 Start with Iosan Green in the airbrush. We’re just getting the green down at this level; there’s no need to be careful because a bit of over-spray is what gives us that glowing effect.
Note that doesn’t mean you can just let the paint spray everywhere; you want a little natural over-spray to make this technique work.
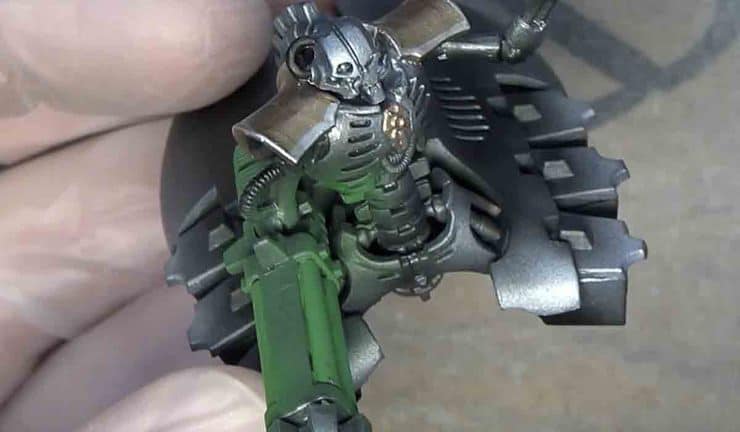
Step 2:
 For this stage, load some Necronite Green into the airbrush. Now, we’re taking it a step up in color, but the key here is aiming just for the very middle of the green areas. We’re going to be very precise with it, but we’re still getting a tiny bit of overspray.
 Pro-tip: You’ll notice I’m doing a bit of over-spray again in some areas. This makes it look like a natural glow effect; if you’re too precise, it won’t look natural.
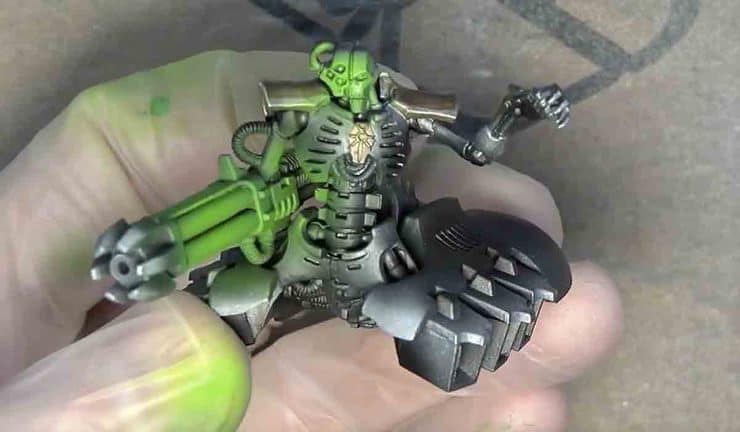
Step 3:
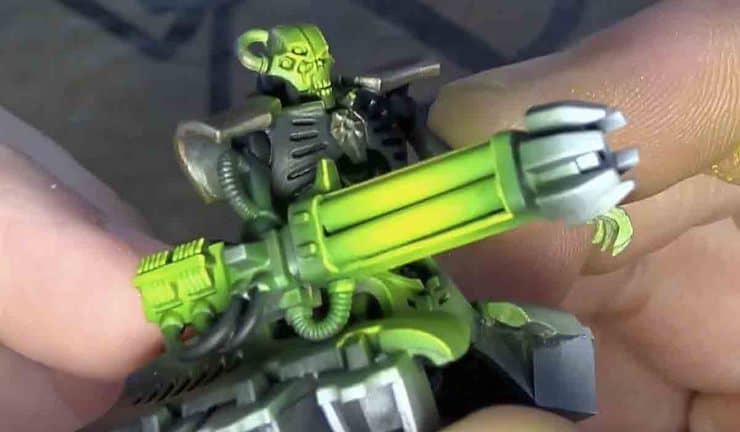 Flash Gitz Yellow is next up. This is such an amazing color, and we’re going to mix it thin. We’re doing very light-controlled bursts with this yellow.
I’m aiming right in the middle of the weapon and holding my airbrush super far away. You don’t want to be too obnoxious with it, and we’re aiming for the very top of the green areas.
Step 4:
It is time to highlight with the Flash Gitz. We’re dropping the airbrush for this and going in with the brush. We’re going to edge highlight with Flash Gitz Yellow, and just make sure to get clean lines. Just to note, before you start this stage, make sure everything is very dry!
The first line is the toughest because you want a good angle of attack, so make sure to take your time on that first line.
Note: I really watered it down in case I messed up; that way, I can just pull it off with my finger. Your window of opportunity is short, however, so you need to focus. If you miss, quickly pull it off with your finger or a paper towel.
I’m just dragging the brush right over the edge. It’s almost cheating because it’s so easy; it’s just a matter of getting in there and doing the work.
Pro-Tip: For highlighting, pull the brush towards you for more control. For even more control, move the model, not the brush.
This step is super important, and in the video, I show all the highlighting so you know everything to hit; it takes time, so don’t get frustrated. For this particular model, it took me about 6 minutes to do all the highlighting.
You’ll also see in the video that I’m not using the tip; I’m using the side/edge of the brush to make it easier (that’s what edge highlighting means if you didn’t know exactly what that meant).
I also show you how to properly load up your brush in the video, so if you’re looking for another hobby tool to add to your arsenal, check out the video above!
Step 5:
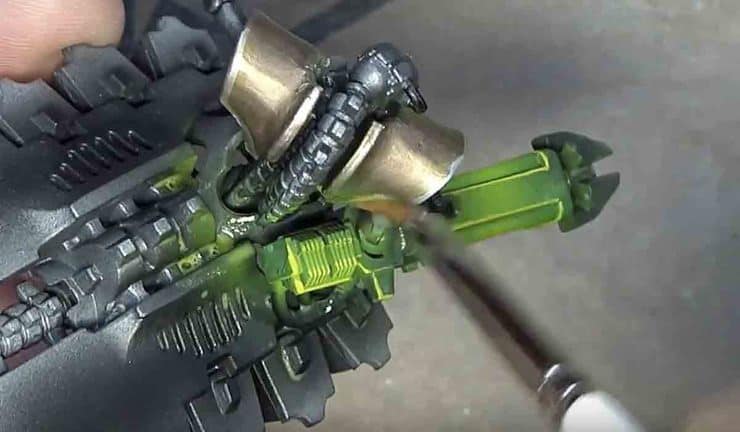 Time to Glaze it up! We’re using Secret Weapon Mini’s Fallout Wash, which is great for glazing. To make it easier, we’re using Army Painter wedge brushes. You’re going over all the green and even a bit of the metal parts that didn’t get any green on it. This works because it’s so thin it gives it a false shade that tapers off the end of the airbrush-painted areas.
Pro-Tip: Get rid of the bubbles and clean up the excess.
Let it dry, and that’s a wrap. It’s an amazing effect and takes about 20 minutes a model, which, in my opinion, isn’t that bad for something that really makes your minis pop! Make sure to subscribe to Spikey Bits to get great videos every week!
All the Latest Warhammer Rules & Model Rumors
Have you used this technique for your Necrons, wat is your favorite colors for OSL glow effects?
Let us know in the comments of our Facebook Hobby Group, or our new Discord server, and make sure you enter the latest monthly giveaway for FREE today!

Click Here To Follow Us On Google News
Get ad-free access to our hobby videos, a monthly crate of miniatures, and support some of the best creators out there for as little as $6 a month on Patreon!