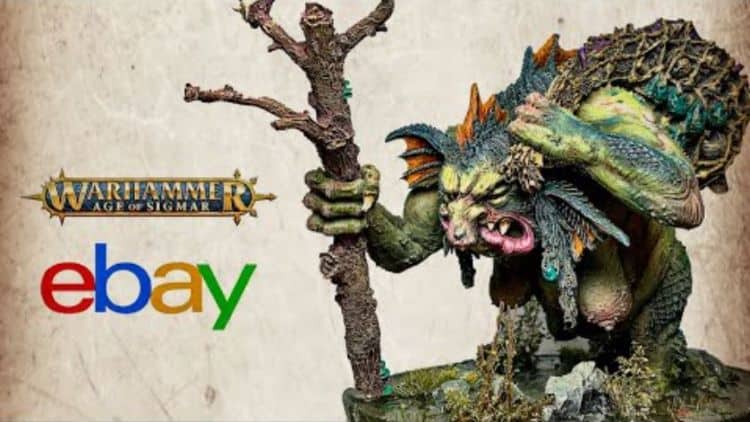
 eBay Miniature Rescues is back again with another video tutorial, and this time he’s painting a Troggoth Hag!
eBay Miniature Rescues is a unique channel that shows you how to take beat-up, damaged minis, and restore them to their fullest potential! It’s a relatively new channel on YouTube and it’s super fun to watch what Casey is able to do with some once hopeless miniatures. Be sure to check out all his stuff here! This week, he shows us how you can go tryhard mode on some Forge World minis! Let’s see how he takes this troll over the top!
Painting a Troggoth Hag: eBay Miniature Rescues
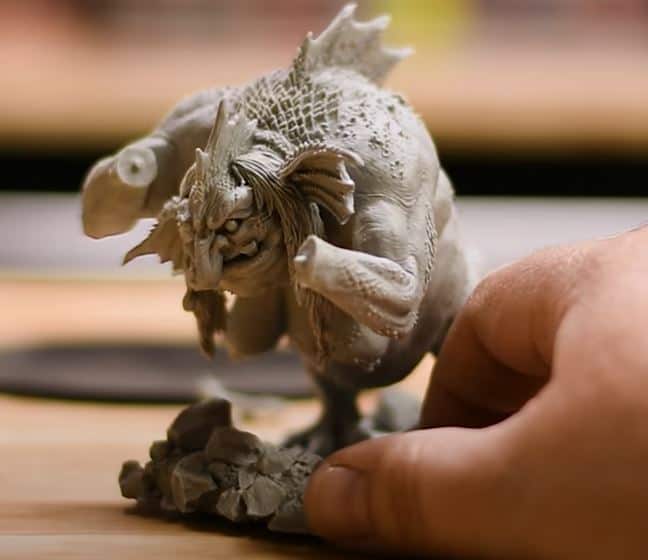 This is one of his favorite miniatures out there! It has so many little details in it and just seems like such a fun painting challenge. This is the start, bare resin and there are a few problems. There are a lot of gaps and such, but he is a rescuer after all. let’s see how to take it to the next level!
Getting it Ready for Painting
 First, he references what the model should actually look like. Once he has that in mind, he starts with Milliput. He smooths it down the best he can and tries to keep it flowing with the curves of the model. Unfortunately, there are gaps all over the place so it takes some time. Then the putty needs about 4 hours to dry, but the mini is finally ready for paint!
Painting the Troggoth
 He starts with a Synylrez Black Primer and then does a white ink through the airbrush from the top down. Just to note, he also grabs a paint job from online that he loves to use as a reference guide, he also suggests you do the same.
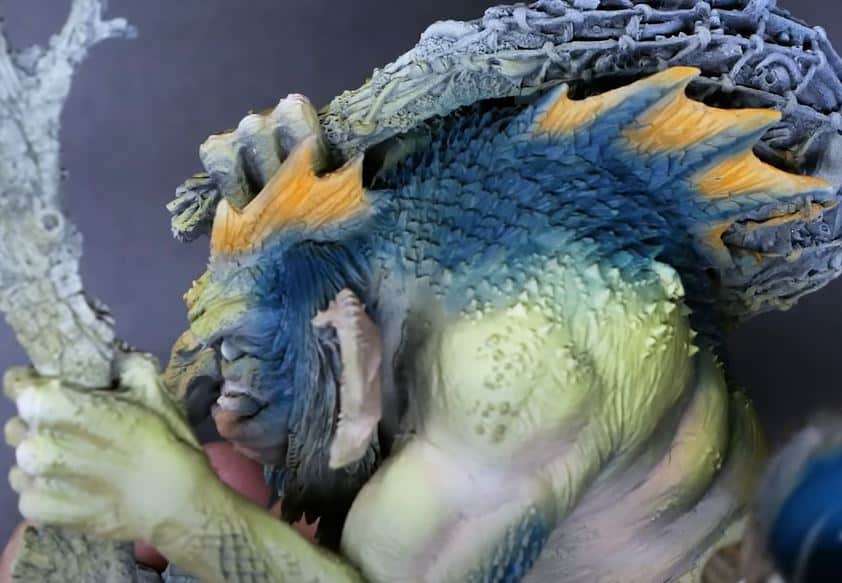 Next, he starts with a base coat of Deathworld Forest and thins it down with flow improver. Next, he grabs some flesh tones and hits the undersides to give it some contrast, followed up by orange on the fins. Just to note, he’s still doing this all with an airbrush. The last stage here is adding some blue near the fins.
 Once that’s dry he mixes up a nice dark wash and puts it over the entire mini, then waits for that to dry. This will really unify the skin tones. Using the basecoat colors, he starts to blend them together to make them look smooth. He uses a Red Grass Wet Palette here to keep the paint thin and flowing.
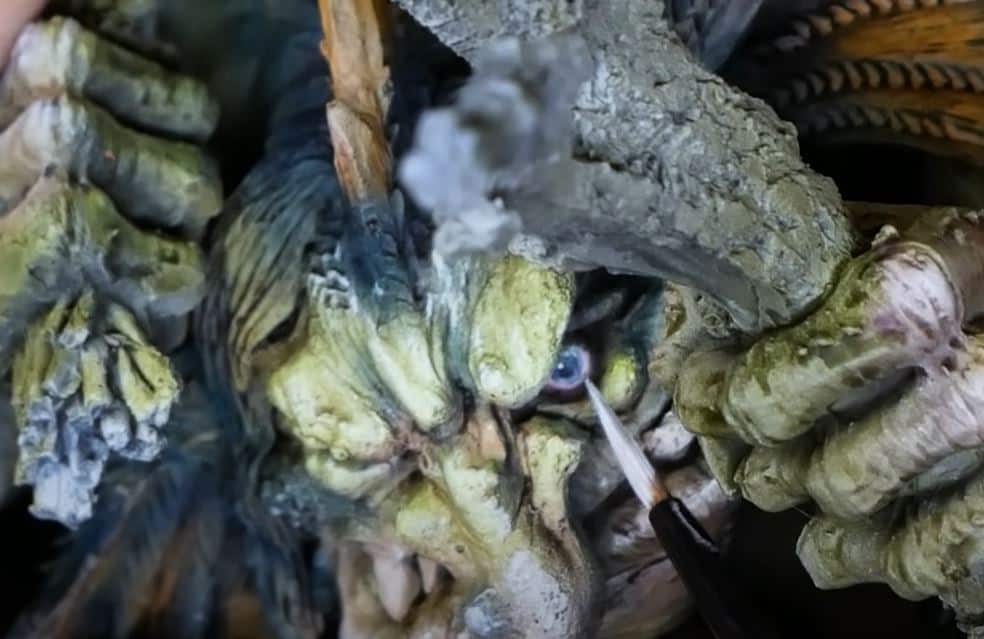
Then for the eyes, he is going full tryhard and started with a small circle of blue, followed by white, then wet blended it all together. Followed by a small black dot and then some more highlights. For dry brushing, he goes in with an off-white and highlights all the scales.
 For the staff, he starts with Arbuckles Brown and covers the whole thing, and does blends with Ivory back and forth into it. The bag has a lot to paint in it and he goes with the look that everything is from the swamp so only picks out the highlights then does a wash with Agrax Earthshade.
Basing the Model
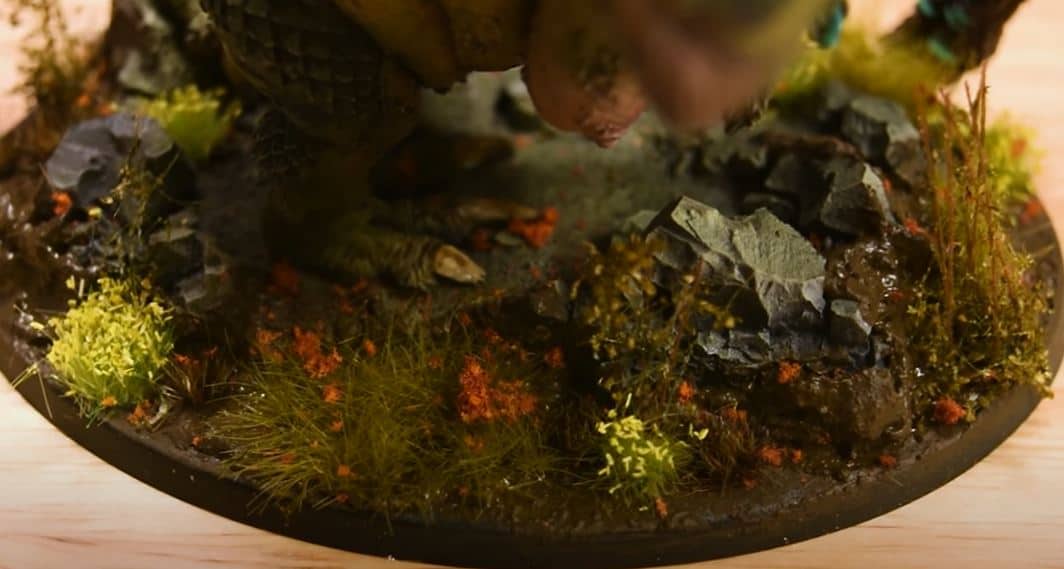 He’s doing a resin pour for the base. He starts with a mud texture paint all around the rocks, then places some tufts of grass all over the base and finished it off with some red flowers.
 Now, onto the resin pour. He takes some plastic, cuts it into little rings, and puts it around the base to hold the resin while it dries. He actually went out and bought a nice two-part resin kit for this, mixes it together, and starts pouring!
Finished Model
 That does it for this amazing model!
Follow eBay Miniature Rescues on YouTube now!
This post contains affiliate links, as an Amazon Associate Spikey Bits earns from qualifying purchases.