Are you tired of trying to get through your opponent’s screens to no avail? Well today, with the help of a little Brown Magic, we’re going to be learning one way to break those screens.
Last week I wrote a nice, tasty article about some real game application of advanced screening, found here. So today, I’m going to treat you guys to some common methods of cracking those pesky screens. Naturally, if screening is one of the fundamental pillars of competitive 40k, then breaking through those screens is equally as important.
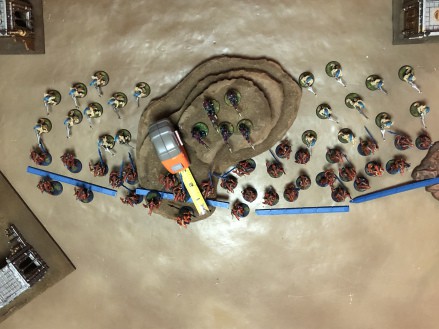
I’ve set up a fairly standard set up demonstrating the classic struggle of Eldar vs Chaos. Here, the Eldar player is using his Rangers (who get to set up 9″ away from the enemy after deployment) to shield his fragile, shooty dark reapers and dire avengers from the incoming Bloodletter bomb.
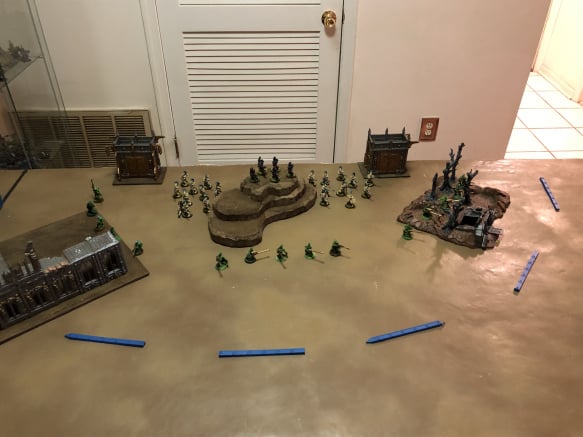
The blue measurement sticks represent 9″ away from the rangers in this scenario. When the Bloodletters arrive, they can’t come in within 9″ of an enemy unit, so that is as close as they can get.
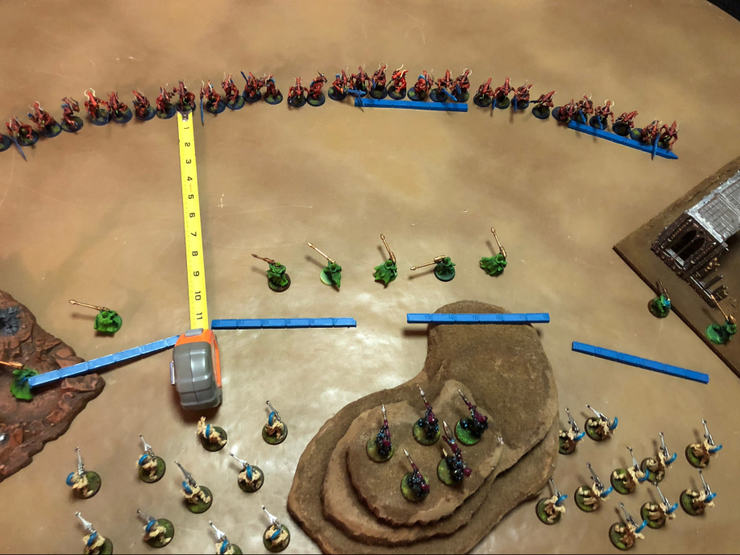
The Bloodletter bomb has deep struck in 9″ away from all the rangers. I’ve also set the tape measure out to 12″ from my bloodletters and put some of those fancy smancy measuring sticks out at the 12″ marker. The significance of this is that is to show the area in which the Bloodletters can charge. Every unit in the game (barring a couple exceptions) may only declare a charge to units within 12″.
A highly effective screening tactic against deep strikers is to deploy your screens at least 3″ in front of your main lines to ensure that even if the enemy manages to get into them with a far charge, he can’t allocate any attacks to them. Remember you may only allocate attacks to units you declared a charge upon. In this example, the Eldar player has made it so the incoming bloodletters were unable to charge any of the Dire Avengers or Reapers.
Action shot of the bloodletters making their 9″ charge. In this instance I depicted them rolling a 10, the average on 3d6. I was careful to avoid the forest on the left because that would have subtracted 2″ from my charge, but the ruin on the right is fair game.
After the Bloodletters activated and slaughtered the rangers, they got to pile in 3″. As you can see this was not enough to get them within 1″ of the Avengers or reapers. It appears as though these Bloodletters are about to get lit up and the Eldar will come out of this victorious. But just wait! With a little brown magic, anything is possible!
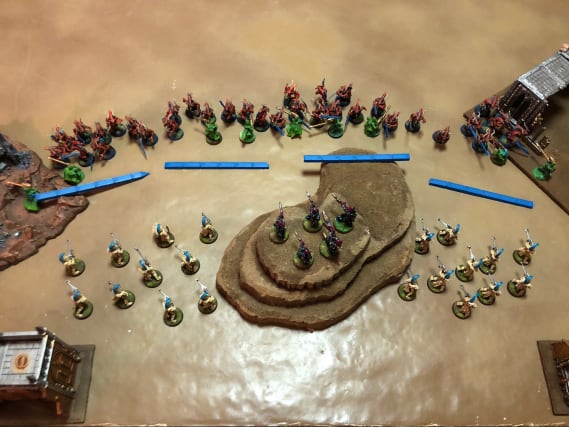
At the end of the fight phase, the Bloodletters used the stratagem to allow them to fight again. The fight again Stratagem allows a unit to make an entire fight phase action. This means the unit may pile in again, attack, then consolidate a final 3″. Here my Bloodletters piled in an additional 3″, engaging the Dire Avengers on the right, but didn’t quite make it to the Dire Avengers on the left or the Dark Reapers on the hill.
Despite reaching the Dire Avengers on the right, they were unable to attack them, because they were not declared as a charge target initially. This is because the Avengers were outside of 12″ of the Bloodletters when the Bloodletters declared their charge.
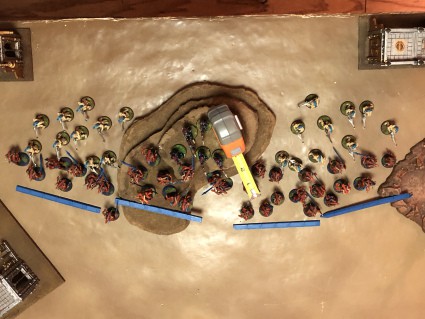
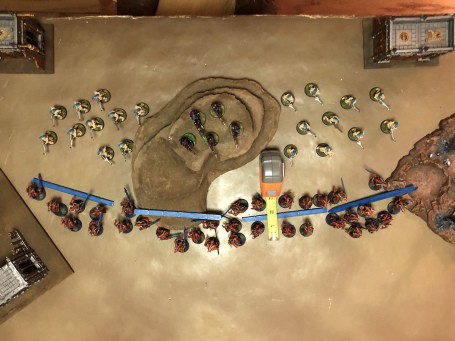
After the Bloodletters activated their second fight activation via the Stratagem, they piled in and “attacked” as depicted above. This picture shows the final consolidation the Bloodletters made this phase.
This it the Bloodletters fourth 3″ move this turn. Now they are engaged with the Dark Reapers and both units of Avengers.
While 3 CP is definitely a hefty price to pay for a Stratagem, (especially since you won’t kill anything) you have to look at the bigger picture. Had the Chaos player not spent those Command Points, the Bloodletters would have been left standing there naked in the wind in front of 20 Avengers and 5 Reapers. Instead, the Bloodletters have engaged all 3 units, gotten deeper into the enemy lines, and ensured that they won’t be shot by any of those units in the ensuing turn. That sounds like 3 CP well spent to me.
Here’s a before and after shot of where the turn started and how it ended.

It’s quite amazing what your army can do with a solid plan and effective use of all the tools at your disposal. Understanding how to maximize your movement in the charge and fight phase is imperative for your success as a competitive 40k player.
In this article, I covered a creative way to brute force your way through some enemy screens. In my next article, I’m going to cover how to actually use the enemy screens to your advantage and use his own models against him!
Check out more tips on how YOU can beef up your game and make that first step to competitive events over on my site, Brown Magic: