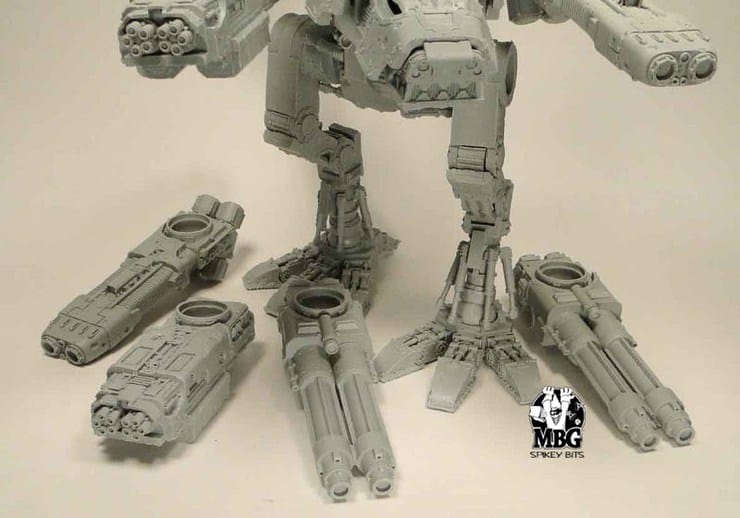
So far we’re up to working on the pistons and weapons for Warhound #1. We knocked the rest of that assembly out in one night, and managed to clean and trim the weapons.
We went ahead and cleaned up all the weapons I bought for both Warhounds just so we could have options to use for the upcoming Apocalypse game. I wasn’t sure what lists we would be running for that so I wanted to make sure I at least planned the Titan out for maximum killing.
I left the leg greaves off so I could paint them, and the leg detail itself easier. The pistons go on pretty fast, but some we had to drill out because the casts had been a bit smooshed and the sides had jutted into the mounting hole. No big deal really, but you have to be prepared for anything I think when you are assembling these things.


I ended up magnetizing the weapon arms, so we could use whatever weapon load-out I had. The most popular weapon combo so far, seemed to be the twin Turbo Laser Destroyers. I pinned the top of the weapons mount and magnetized the bottom, again with a 1/2″ diameter rare earth magnet. I also glued a small strip of plastic card onto the magnet on the weapon mount, to help prevent them from chipping or cracking- a fact learned from a previous blog comment!

Now that the assembly was complete for the most part, I needed to wash the resin down so I wouldn’t have any problems with the paint adhering to it. It’s a good idea to do this because when resin is cast, a small coat of mold release is left on the model. Sometimes some of the mold comes off and gets wedged into bits of detail as well. It all can make paint run off, or not even stick at all. So it’s best to scrub this thing down with soap, and let it dry overnight.
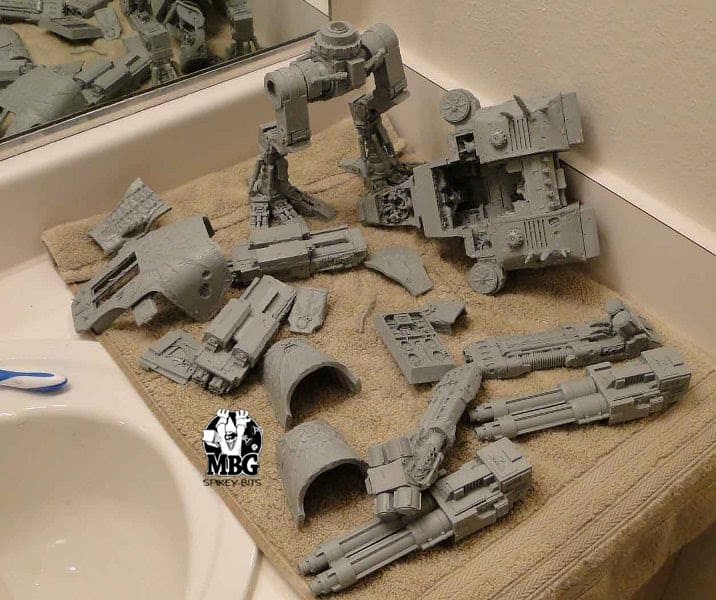
I used some Dawn to clean the titan cause it good at cutting grease as well as dirt. I dunno if there is any of either on there, but hey least I got my bases covered. I got an old tooth brush and a normal soft sponge and just scrubbed every exposed surface I could see. Then I left it to dry overnight with a small fan running on it.
By morning it was completely dry, and I started priming it up in the base color I wanted. I used Army Painter’s Necrotic Flesh. It’s a lighter green color, like Dead Flesh, which is fine because I’m going to wash it with darker colors anyways.

Next update- a little bit of customizing…
-MBG

About the Author: Rob Baer
Rob Baer
 Job Title: Founder, Publisher, & Managing Editor
Founded Spikey Bits In 2009
Socials: Rob Baer on Facebook and @catdaddymbg on X
Bio: Virginia restless, miniature painter & cat dad. He blames LEGOs for all this, as there was something about those little-colored blocks that started it all. Spikey Bits started with Rob trying to stay motivated to hobby on his backlog of projects and share his knowledge with others during the early blogging era.
Scale model hobbyist in the 80s, miniature wargamer, and trading card player ever since. He’s played every edition of Warhammer 40k and Warhammer Fantasy since 5th Edition, but Titans of all sizes will always be his favorite! It’s even rumored that his hobby vault rivals the Solemnance Galleries, containing rulebooks filled with lore from editions long past, ancient packs of black-bordered Magic Cards, and minatures made of both pewter and resin.