Today, we’re going to be getting another dose of Brown Magic, as we get to learn another great way to break through those pesky screens or bubble wraps in 40k with Cultists.
In my last article, I covered a way to use the highly common stratagem: Fight Again, to brute force your way through a basic screen.
Many of the comments I received were actually follow up questions about what to do when the screen is pushed out further, preventing you from getting through like I did in my last article. These types of comments are great! They really show that you (the audience) are thinking critically and really grasping the concepts I’m trying to convey. I’d love to encourage more such dialogues and conversations on all my articles!
Today, I’m going to cover exactly what to do when someone is able to screen out properly enough so that you can’t brute force your way through it and into other units. So grab a seat, order some pizza, and get ready for the wildest night of your life as I go over how to actually use your opponent’s screens against him!
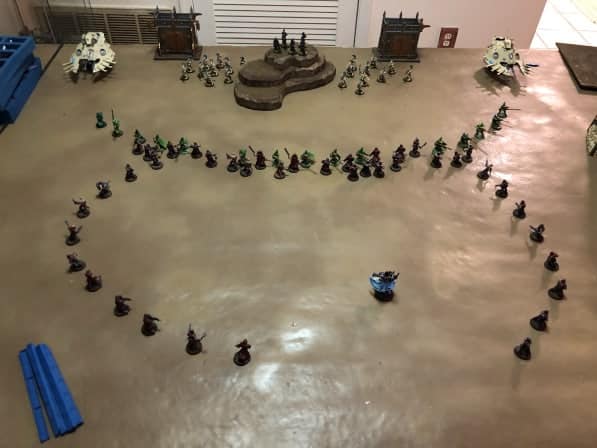
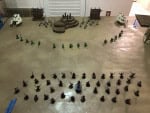
Here we have a similar set up to the one in the previous article- an Eldar fire base protected from the oncoming Chaos hordes by their brave little suicidal Rangers. I’ve also added 2 Serpents on the sides of the fire base, just in case someone got clever and wanted to suggest using Tide of Traitors with the Cultists.
 In this scenario, the rangers are much too far forward for the cultists to use the fight again Stratagem to engage the Avengers and Reapers upon finishing the Rangers in the Assault, as they did in the last article.

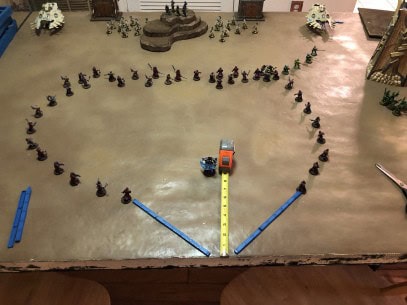
I moved the Cultists 6″ in the Movement phase. The blue measurement sticks represent where the Cultists were and how far they could have moved in any given direction. You’ll notice that many Cultists decided to move off to the sides or even backward. The reason for this will become clearer as the turn unfolds, but for now, it’s important to understand you have to have a vision for where you will finish the turn, and take steps toward reaching that goal earlier. Sounds familiar, right?

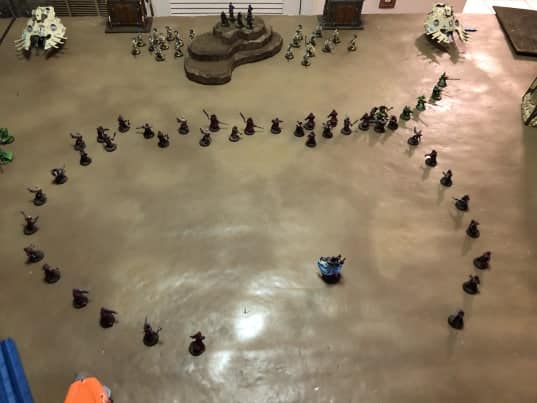
This is a picture taken after the Sorcerer in the center cast Warp Time and the Cultists moved again. Warp Time wasn’t integral to this plan working, so don’t get caught up in that step, but it was nice to help illustrate what the plan is more clearly. As you can see, many of the Cultists moved towards the Rangers while a handful hung back in a sort of circle around the sorcerer.
Here’s a pic post-charge. A lot of the Cultists opted to just move or shuffle about in the back, rather than move full on towards the enemy. It’s important to understand that just because you’re charging doesn’t mean you have to go closer to the enemy. Charging can essentially just be another Movement phase which you get to take after you’ve seen the results of your Psychic and Shooting phases.
Many of the Cultists did choose to go up and punch some Rangers in the face but I was careful to not declare the squad on the far right as a target to my charge. Remember how in the last article I discussed how you can’t attack units which you did not declare as a charge target? Well, here I’m actually using that rule to my advantage, as I don’t actually want to kill those rangers.

Here’s a close up of that portion of my charge. Since I didn’t declare the Rangers on the right as a charge target I was unable to go within 1″ of them during the Charge phase. However, I still wanted to be able to Pile In around them, so I left a few models 1.1″ away.
 During my Pile In portion of my charge, I Piled In on the Rangers, which I set myself up for during my initial Charge move. Not only that, but I moved in such a way that I surrounded the Rangers on all sides with my Cultists. This will actually prevent that Ranger unit from falling back during the upcoming Eldar turn due to that model being trapped.
Fun Fact- It actually only takes 3 models to trap 1 model. 3 models forming a triangle around 1 models base will mathematically prevent it from escaping in any direction without moving through one of your bases. In the example above I just used 5 models to really illustrate the idea.
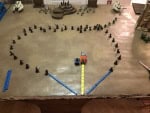
Here’s what the board looked like I after I finished my turn:
As you can see, my Cultists now expand to control about 60% of the table, and they are unable to be shot. On the Eldar player’s turn, they will be able to finish those pesky Rangers and move onward to the gun line in the back.
As far as the fancy shape of the cultists, that’s just a way of pushing out Deep Strikers without having to go out of your way. While most players would simply push the Cultists up and charge the Ranger screen, a good player would push up and surround a Ranger. But a truly great player would push up, surround a Ranger and screen off Deep Strikers. Getting as mileage as you can out of every unit in every situation is one of the key differences between a 4-1 player and a 5-0 player.

It’s clear to see that no enemy Deep Strikers are able to come in behind my cultists to be closest to my sorcerer. There’s also no point in the middle of my cultists where I left a gap for any enemy units.
Here’s a before and after pic to show how the turn played out:
And thus concludes our lovely time together this evening. A lot of competitive 40k is recognizing these opportunities to milk advantages out of every situation and interaction. What initially looked like a tall order for a small band of Cultists and a Sorcerer, it turned into a very favorable position with just a little creativity and understanding of the nuances of the Assault phase. Try familiarizing yourself with these types of situations and implementing these tactics in your own games, it’ll really make a world of difference in your results!
Check out more tips on how YOU can beef up your game and make that first step to competitive events over on my site, Brown Magic:
Brown Magic