Winning 40k starts before the battle begins. But once you’re in the game, how do you get to a place where you’ll win every turn? Nick Nanavati guides us down the path to excellence once again today.
This article is the second part of my incredibly lengthy series on setting goals. In case you missed part one, or you want to reread it because it was just that good, you can find it here. In part one I discussed how to set long-term goals for yourself.
Today, I’ll help you set some in-game/turn by turn goals that you should keep in mind for your own games.
All too often, players find themselves losing to themselves in their deployment and first turns. Some examples of this are:
- not screening properly
- incorrect target priority
- a general lack of plan or direction
After you get to your table and read your opponent’s list, one of the first things you should do is try and understand what they are going to try to do and what you can do to stop it. I’ve recreated the first couple turns of one of my games from LVO (one I’m particularly proud of) to demonstrate exactly what I mean.

Let’s start with my round 2 game vs Josh Conant and his chaos list. In summary, his list (from memory) was:
- Magnus
- Chaos lord
- Jump Sorc
- 40 Alpha Legion cultist
- 2×10 cultists
- 2 Fire Raptors
- 2 Heralds
- 25 Bloodletters- icon instrument
- 3 nurglings
- 3 nurglings
He played against my wonderful, super balanced and fair Eldar list.
The reason I want to show this game off is that it demonstrates the value of setting turn specific goals and focusing on them.
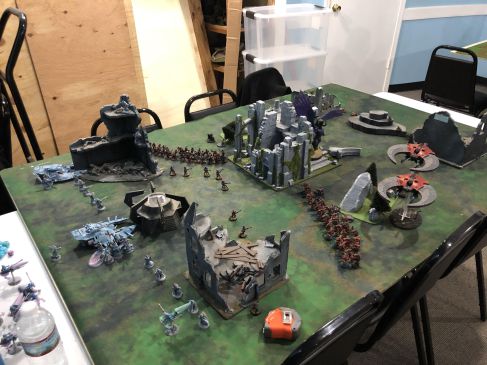
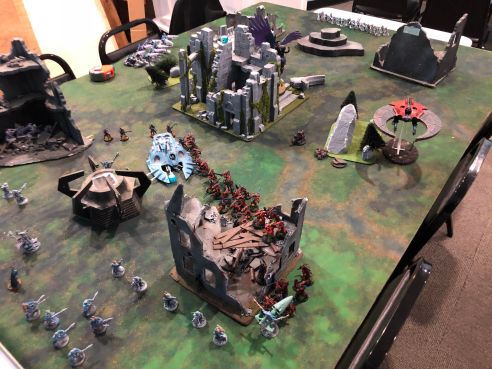
Here you can see our deployments (it was pointy hammer and anvil). This was prior to infiltrators being deployed and the roll for first.
 (Forgive the Night Scythes, they’re playing a really bad game of “pretend to be fire raptors”)
The deployment is fairly basic: serpents far away and touching terrain, warrior screens out front in case I go second, and the autarch in la-la land just zoning out bloodletters. Conant realized that his only chance is going first and going all in so he deployed accordingly.
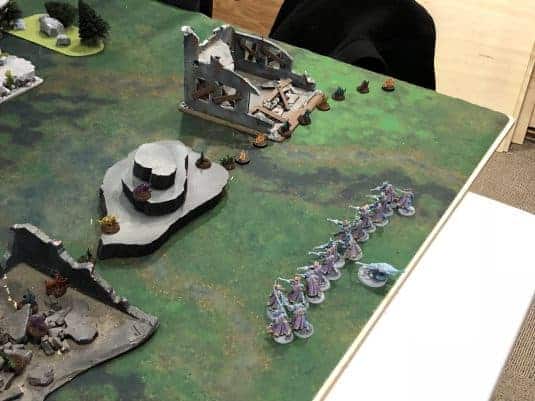
Luckily for him, he seized! This is what it looked like post seize after we set up our infiltrators and he took his first movement phase.
Magnus decided to stay back which is the correct move in this situation. When he gets aggressive he’s much more vulnerable and easy to kill with smites and serpent shields. Conant’s decision to hold Magnus back put in a rough spot. The Fire raptors were forced to split fire against serpents (which is the correct play contrary to the common wisdom of concentrating fire) and they weren’t able to bring one down but left both pretty wounded.
On to the assault phase!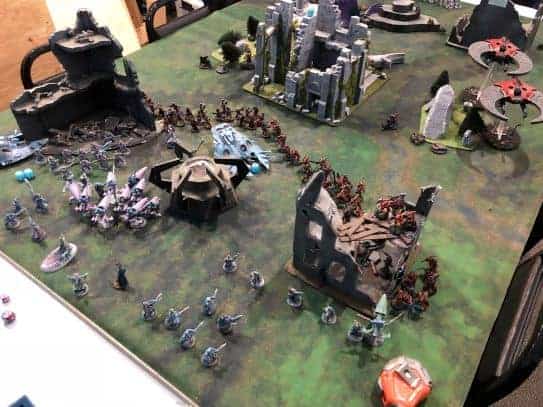 Conant charged in with his bloodletters and cultists and used pile ins correctly to limit the number of attacks he would get so he was able to surround my warriors and keep himself safe from my shooting.
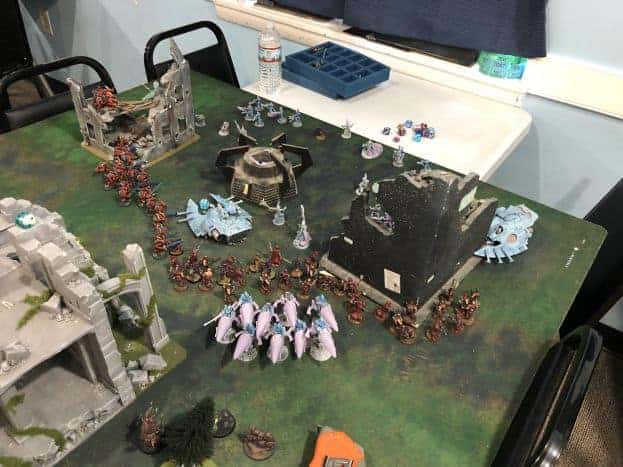
So, after getting seized on, a cultist blob and a bloodletter bomb charged me. They are now in my deployment zone and can’t be shot. Also, Magnus and 2 fire raptors are waiting in midfield for a turn 2 finish. Here’s how I dug myself out of this hole.
Here is my bottom of 1 at the end of my movement phase. I’m knee deep in a pile of chaos crap. It’s very easy to get overwhelmed by this situation. I had to take a solid few minutes just staring at the board to figure out how to get out of this mess. But it all came down to approaching it systematically.
Step 1. Identify problems- in this case, everything! Magnus, 2 Raptors, unshootable cultists, and unshootable bloodletters.
Step 2. Evaluate your options- once I identified all the immediate problems, I started to think through my options. To be accurate, I determined my strengths and weighed them against Conant’s weaknesses.
- The bloodletters were very vulnerable to being tied up in CC because of how they were spread out. So I moved my serpent forward towards them at one end and the autarch over towards the other, hoping they would keep the letters at bay.
- The cultists already took a handful of casualties from overwatch+combat+morale. My army has a surprising amount of ability to deal damage to units locked in combat between smites, executioner, and serpent shields. Not only that, but Conant was down to 4CP because he spent so many during pre-game. If I could get him to spend just 1 more he’d be unable to both rescue the cultists from morale death and tide of traitors them.
- Magnus can only be at 1 place in 1 time so spreading out threats against him is ideal.
- My reapers were intact so I figured I could put down 1 raptor no problem.

Knowing all of that, I set goals.
- Neutralize bloodletters
- Kill the cultists (either with morale if Josh used a CP prematurely or through sheer effort)
- Spread out and force Magnus into having too many things to do.
- Kill a fire raptor
Now let’s see how it turned out.
 Spears quickened up in a position to help murder cultists and I put them within 7″ of the nurglings to trigger a soul burst. This would either be to fight again if need be to finish the cultists or move again if the cultists were dealt with sufficiently.
Reapers all shot fire raptors. A serpent and the autarch moved to opposite sides of the bloodletter bomb to hold that off for a turn.
The guardians (a few pictures up) came in deep in Conant’s deployment zone in a hole he left open for them.
Here’s how the damage went.
- Guardians killed the backfield cultists by splitting fire and using morale.
- Reapers put down 1 of the fire raptors.
- Josh used a CP to try and keep a raptor alive which took him below 4. This allowed me to use the spears to kill the nurglings and move again off soul burst (rather than fight again) to help spread out.
- Serpent and autarch survived the letters and kept them tied up.
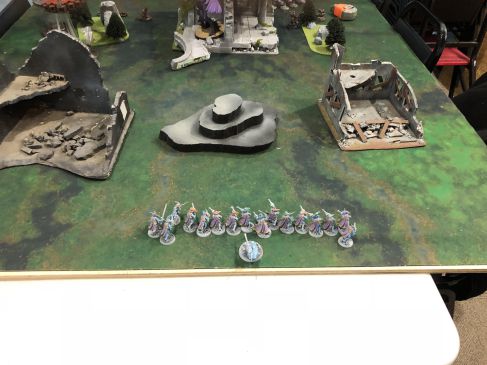
This is what the board looked like after my bottom of 1.

Here we can see all my goals have been accomplished. Magnus wants to go into every direction imaginable. Bloodletters are neutralized. Cultists are dead. 1 Fire raptor dead. All in a day’s work.
At this point Josh actually conceded and we talked through the rest of the game. With essentially 2 models left there was just no way for him to come back.
So what was the point of all this?
To show how setting goals is imperative to success!

While the moves I made in the post-game picture with my reasoning and line of thought may seem logical and easily identifiable now, everything is easier in hindsight. It really is easy to look at that initial position after Josh’s top of 1 and feel like it was unwinnable, but with some methodical thinking and prioritization, it was actually fairly solvable.
The key takeaway here is to set up realistic, manageable goals for yourself every turn. Instead of looking at the game from an ‘I need to win’ perspective, look at it from the viewpoint of ‘I need to do this, this, and this in order to win.’
Everything is easier said than done, but hopefully, my future articles and upcoming videos will help you better understand what goals you need to set to achieve victory.
Editors Note: While first turn “bombs” are no longer a thing with the BIG 40k FAQ, this same scenario could have just played out on turn 2 instead.