 If you’re sitting on some spare Necron bits, you might be able to throw this conversion together for a reworked Tomb Blade model.
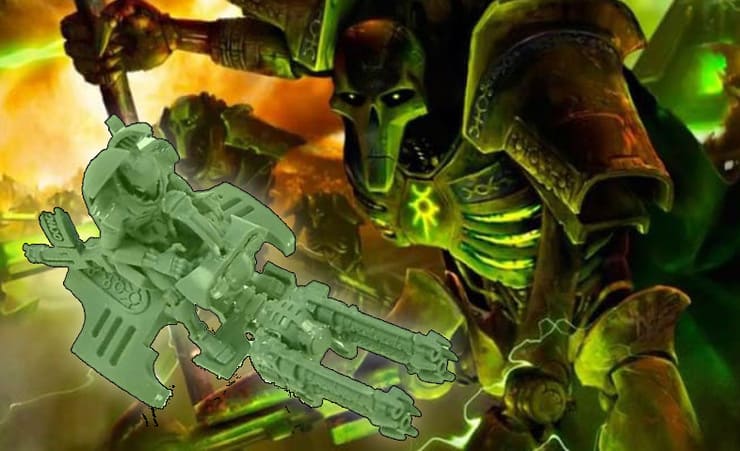
We’re blowing the dust off of this old Necron conversion from back in the day. But with all the new Necron hype coming in 9th Edition, you may want to start going through your old sprues and bits to see what you can throw together. Here is the old conversion for the Tomb Blades.
Necron Tomb Blade Conversion You’ll Want To Try!
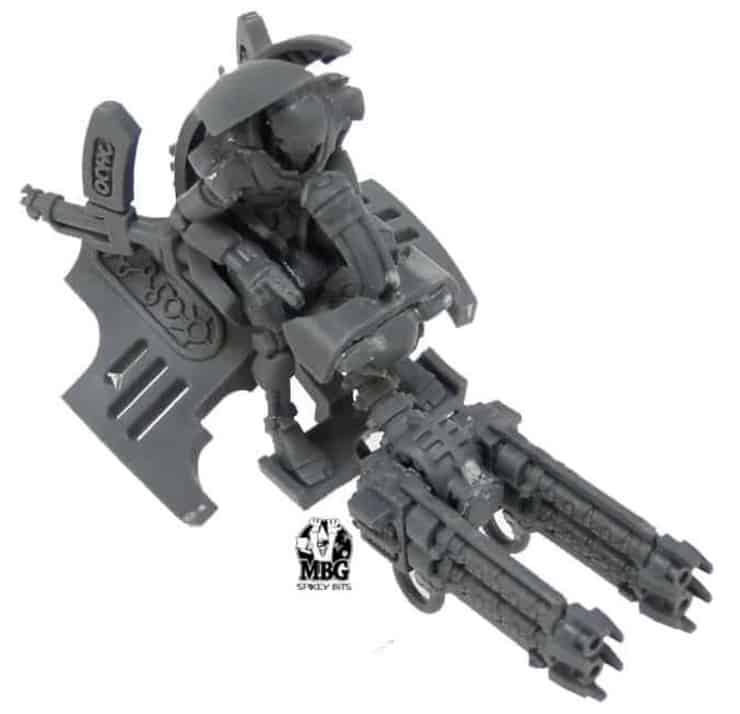
 Here’s the Necron Tomb Blade conversion. The Tomb Blade itself has a bigger profile, but if you’ve got a unique theme that you’re going for, these little skimmers look sweet painted up. Here’s what you need.
Bits Parts List
- Ghost Ark Steersman Chair
- Ghost Ark Pilot
- Command Barge Armor Plates
- Immortal Gauss Blasters Set
- Command Barge Prow Set
Optional Parts List
- Command Barge Pilot & Gunner Kit
Now let’s get into actually putting this bad boy together.
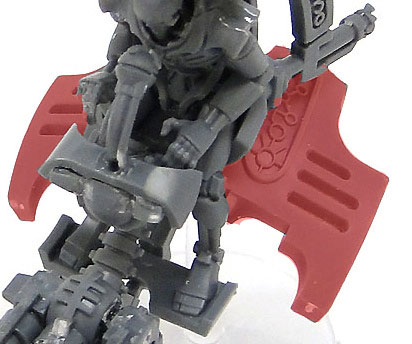
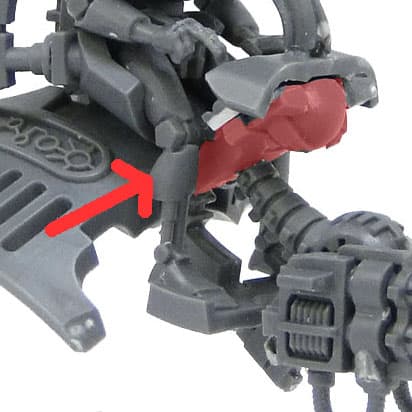 To start, just take the chair assembly and pin the base of the Command Barge Prow bit to it. The arrow above indicates where the Prow Bit (shaded in red) was pinned. Rob had to cut down the prow bit right where the front part starts to curve up, but it’s a very easy cut to figure out.
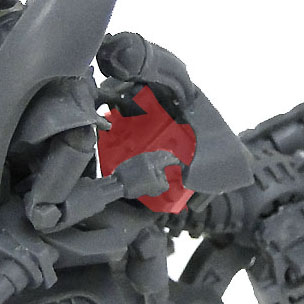 Then Rob topped the prow bit with the leg rest for the Command Barge pilot and cut down and re-positioned the panels that attach to the prow bit (again shaded in red) to fit the space created. Note there are extra fins leftover from this bits pack. They can be glued on somewhere to represent the Shield Vanes upgrade if you want.
Attaching the Wargear
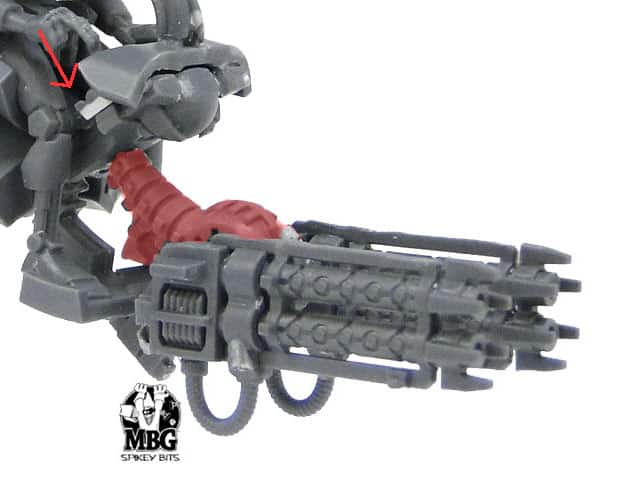 Next, you’ll want to cut down the harness that holds the Command Barge pilots and pin it to the assembly. You could replace this bit with something if you wanted to. The only job this has is connecting the wargear to the chassis itself.
Once you do that, just cut down and re-position two Gauss Blasters from the Immortals kit to make them symmetrical to each other. They have to mount on each side of the assembly which may be hard to get to look symmetrical (because they’re both right-handed weapons). You can chop the coils up and swap them around for a little variation.
 The Command Barge Armor plates attach to each side like shown. Just cut down the rear end of the plates to fit the shape of the vehicle. The cut isn’t set in stone. Just whatever looks good is the key to this project.
Finally, Rob added the pilot from the steersman kit with an alternate head, and some of the Command Barge Pilot arms (the ones that are pushing buttons and such). For last touches, you can take spare wiring from the Gauss Blasters and mount it vertically to make the Nebuloscope targeter, depending on how detailed you want to get.
 There you have it! Like we said, this conversion is a little old but a good conversion can last the test of time!
You can follow along below for every detail!
Have you converted your Tomb Blades in a similar way? What’s your favorite Necron unit to convert? What do you think will be the star Necron unit in 9th Edition?
Let us know in the comments of our Facebook Hobby Group, and make sure you enter the latest monthly giveaway for FREE today!

About the Author: Wesley Floyd
Wesley Floyd
 Job Title: Staff Writer
Joined: 2018
Socials:@RealmbrushPainting
About Wesley Floyd: Wes has been in the Warhammer hobby since 2015 and joined the Spikey Bits writing team in 2018. He is known for his satirist takes on trending topics and imaginative yet amazingly affordable hobby solutions to painting Warhammer miniatures.
Imperial fanboy, tabletop fanatic, and the self-proclaimed King of Sprues. He knows for a fact that Mephiston red is the best-tasting paint and is the commission painting equivalent of a Wendy’s 4 for $4. If you like what he writes and want to contact him or have your tabletop minatures painted (to a mostly okayish standard), message him on Instagram.