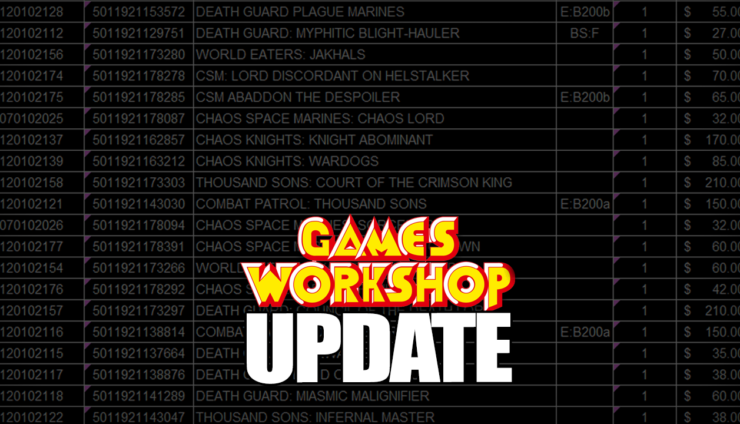
Using your airbrush for more than a quick primer coat can be daunting. Follow along as Travis takes the big plunge and learns a few lessons with the Airbrush!
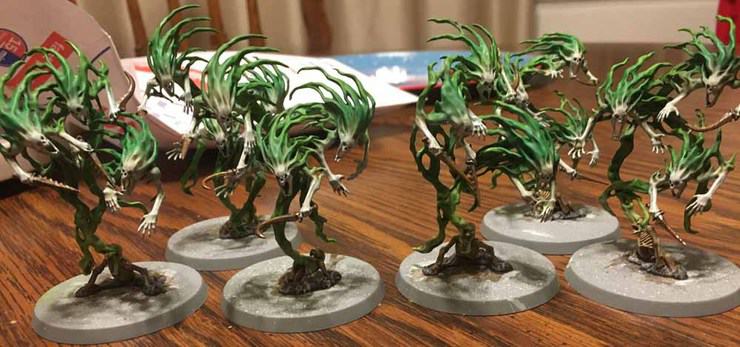
Since this is the first time I am using my airbrush outside of priming, I wanted to start with models that have a little bit less detail and seem forgiving. I chose the spirit hosts as they don’t have a ton of detail outside of the bits of metal and bone. Also, they are a battle line troop and I wanted to knock out those before moving onto the leader characters, thus giving me more practice with the airbrush before starting on more intricate models.
A Noob’s Guide to Learn Airbrushing & Display Making
*Note: I only managed one photo of the finished models as the work in progress pictures were deleted by what I think was a Nurgling AKA my daughter*
Airbrush Safety and Set Up:
I tend to wear a decent respirator when I am using the airbrush even when not priming even though I am not sure it’s required. In my mind, you’re still atomizing tiny particles of paint so, better safe than sorry! If you are priming, I would strongly suggest wearing a respirator. Primer can have some nasty stuff in it. I also like to use a plastic glove on my left hand which is the one holding the miniature. I don’t think the paint can hurt your skin but, it prevents you from having to get all that paint off.
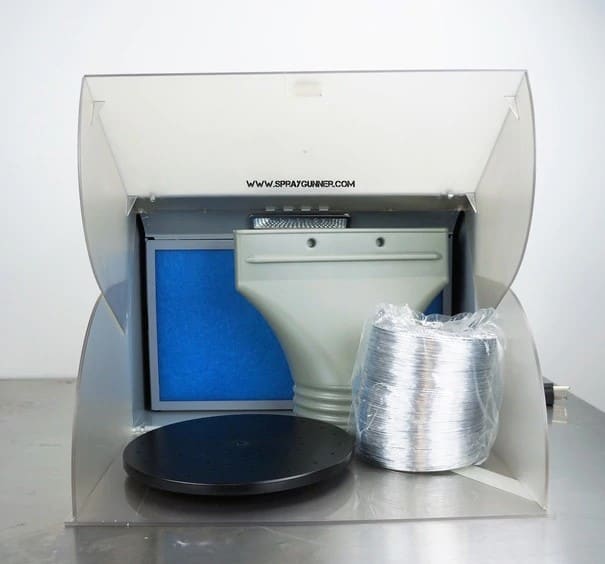
Portable Hobby Spray Booth by NO-NAME Brand: $99.00
Finally, I don’t have an airbrush booth but I do have a large kitchen table. I put a big piece of cardboard down on that table and open a nearby window. In general, I like to have airflow when painting (anything from airbrush to walls) even though I live in the mitten state and it is freezing outside. I set my air pressure to 20 with the idea that I can use the bleed-off valve when I want more detail.
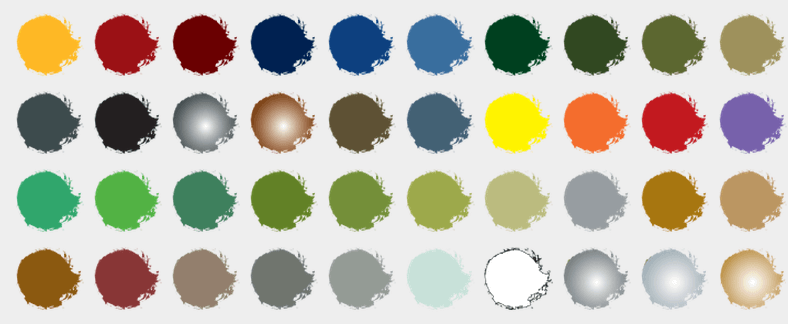
FYI: I’m pretty much a Citadel Paint guy. (I do use Vallejo primer and cleaner.) They are easy to find and there’s a lot of material on the web for using them. However, I would like to start exploring other paints down the road. More on that later. Below are all the paints I used for these models, in alphabetical order.
- Agrax Earthshade (Citadel Wash)
- Athonian Camoshade (Citadel Wash)
- Leaderbelcher (Citadel Base)
- Mechanicus Standard Grey (Citadel Base)
- Moot Green (Citadel Layer)
- Nuln Oil (Citadel Wash)
- Runefang Steel (Citadel Layer)
- Ryza Rust (Citadel Dry)
- Screaming Skull (Citadel Layer)
- Seraphim Sepia (Citadel Wash)
- Terminatus Stone (Citadel Dry)
- Typhus Corrosion (Citadel Technical)
- Ulthuan Grey (Citadel Layer)
- Ushabti Bone (Citadel Layer)
- Warpstone Glow (Citadel Layer)
- Waywatcher Green (Citadel Glaze)
- White Scar (Citadel Layer)
- Zandri Dust (Citadel Base)
Painting the Spirit Hosts:
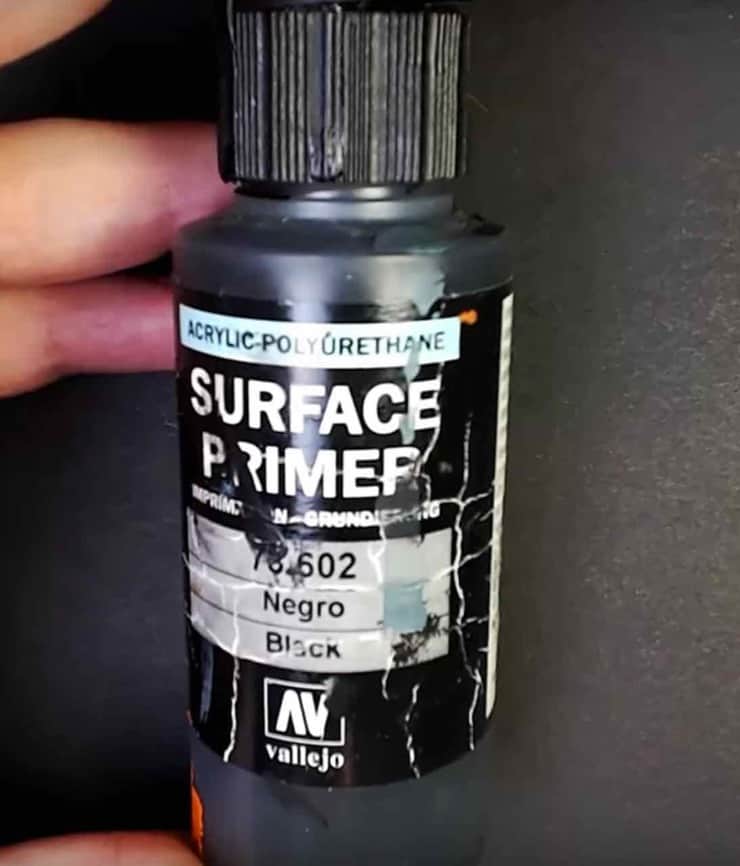
Undercoat: I want my ghostly friends to be brighter and use glazes and washes to bring out color, so I decided to prime this army white. Since getting an airbrush I started using the Vallejo black and white primer for my miniatures. I love it compared to the rattle cans I used to use. The white primer is a little bit harder to work with than the black, as it can clog up the end of your airbrush (in my experience) and sometimes will need two coats rather than one. The level of detail it leaves is sharp and seems to be a smoother finish than the rattle cans.
Main Colors: I decided to do all the airbrushing in one night for these guys. I wanted to work with some colors I had on hand so went with a green color scheme. Starting off I used Warpstone Glow as the main body but kept it away from the arms and head as much as possible. After that, I hit the tips with Moot Green to transition from darker to lighter. Finally, I used Ulthuan Grey on the faces the very end of the tips and the arms.
It was my first time painting with an airbrush and I knocked it out in a night, so I was happy with it. However, I wanted to add some depth. I washed the tips with Waywatcher Green to give them a very light green tint, then washed the entire model with Athonian Camoshade. I was a little leery that this would darken up the miniature too much, but I was pleasantly surprised with the effect it had on the Uthuan Grey. It gave it a darker green tint which works with the overall green theme.
I did want to brighten up the miniatures too, so I dry brushed Warpstone Glow, Moot Green, and Ulthuan Grey over the respective areas and a little bit in the other color areas to show transition. After that, I hit the areas with the Waywatcher Glaze again to make them brighter. I did an edge highlight of white scar on the faces and fingers. Finally, I took a fine detail brush and highlighted the fingers and faces with White Scar to make them stand out a little bit.
Details: For the weapons I went with a traditional rusted effect with Leaderbelcher, followed by Nuln Oil, then stippled Typhus Corrosion, then a heavy dry brush of Ryza Rust, and a final edge highlight of Runefang Steel. On the bones I went Zandri Dust, then Seraphim Sepia, then a very thin coat of Ushabti Bone, and a final highlight of Screaming Skull. Lastly, for the rocks I did a coat of Mechanicus Standard Grey (Citadel Base), washed with Agrax Earthshade, and dry brushed with a heavy Terminatus Stone (Citadel Dry). I left the base blank because I don’t know what I want to do with it yet!
This is the final result. (Note: I am not a professional photographer so this is about the best I can get.)
Results and Lessons Learned:
The first lesson I learned was to be careful how much you thin your paints in an airbrush. My first go with the Warpstone Glow I thinned with too much Vallejo Thinner and it basically exploded in the end of my needle and got everywhere. Stopping and cleaning all that up was a pain and I do not care to repeat that again.
The next lesson I learned was not to run just cleaner through your airbrush. Instead, you’re supposed to mix it 50:50 with water. When I first tried it, I used undiluted and was unloading it into my paint pot and noticed what looked like fumes coming up from the filter. (Good thing I was wearing a respirator.) I quickly stopped spraying and looked to see what was in that stuff when I read the directions and realized it needs to be mixed. (Vallejo Cleaner)
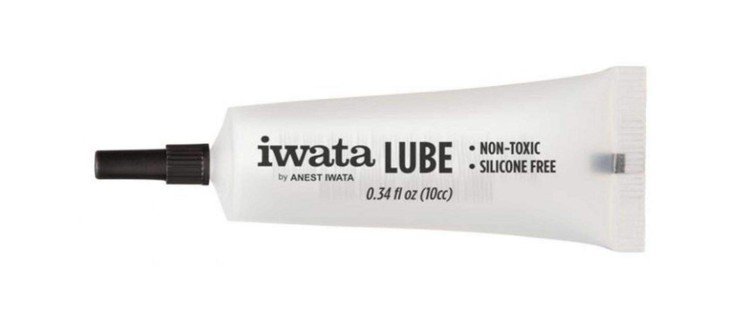
Editors Note: I don’t use cleaner very often but when you do make sure to add some lube (like Iwata’s super lube) to your needle as you insert it back into the airbrush. Also one of the best cleaners out there is 10:1 concentrated GREX cleaner. I pretty much have used that exclusively for the last 5 or so years for cleaning (outside of just normal water).
On a painting level, I quickly learned that the airbrush is good for blending colors together quickly. I don’t think I will ever go back to brushing on base coats, based on how smooth the transition was in my first airbrush experience. Also, it’s super easy to use. Don’t be intimidated like I was when I first got this thing and was reading and watching reviews. All you need to do is thin some paint (unless you have airbrush paint) and pull a trigger, after that it’s all practice.
Finally, I’m happy with how the models turned out, except for the rocks. I just painted them that way as a place holder but I’ll probably change that when I figure out what kind of a display board I want to do.
For Next Time:
On my paint table, I have 20 Chainrasp Horde models primed white and ready to go and I am going to dive in head first. This will be my second battle line troop and the biggest block that I have tried in one go. I’m hoping the airbrush will speed this along. In addition to the base colors I’m going to attempt to use the airbrush to highlight some of the models after washing. Time to go look up some YouTube videos on how to do that!
Current Finished Nighthaunts
- 6 Spirit Hosts: 240 points (Battleline 1 of 3)
- Total (240 points)
![]()
This post contains affiliate links, meaning that Spikey Bits will earn a commission if you click through and make a purchase.


About the Author: Travis Perkins
An avid homebrewer and Detroit sports fan (yes even the Lions). I am new to the world of wargamming and very much enjoying the journey. If you have any suggestions or comments feel free to comment on the article or email me at perki116@msu.edu