Time to light up your models with a quick and easy way to paint power weapon using the airbrush! Check out today’s video tutorial!
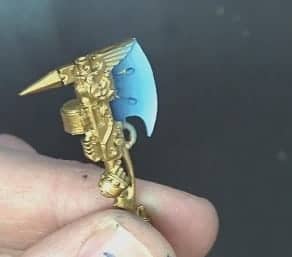
Here’s a quick and easy way to airbrush the power axe from Legio Custodes Tribune Ixion Hale. Using easy, simple techniques of base coating, light layers, and edge highlighting, the power weapon comes together with smooth transitions and an uncanny glow. For the complete tutorial, scroll down and click play on the video below.
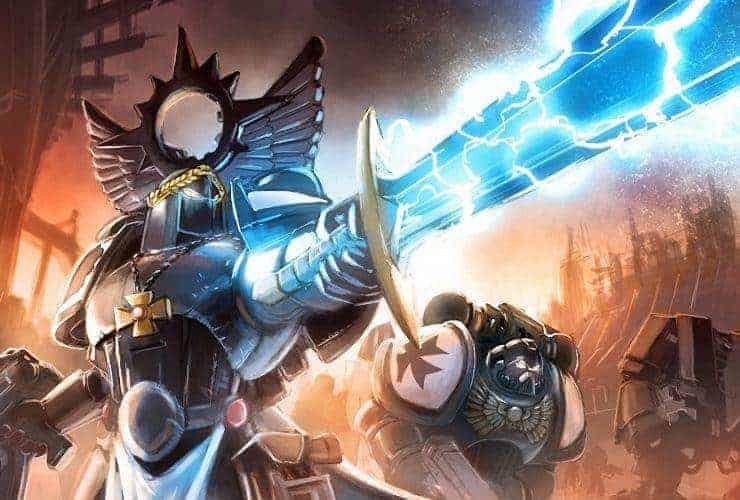
The ax was primed with Retributor Gold then painted with Kantor Blue, using a brush to work in the paint over the large flat surfaces and prevent some over spray on the gold. This will help save time in the long run.
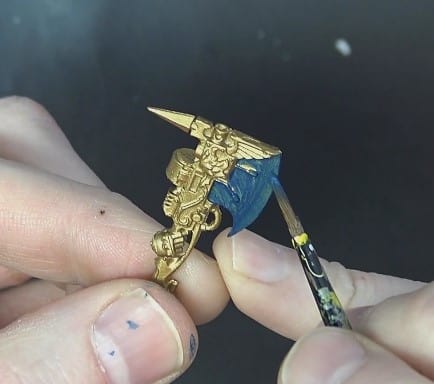
 Next, the airbrush is loaded with Lothern Blue Air paint to get good, solid fade on the edge of the axe. Do as many passes as needed to get the desired fade, using an equal part paint and air. After getting the fade, focus on the edge of the blade to get a brighter tip to enhance the glow.
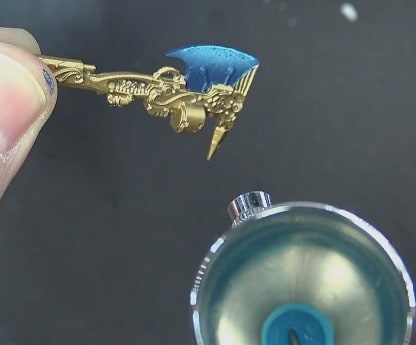
 Once that is set, mix 50/50 Lothern Blue (air) and Ulthuan Grey (air) into the pot and aim down the blade into space to transition the fade even more. The transition will initially be difficult to see, since the colours are so close together, but will become clear after several passes.
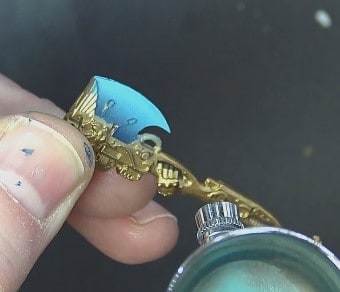
Last, Ulthuan Grey (air) is directed to the tip in a tight line along the leading edge to make a bright light on the edge, giving that extra detail. Light greys, such as Ulthuan Grey, and whites tend to speckle a bit more than others, so don’t be afraid to use the finger eraser to remove unwanted over spray!

After airbrushing the fade, and going back over any parts that need to be assisted in the fades with mixes of our previous paints, Ulthuan Grey is used to edge highlight the blade itself to bring out a heavy contrast and enhance the fade work we did. The edge highlight helps bring out a stronger glowing effect from our power weapon. To add area of effect, glazing after cleaning up the gold work and getting the rest set up will bring in a beautiful glow on the finished product.
To see the full tutorial and how to create an airbrush fade on power weapons, press play on the video below!
About the Author: Rob Baer
Rob Baer
 Job Title: Founder, Publisher, & Managing Editor
Founded Spikey Bits In 2009
Socials: Rob Baer on Facebook and @catdaddymbg on X
Bio: Virginia restless, miniature painter & cat dad. He blames LEGOs for all this, as there was something about those little-colored blocks that started it all. Spikey Bits started with Rob trying to stay motivated to hobby on his backlog of projects and share his knowledge with others during the early blogging era.
Scale model hobbyist in the 80s, miniature wargamer, and trading card player ever since. He’s played every edition of Warhammer 40k and Warhammer Fantasy since 5th Edition, but Titans of all sizes will always be his favorite! It’s even rumored that his hobby vault rivals the Solemnance Galleries, containing rulebooks filled with lore from editions long past, ancient packs of black-bordered Magic Cards, and minatures made of both pewter and resin.