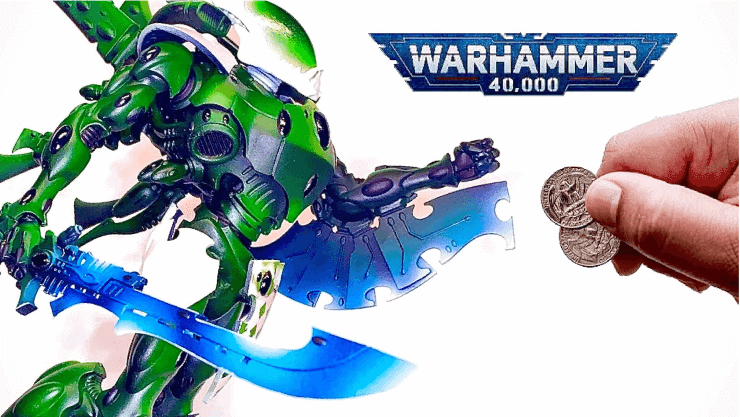
 eBay Miniature Rescues is back again with another painting video, and this time he’s trying to save the worst Wraithknight he’s seen!
eBay Miniature Rescues is a unique channel that shows you how to take beat-up, damaged minis, and restore them to their fullest potential! It’s a relatively new channel on YouTube and it’s super fun to watch what Casey is able to do with some once hopeless miniatures. Be sure to check out all his stuff here!
This week, he shows us one of the worst minis he’s ever received from eBay. Let’s check it out.
Saving the Worst Wraithknight: eBay Miniature Rescue Painting Tutorial
 Casey was just going through eBay and a listing for the worst Knight caught his eye (he may have even been trolled)! Of course, he had to buy it. It had some seriously bad issues from the pictures, but he just couldn’t resist. He bought the mini for $53 which isn’t a terrible deal, but with a little searching, you can get a decent one for under $100.
Here’s how he started painting and saved this Wraithknight!
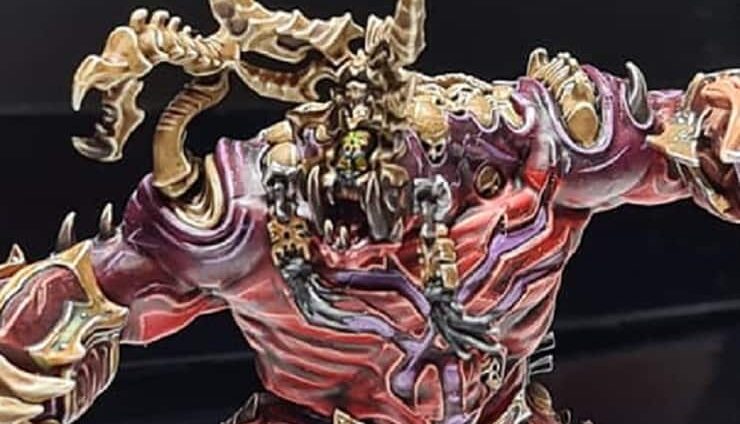
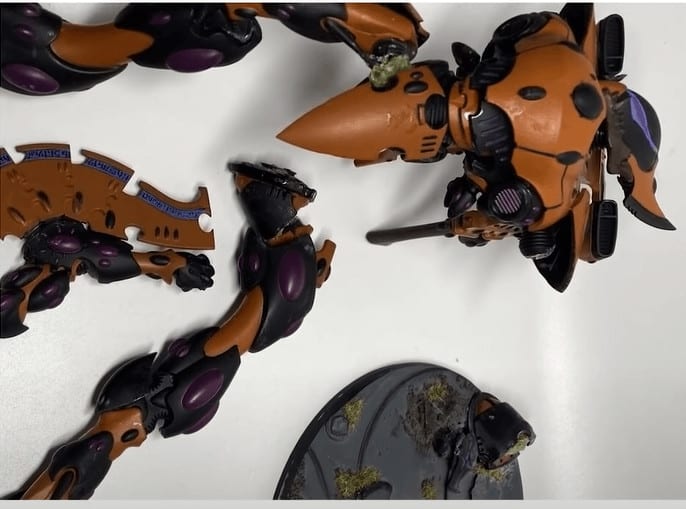
The Beat-Up Mini
 The base is basically unusable, there is green stuff everywhere from a failed magnetization attempt, but the paint job isn’t bad or too thick. Other than that, the mini looks to be savable, but it is going to take some serious work.
Repairing It
 First, he strips all the paint and then takes an Exacto knife to try and get rid of all the random Green Stuff. But there is still a ton in the joints, so it took way more work to get everything out. For the base, he used some of the Martian Cliffs from the awesome Project called Fantastic Rocks & Plants Volume 2. If you want some sweet STL files, you need to check them out!
Working on the Base
 He puts Elmer’s glue down on the base all around the terrain. Then he hits it with a black primer over the whole thing, including the terrain. To finish off the rocks, he hit them with a saturated red. To tie the base in with the color scheme he hits the rest with some grass flock and grass tufts from the Army Painter. Lastly, he hits all the little details on the terrain pieces and gives the rocks a white drybrush to really bring out the colors.
Painting the Body
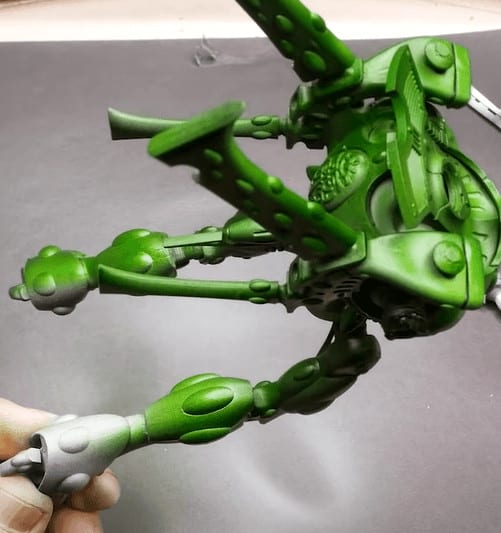 He starts with white ink in the airbrush to bring out the details before he hits the green. He does this from a top-down angle to get a natural highlight and leaves some dark recesses. For the body, he uses green ink in the airbrush, and basically covers the whole model. Once dry he then goes over the body with some light yellow highlights.
Painting the Blade
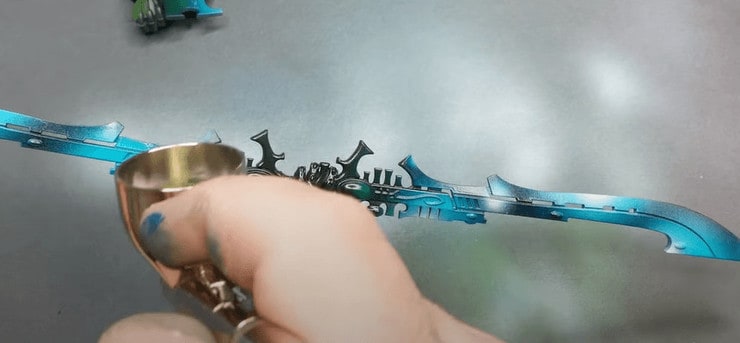 For the blade, he does a power weapon pattern, then mixes up some Golden high-flow Green and Blue into a teal color. To finish that off he then does a quick highlight of white to really make them stand out.
Painting the Head
 If you need to mask something off, he uses silly putty because you can move it into whatever shape you want, just a fun little tip from Casey! For the color, he just masks off the inside of the mask with the Silly Putty and hits the rest with a bone white, then does a similar scheme that he used on the body for the visor part.
Finishing Touches
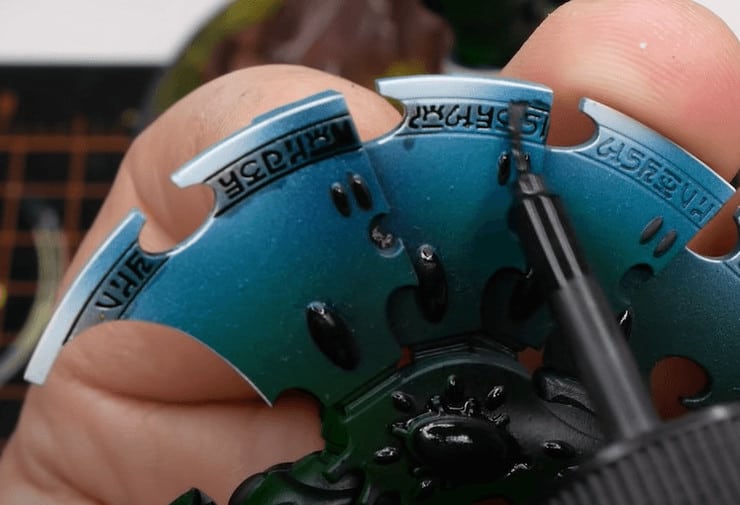 He hits all the panels with the Tamiya Panel Liner to really just bring out the contrast.
Finished Mini
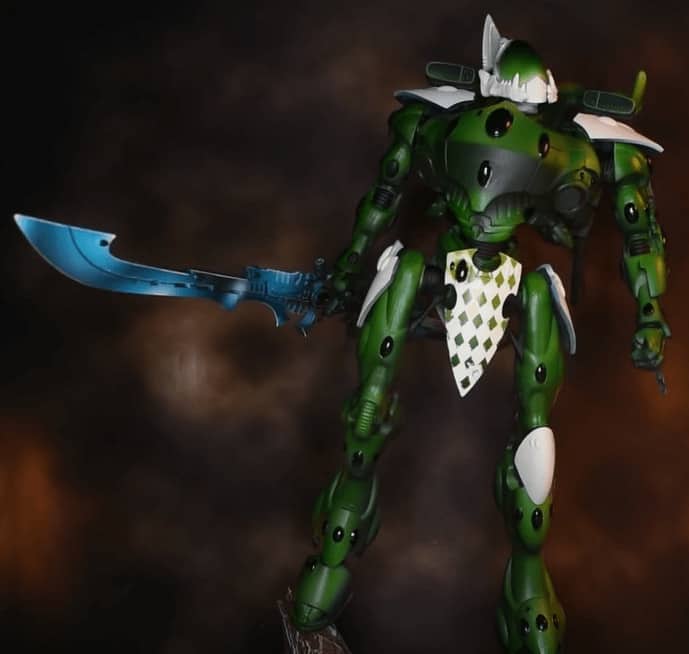 There you have it! It a pretty sweet-looking mini that didn’t take too much work- and for the price, definitely worth it!
Follow eBay Miniature Rescues on YouTube now!
This post contains affiliate links, as an Amazon Associate Spikey Bits earns from qualifying purchases.