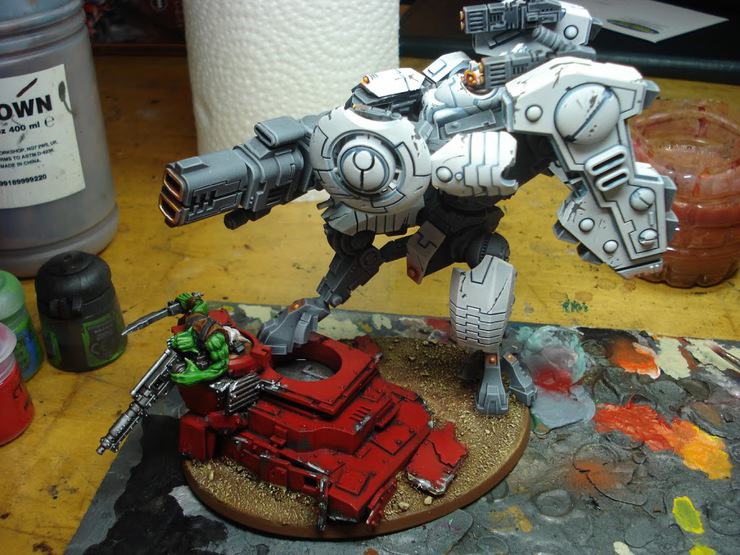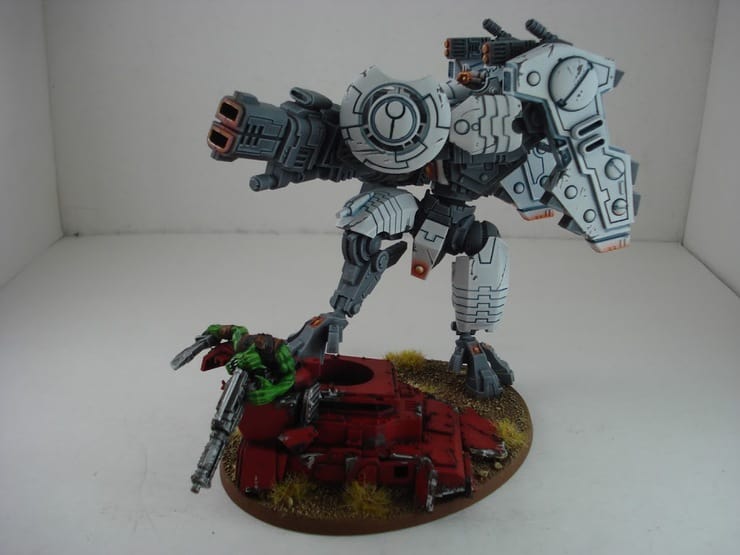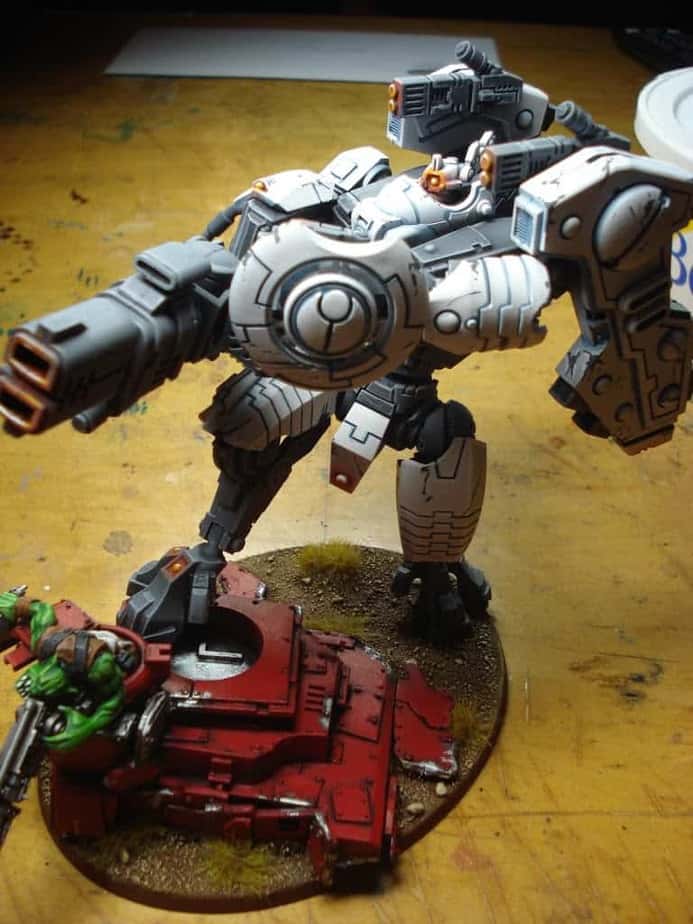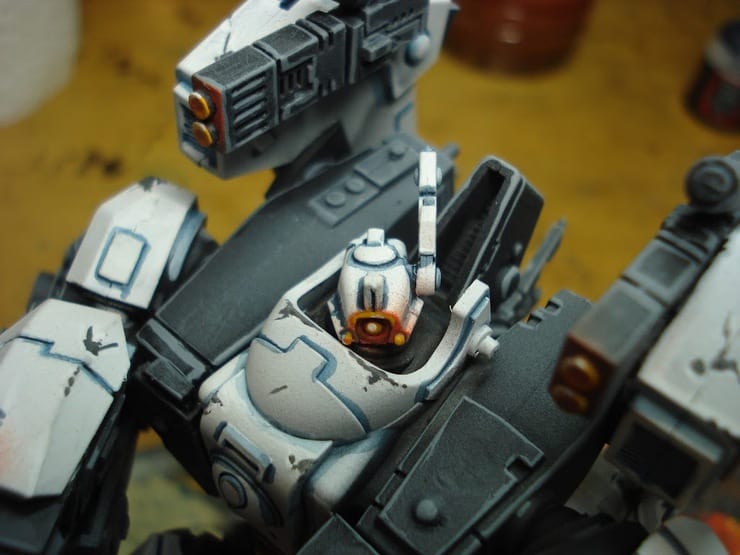
Hey guys, Rage of Khorne here for a tutorial on one way you can paint white quickly and easily and to help me out is one of the new Tau Riptides.
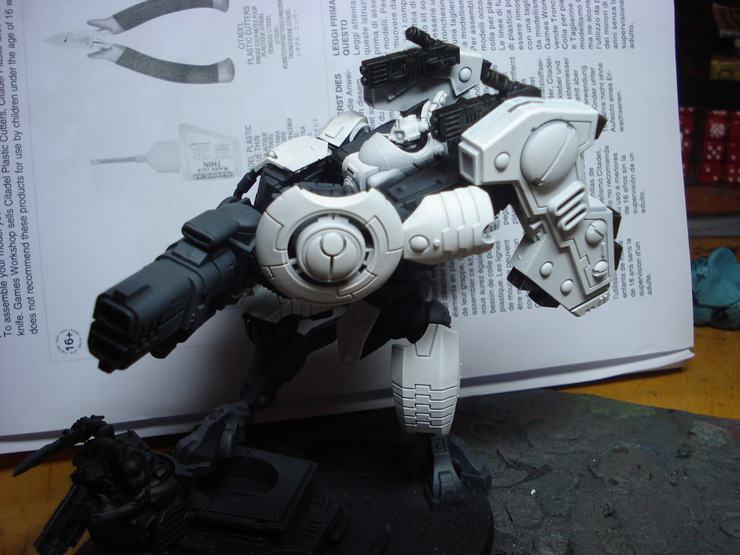
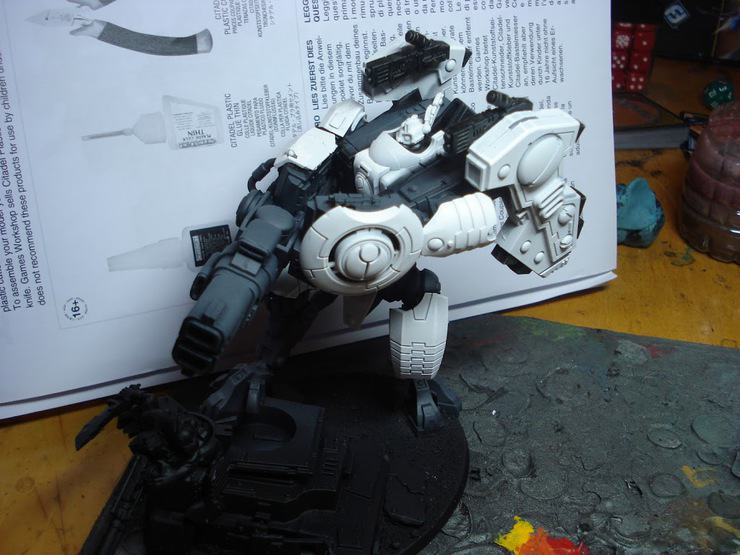
The Riptide I have chosen to use is modified a bit and for anyone who has built the model you can probably pick out the changes right away. The weapon has been elongated and posed so it is held as a rifle and the legs have been posed in a semi-kneeling position on top of a piece of Ork wreckage.
There are several common ways of painting white on models including the following:
- Priming black, painting the white areas with a mid scale grey and then highlighting up to white.
- Priming the model black and painting white right onto the white areas and blending the shadows in using a light grey.
- Priming white and leaving the areas you want white.
The way I usually do white is a combination of leaving the right areas primed white and highlighting the most raised edges. I have access to an air brush but this color scheme works without it which is nice for anyone who likes to stick to brush work.
Step 1
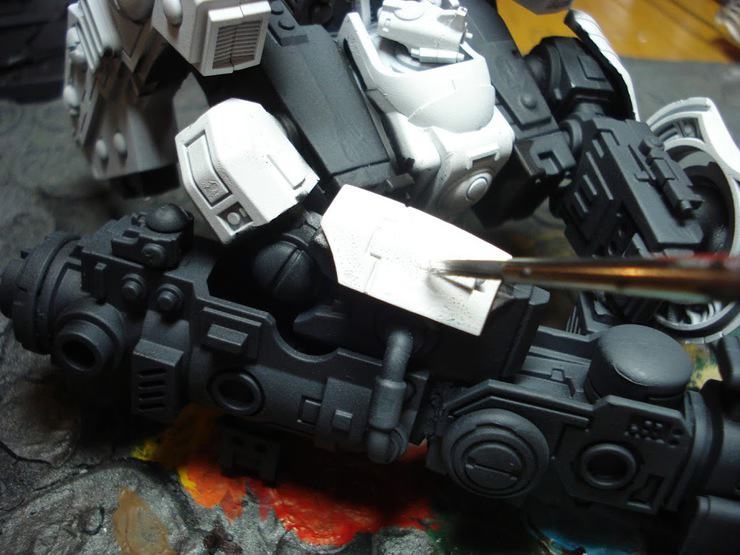
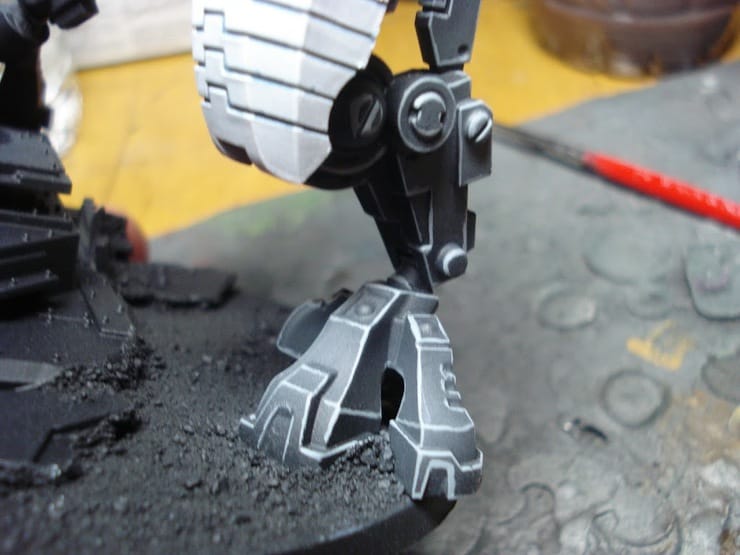
Prime the models with white primer and don’t worry about applying the spray too thickly. There is a natural soft fade that happens when you prime the model lightly and you can use this to mimic shadow effects. I’m not saying avoid priming certain areas, but having a higher concentration of spray on the raised areas is useful. After the model has been primed, let it dry and then cover up all the areas you want to remain white (in this case the armored carapace) with blue-tac. Then spray the model again but with the other primary color (or paint it on by hand). In the case of the Riptide, I sprayed the model with black spray and gave it a light dusting of grey spray from my airbrush. If you don’t have an airbrush just lightly dry brush the black areas.
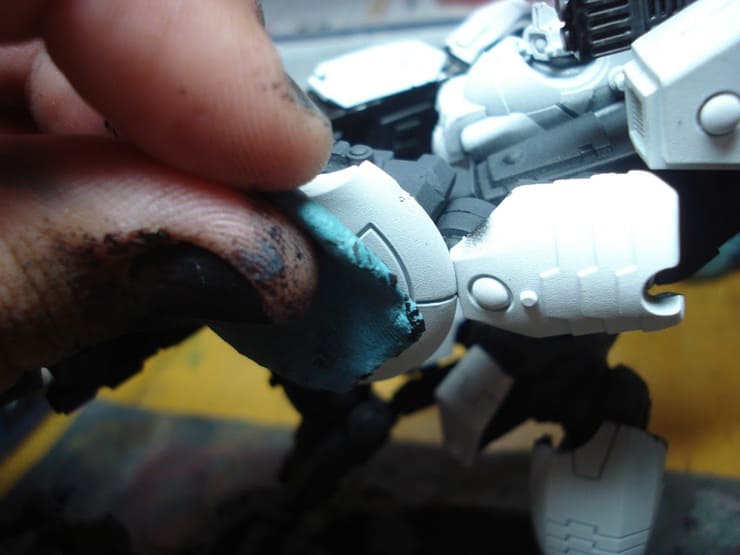
Remove the blue-tac when the model is finished drying and touch up any areas where the primer went under the blue-tac.

Step 2
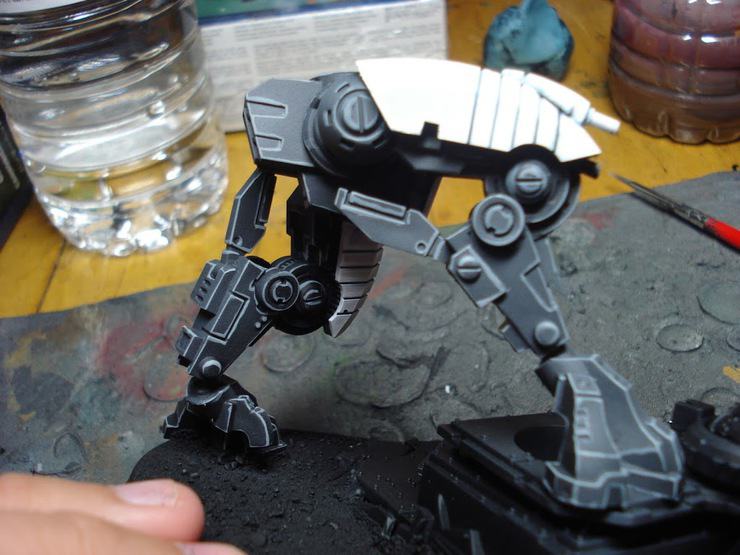
At this stage it is important to add shadow effects in the cracks and sunken areas of the model. For this I use a combination of black and blue wash which looks fairly natural against the white areas. Brush this wash into the cracks and be careful not to be too messy as it will stain the white and make allot more work later on.

Step 3
For this step I went in and highlighted the edges of the black areas of the model. This step took a long time but looks really good when it’s done. I like to use two stages of highlighting to really make the edges pop out. The reason I did this step before finishing the white was that if I made any mistakes that bled onto the white areas, the final highlight on the white would hide them.
Step 4
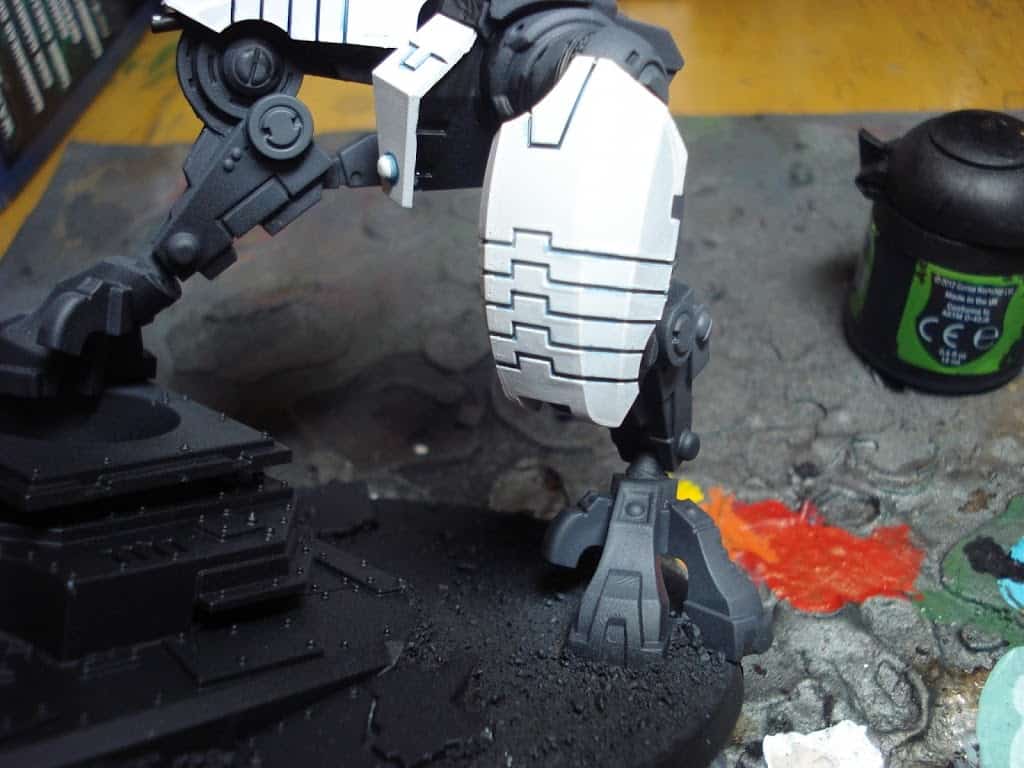
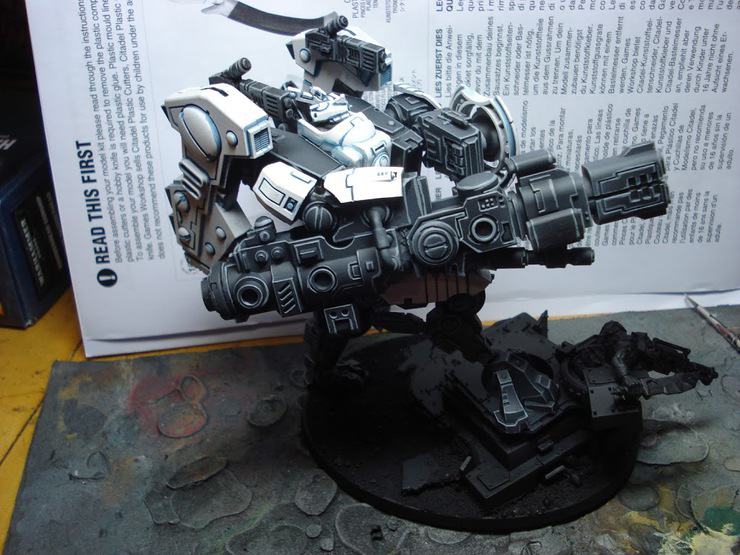
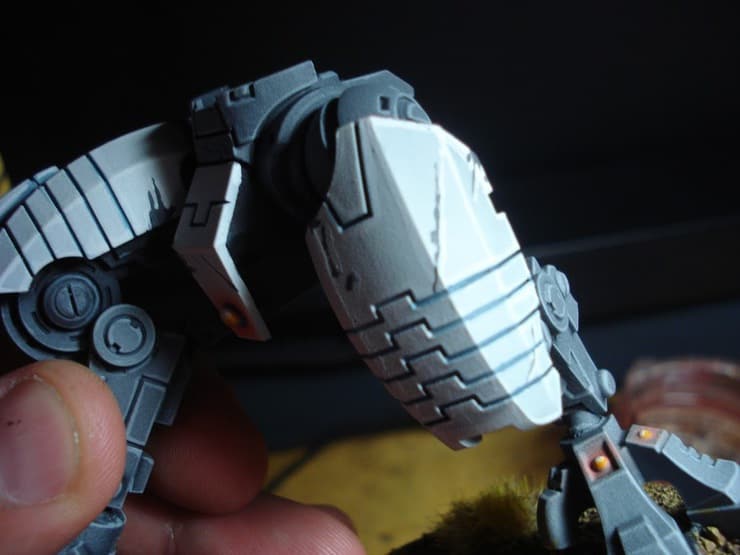
The last step of painting the white is simply painting pure white onto the edges of the plating just as was done with the black areas but with white instead of grey. This usually only takes one step but if the lines don’t show up well you might want to use another layer. This effect is subtle and you won’t notice it everywhere but the areas of shadow on the white plates will stand out most. I usually also add some touches of battle damage at this stage as well by using a dark grey to paint on scrapes and cuts and underlining them with pure white.
This is the finished model after all the details were added. I would suggest sealing the model before doing the details because paint from other parts of the model and from your fingers can easily stain the white plating. In the case of this model, the red wreck on the base could smudge onto the white leg plates and cause allot of extra clean up work.