Recently I’ve been posting up Work in Progress pics of Grey Knights Vehicles I’m currently painting, on Facebook.
It’s easy to post there cause I can just snap some pics with my phone and upload them while I work.
(Wanna see more WIP GK’s? Maybe it’s a good time to make sure you “like” Spikey Bits’ Facebook?
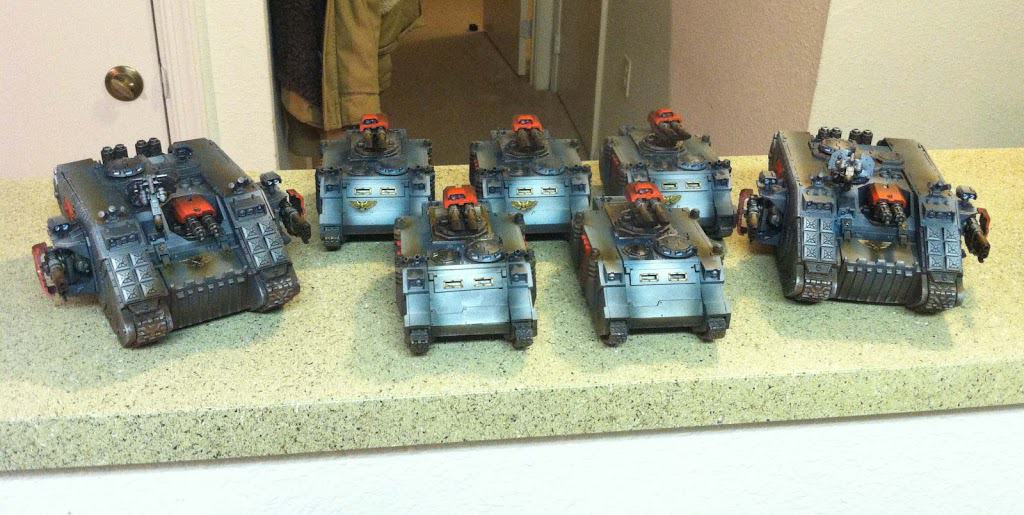
I’m just about finished with all the details on the vehicles. After doing some quick touch-ups on all their hulls, I think they are looking pretty good.
 To detail them, first I separated all the parts that were going to be red, and painted them using the techniques in my Red Shoulder Pad Tutorial.
While I had no trim to paint gold on most of those parts, there were still several skulls and imperial eagles that received the same treatment after the airbrushing (see opposite).
Then I painted the lenses and viewports using the blues tutorial below.
At first, I thought that perhaps I would have to paint the area I was detailing black so the blues would contrast better.
However after the test paint scheme I did, just the plain old boltgun look from the basecoat was dark enough to trick the eyes into seeing a natural transition.
So that’s a small example of working smarter, not harder by skipping a step.

To start off painting the viewports, just paint a sliver of Hawk Turquoise like so, taking up about 3/4 of the viewport/ lens.
Already the negative space above the sliver is starting to look more dark naturally.
Step two was to paint another smaller sliver of lighter Hawk Turquoise underneath the first layer.
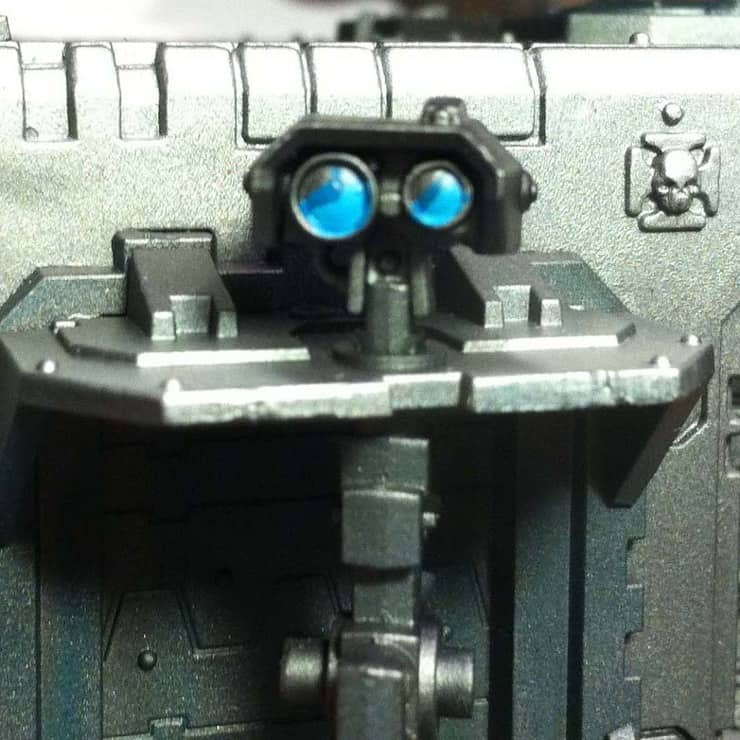
For this I mixed the pure Hawk from Step One 50/50 with some of the new Ceramite White base color.
Now don’t get me wrong, with 145 new Citadel paints, there is probably a natural highlight to whatever replaced Hawk Turquoise back in April, but I have a perfectly good pot of Hawk here so I’m going to use it ’till it’s gone!
The last step is to paint an even smaller sliver of just pure white ( I used my Ceramite), below the middle layer.
After that go back and “dot” the negative space at the top, like so.
Now go back with a little black or boltgun metal and tidy up anywhere blue went astray out of the lens area.
At this point it’s pretty much done. If you don’t like the look, you can certainly hit it with a wash or glaze of blue to make the transitions smoother.
Being that the detail is so small, it will be very hard to pick out the gradient (or lack thereof) normally.
These pictures exaggerate it a bit, being larger than 100% scale and all.
However if you have the time, the extra step would most certainly make the lenses pop better!
So that’s pretty much it, another quick and easy way to detail vehicles. Have at it! -MBG
If you like this article you may want to also checkout some of the other detailing articles I did for these Grey Knights below.
They are pretty easy and can really put your models over the top in no time!
Easy Purity Seals, and Tabards
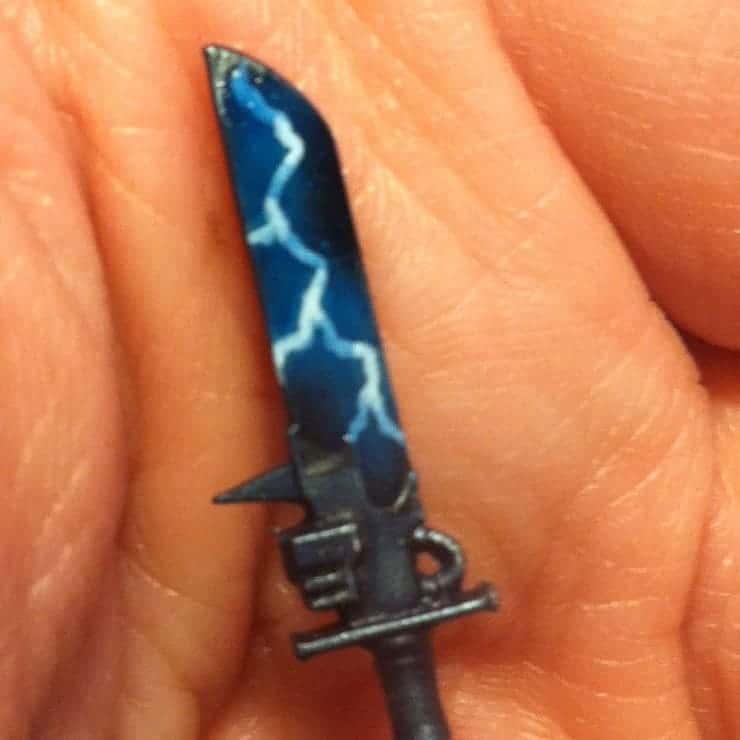
Quick Lightning Effects on Weapons
Red Shoulder Pad Tutorial (mentioned above)

About the Author: Rob Baer

Rob Baer
Job Title: Managing Editor
Founded Spikey Bits in 2009
Socials: Rob Baer on Facebook and @catdaddymbg on X
About Rob Baer: Founder, Publisher, & Managing Editor of Spikey Bits, the leading tabletop gaming news website focused on the hobby side of wargaming and miniatures.
Rob also co-founded and currently hosts the Long War Podcast, which has over 350 episodes and focuses on tabletop miniatures gaming, specializing in Warhammer 40k. and spent six years writing for Bell of Lost Souls.
Every year, along with his co-hosts, he helps host the Long War 40k Doubles Tournament at Adepticon and the Long War 40k Doubles at the Las Vegas Open, each of which attracts thousands of players from around the world.
Rob has won many Warhammer 40k Tournaments over the years, including multiple first-place finishes in Warhammer 40k Grand Tournaments over the years and even winning 1st place at the 2011 Adepticon 40k Team Tournament. He was even featured for his painting in issue #304 of Games Workshop’s White Dwarf Magazine.
With over 30 years of experience in retail and distribution, Rob knows all the products and exactly which ones are the best. As a member of GAMA (Game Manufacturers Association), he advocates for gaming stores and manufacturers in these difficult times, always looking for the next big thing to feature for the miniatures hobby, helping everyone to provide the value consumers want.
While he’s played every edition of Warhammer 40k and Warhammer Fantasy (since 5th Edition) and has been hobbying on miniatures since the 1980s, Titans of all sizes will always be his favorite! It’s even rumored that his hobby vault rivals the Solemnance Galleries, containing rulebooks filled with lore from editions long past, ancient packs of black-bordered Magic Cards, and models made of both pewter and resin.