First off let me be the first to thank everyone for their overwhelming interest in this project.
I can’t remember the last time a conversion I did was so well received. Heck this baby even ended up on the front page of the Warhammer Reddit for awhile!
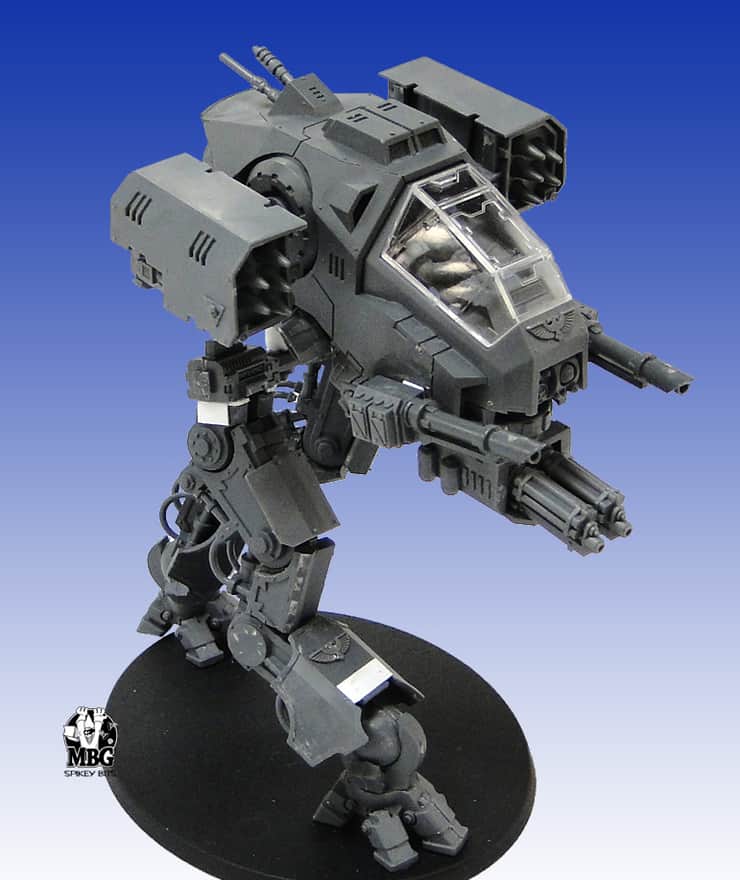
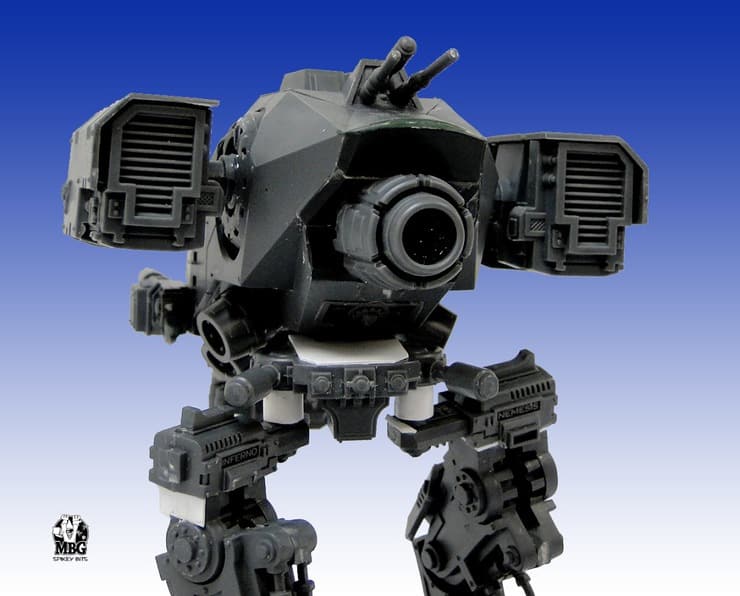
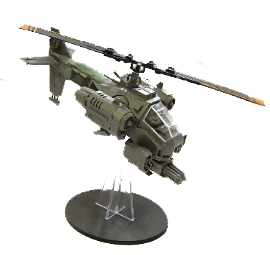
This model’s official designation is the Stormhound Assault Walker after it’s bigger brother, the Warhound Titan.
I had alot of fun making this conversion, and hope this guide helps anyone out there looking to make their own version.
Unfortunately unlike a lot of my how to articles that try to help find alternatives to pricey kits and bits, this model is not cheap to make.
But I have a few tricks for you to help minimize what you need, and how to get some cash back out of your extras.
After Sixth Edition drops here shortly, I’ll be making a datasheet for this so it has a baseline, rules wise for Apocalypse or friendly games of 40k.
For now though it definitely usable as is, for a Stormtalon itself at the very least.
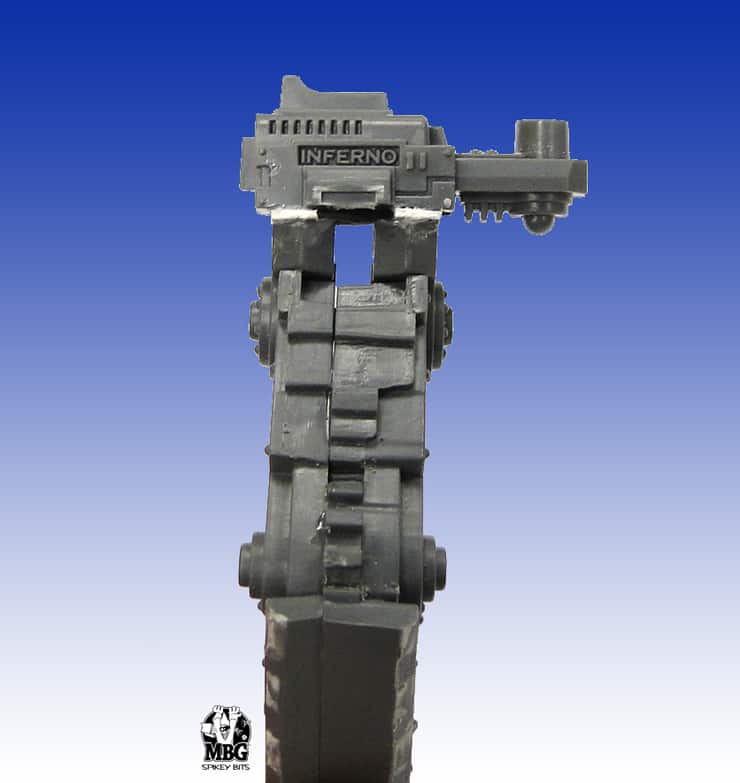
Stormraven Lascannon Set
Dreadknight Lower Torso Bit (from the torso bits pack)
Two Dreadknight Heavy Weapon Mounts (for hip joints)
Dreadknight Feet
1/8″ Magnets
Commander Chapter Symbols (for joint caps)
Dreadknight armor platings
GF9 Plastic Variety Pack (super convenient for pre-sized tubing)
It may be more econmoical to just buy the Dreadknight outright, than just ordering the bits.
Also since you have to destroy the Defiler torso for the couplers to use for the arms, (now legs) it may be worth it to buy a Soulgrinder instead of a Defiler. That way you can at least maybe resell or trade off the Soulgrinder upgrade sprue and recoup some cash.
It may also be a good idea to use the weapon pods that come with the Stormtalon instead of the Whirlwind Rocket Pods to save a little scratch as well.

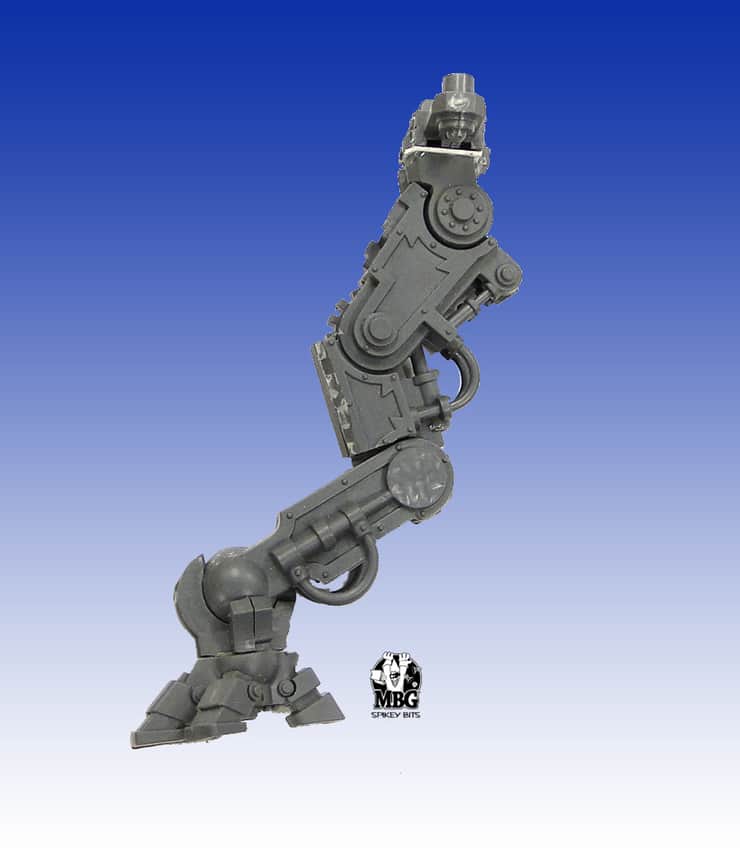
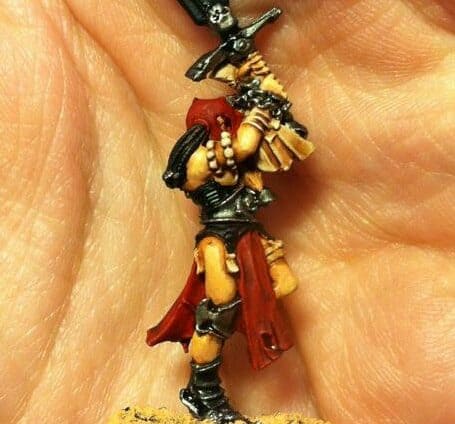
First off I made the feet first. I think on projects like this it’s good to work from the “ground up”. So I took the Dreadknight feet sheered them flat a bit and mounted the arm couplers I cut off the front of the defiler torso.
As you can see I glued one with the main support facing forward, and one backwards to help brace the leg assemble. The pose for the legs was striding, but if you want to make it just standing there you may not have to do that, as there will be no additional stresses on the feet besides gravity.
Next I went about assembling the legs. As you can see from the side shots, it’s a little intense. Lets break it down some.
First off I inverted the legs from the arm poses. Meaning the “claws” would be attaching to the hip of the Stormhound.
You have to actually trim the claws flush near their joint to make a mount to attach to the Dreadkight weapon bit that forms the hip. I also put a piece of plasticard across the two stubby claw halves to glue the DK Heavy Weapon Mount to. This allows the two claws to pivot together, forming a hip joint of sorts.
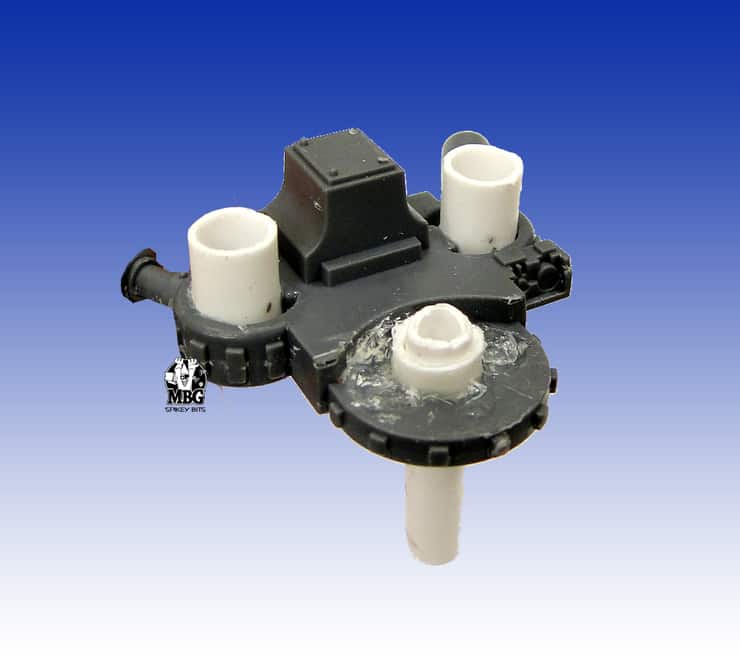
The rest of the hip joint is formed by adding tubing from the GF9 Variety pack to the two recess in the Lower Dreadknight Torso.
Picture shows the bottom of the torso, to which the legs are attached.
There is one piece of tubing in that pack that fits the holes in that torso, and perfectly fits over the nub on the weapon (now hip) mount and allows for perfect movement and support.
Now you should be have two legs and two feet, as well as a lower torso hip joint. This assembly should be free standing at this point, so try our some poses before you glue the legs into their final positions.
I waited until the final positioning with the cockpit to attach the armor plates. While the legs are loose, now is a good time to de-spikey them, as there is quite a bit of chaos icons plastered all over these legs.
In place of the chaos stars on the joints you can use some of these Commander Chapter Symbols or even some of the small aquilas that come with the Stormtalon itself.
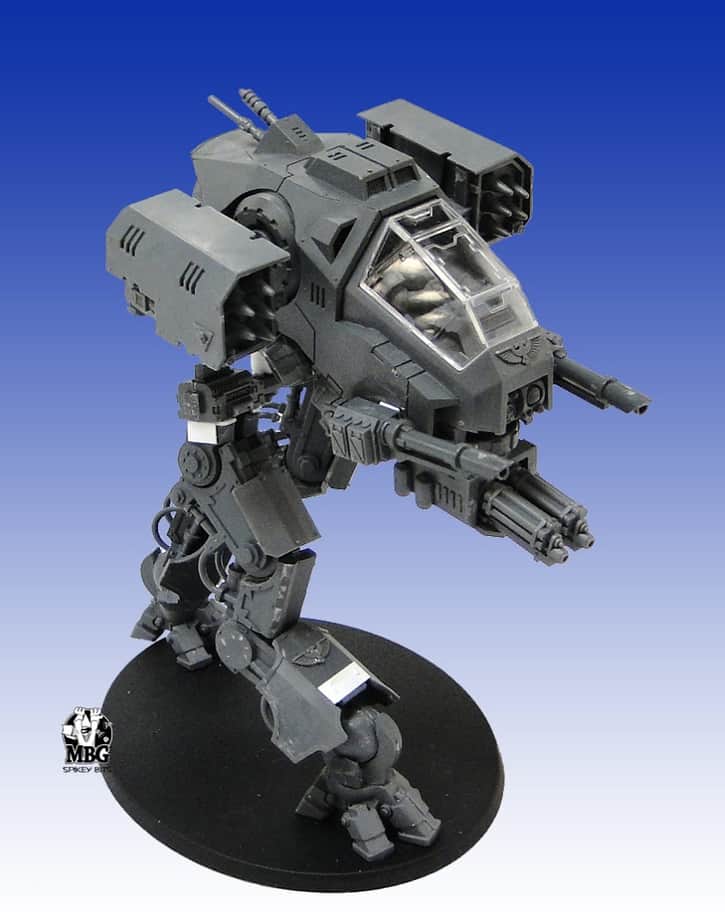
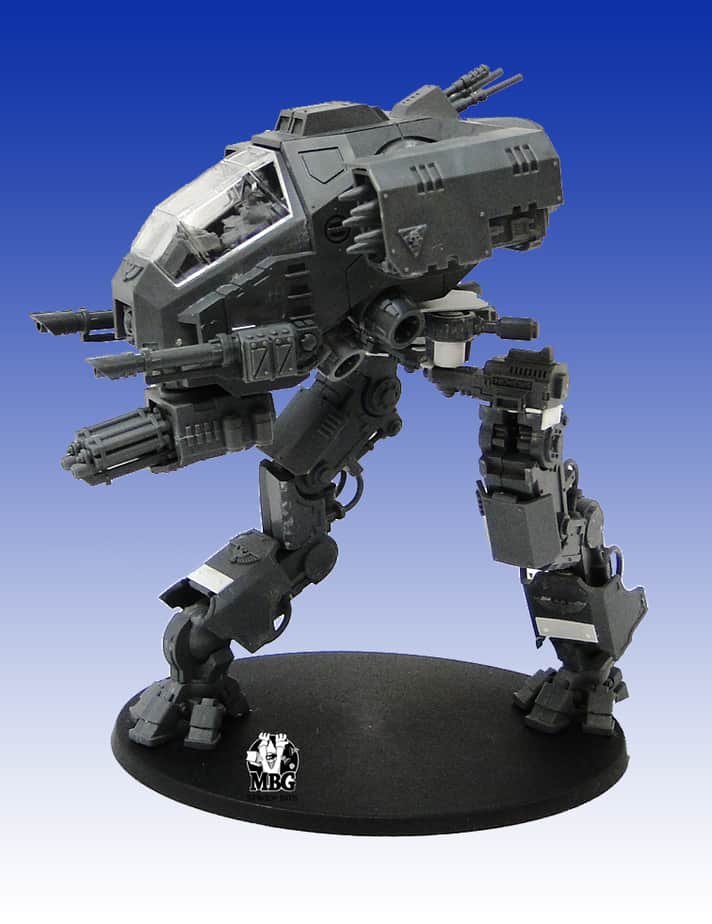
Cockpit Assembly
Assemble up the Stormtalon fuselage per normal and let dry. After drying you can see from the picture where I cut down the rear of the cockpit. I had some help with this, as a friend was itching to lend a hand. In hindsight I may have left just a little bit more of the fuselage on the back, as this assembly tends to lean forwards a tad. Lesson learned for my next one?
After you make your rear cut, patch up any openings with plastic card, and liquid green stuff (which is perfect for filling gaps like this). I keep a small desktop fan around for projects that need quick drying so make sure to dry up any Green Stuff quick and then sand it flush.
I cut down one the thrusters from the main engine and attached that to the rear. I actually ended up going back and adding lead shot into the thruster hole to get it to balance better on the legs.
The front weapon mount had to go, as two sets of weapon pods would just not work. I clipped off that mounting nub, and exposed the recess under it. This is a great place to place a magnet for magnetizing any weapon options (or arms) you may desire.
Here are a few articles on magnetizing things if you need extra help there.
Then I assembled the Whirlwind rocket pods, and after cutting them down at the brackets shown, magentized them to the mounts for the engines. (you have to cut flush the engine axle that juts our from both sizes though).
I used that same diameter tube from the lower torso to form the swivel for left and right movement of the cockpit assembly as well. Just enlarge the “cross” opening for the flying stand enough to insert that tube, and trim flush at the base. The GF9 variety pack is neat because all of the pieces of tubing insert into each other, and can telescope outward if you wish.
We don’t need all that, just the piece that fits into the tube that was just placed and will attach down into the new lower torso assembly. Again the picture shows the bottom of the torso, to which the legs are attached. The middle tubing is for attaching to up into the cockpit.
You should now have a completed upper body assembly with weapon options. Go ahead and play around with leg poses, and when you find something that works for you, glue it down and make it permanent.
I wouldn’t recommend gluing down the top to the legs however, keep that on a swivel for machine gun noise makings!
Checkout my video walk through and close up pictures below, and see how it stacks up to the “real” Stormtalon!


