 Hey Guys, Rage of Khorne here from The Order of Chaos looking to add some more models to my collection of pre heresy Sons of Horus.
 The model I will be working on today is something you wouldn’t usually find in a standard space marine army and that’s exactly why I’ve chosen it.
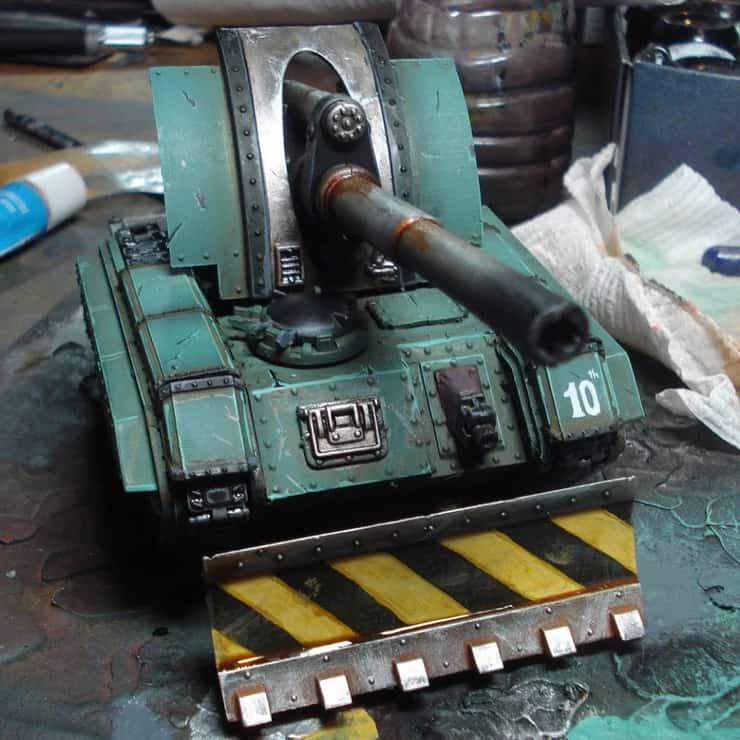
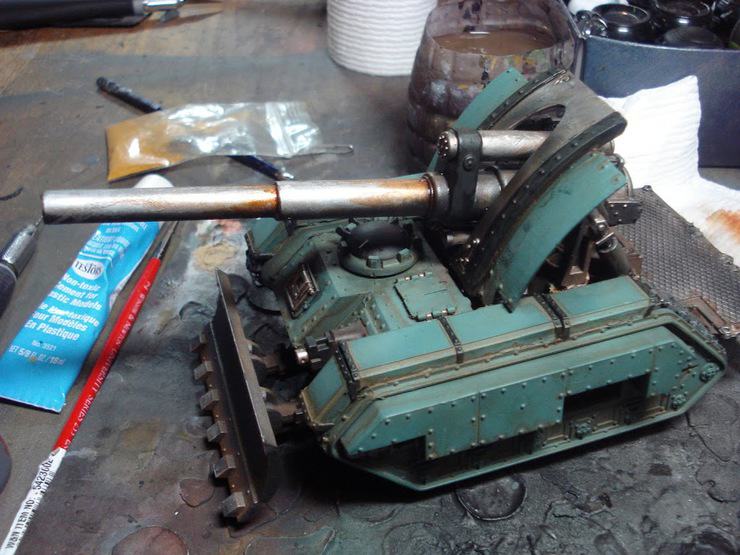
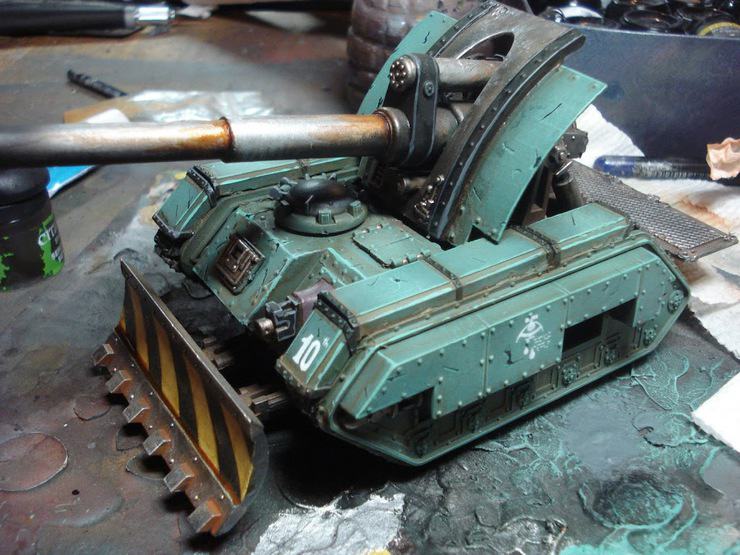
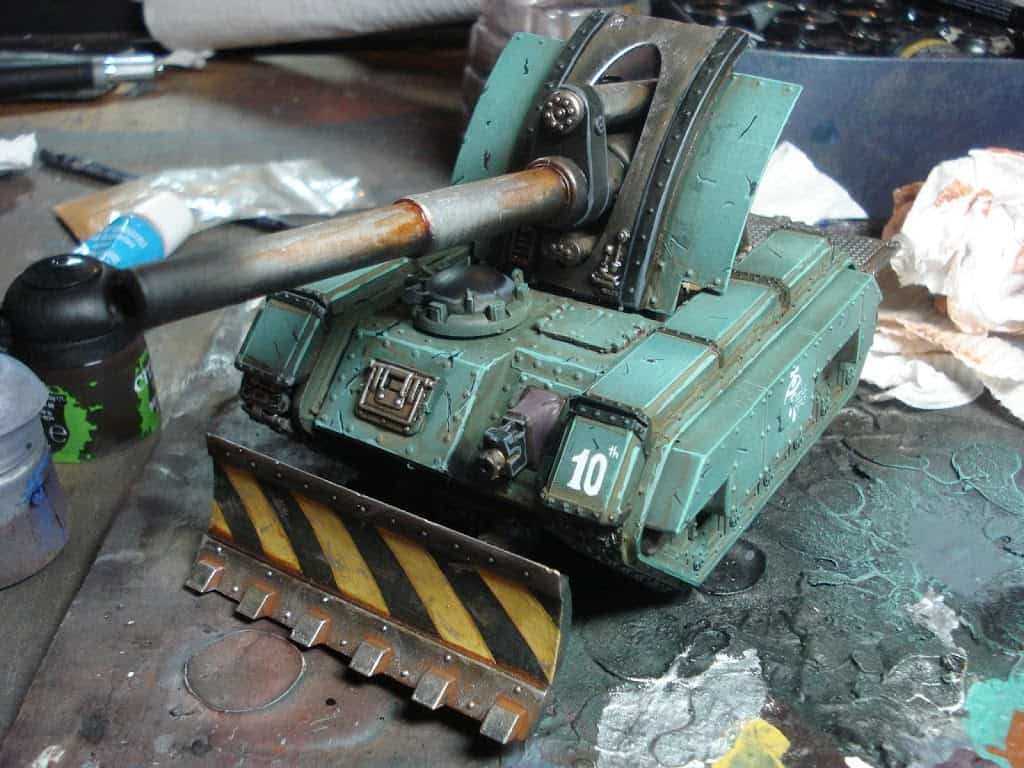
I’ve always loved the appearance of Basilisks on the battlefield and the opportunity to field one of these nasty artillery pieces crewed by a space marine was too good to pass up.

I then dry brushed over the whole model with light silver (Rune fang Steel) and washed into the cracks with a mixture of black and brown (Nuln Oil and Agrax Earth Shade). The reason I went through the effort to prepare the metal areas to this stage was that some of the metal areas will be left showing after the green air brushing stage.


At this point I also found it useful to apply some brown India ink to the barrel of the gun which created the appearance of built up axel grease.
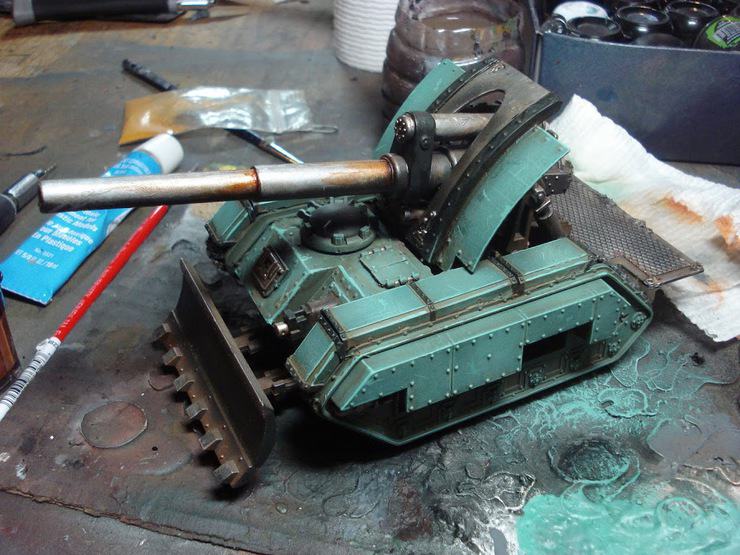
At this stage the model was looking a bit dull and didn’t match very well with the rest of my army because of the heavy application of washes so I went over the green areas with a dry brush of the original green mix to bring out a bit more brightness and detail. The rivets turned out particularly well as they retained their rusty brown edging and were highlighted on the top to stand out more.
The metals were also given a dry brushing using Rune Fang Steel to bring out the depth detail on the working parts of the tank. Edge highlighting the black areas of the model can be done at this point or at the very end but those areas weren’t given too much more attention.
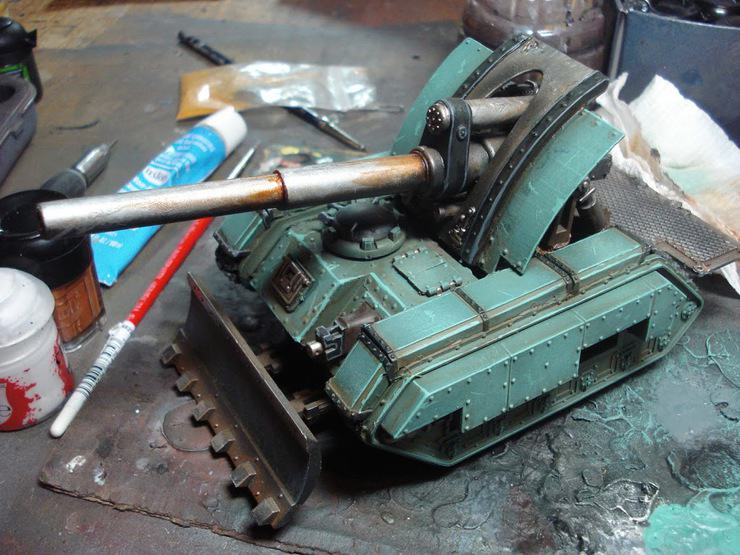
These bits of battle damage were then accented by drawing a single black line on top of the White and Green mix line added in the last step. This gives the visual impression that there is a small hole or scratch and the light is catching the lower lip of it. It’s worth mentioning that the yellow hazard stripes were also hand painted onto the front of the dozer blade at this stage using Averland Sunset.
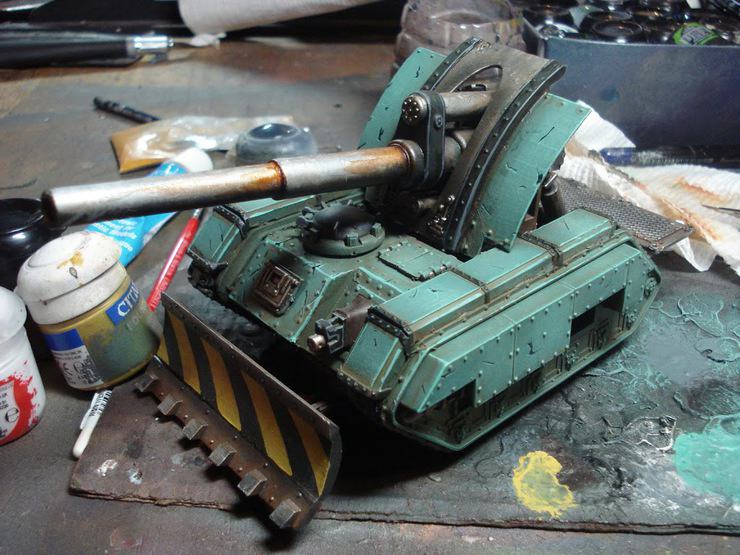
To add some character to the piece I painted on some squadron icons and kill markings to denote the vehicles as having been through some rough battles. Seraphim Sepia was applied heavily to the front of the dozer blade over the black and yellow hazard stripes to leave a gentle fade on the colours and leave a dark line of rust colour built up on the lip of the shovel.
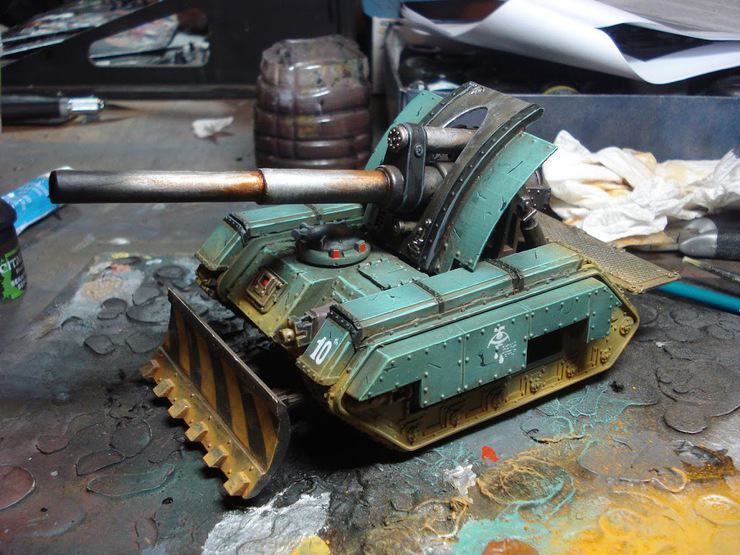
After this step was dry I highlighted the yellow with a 1:1 mix of Averland Sunset and White Scar and then roughly wiped a brush across the dozer with Rune Fang Steel to make it look like the blade is used often.


Next up is a few small infantry models and then maybe something bigger and cooler (I’m looking at you Kabuki miniatures).
About the Author: Rob Baer

Rob Baer
Job Title: Managing Editor
Founded Spikey Bits in 2009
Socials: Rob Baer on Facebook and @catdaddymbg on X
About Rob Baer: Founder, Publisher, & Managing Editor of Spikey Bits, the leading tabletop gaming news website focused on the hobby side of wargaming and miniatures.
Rob also co-founded and currently hosts the Long War Podcast, which has over 350 episodes and focuses on tabletop miniatures gaming, specializing in Warhammer 40k. and spent six years writing for Bell of Lost Souls.
Every year, along with his co-hosts, he helps host the Long War 40k Doubles Tournament at Adepticon and the Long War 40k Doubles at the Las Vegas Open, each of which attracts thousands of players from around the world.
Rob has won many Warhammer 40k Tournaments over the years, including multiple first-place finishes in Warhammer 40k Grand Tournaments over the years and even winning 1st place at the 2011 Adepticon 40k Team Tournament. He was even featured for his painting in issue #304 of Games Workshop’s White Dwarf Magazine.
With over 30 years of experience in retail and distribution, Rob knows all the products and exactly which ones are the best. As a member of GAMA (Game Manufacturers Association), he advocates for gaming stores and manufacturers in these difficult times, always looking for the next big thing to feature for the miniatures hobby, helping everyone to provide the value consumers want.
While he’s played every edition of Warhammer 40k and Warhammer Fantasy (since 5th Edition) and has been hobbying on miniatures since the 1980s, Titans of all sizes will always be his favorite! It’s even rumored that his hobby vault rivals the Solemnance Galleries, containing rulebooks filled with lore from editions long past, ancient packs of black-bordered Magic Cards, and models made of both pewter and resin.