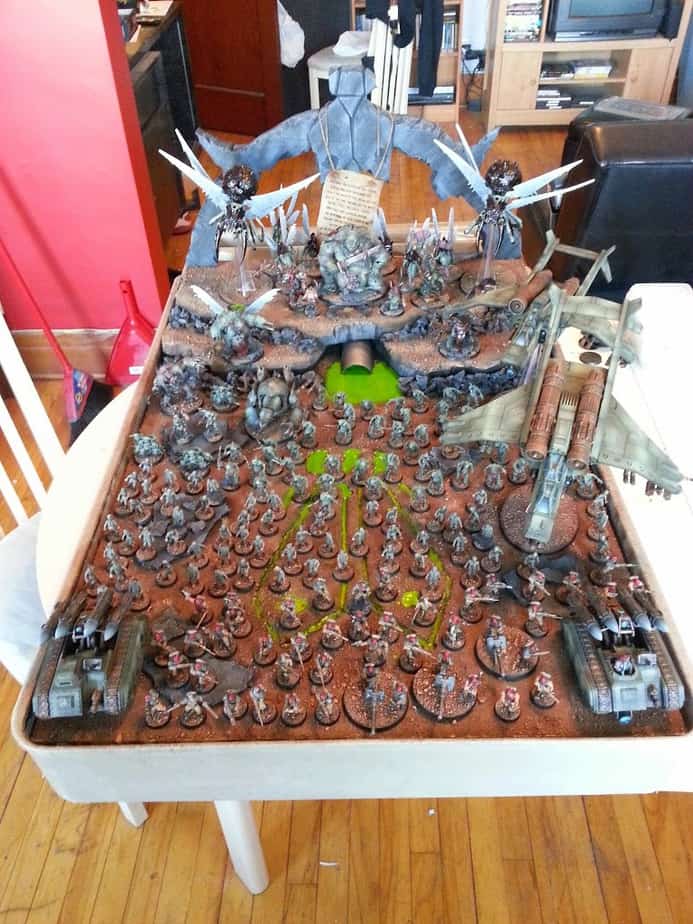
I was recently tasked with building a display board for our Adepticon team army. As I’ve mentioned elsewhere previously, I’m not quite familiar with terrain building, so this was new to me. I’ve watched a bunch of terrain and scenery making videos on YouTube in the past, and time was an issue as seem to always be the case with the stuff that I post here. So yeah, I made things up as I went as usual. Here’s a quick step by step on building a nice and relatively easy display board to score precious presentation points in your next tournament! You will note that I have carefully titled each step with a suitably nasty double-entendre. You’re welcome.
Step 1: PRE-GAME.
I could break this into smaller steps, because it is huge, but this step is all the hoops you need to go through before actually starting the thing. It truly is the pregame to a drinking night out, or tailgating on Sunday.
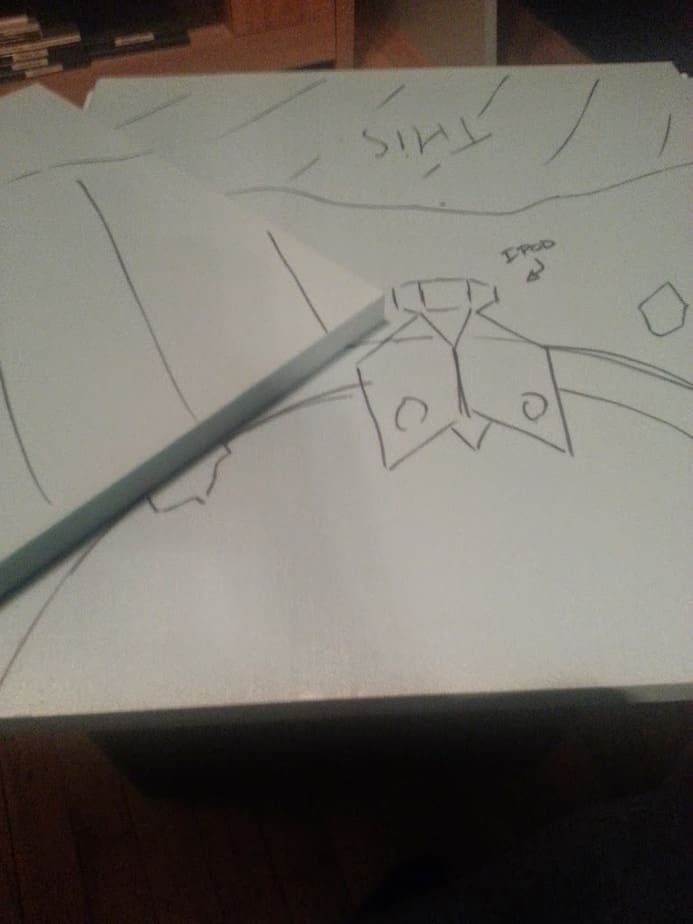
This step will go against your better judgment being a manly man, but you need to plan your things out.
Plan something and draw it out. It doesn’t need to look pretty (my drawing looked like an iPod with a badly drawn shark shape) but this should give you some idea of where you’re going. I don’t think I’ve kept the original doodles, but it was drawn on a bar napkin and looks somewhat nothing like the finished product. In that doodle, write down or take a mental note on the materials you need or can use for this.
Also in the planning step, since I was borrowing models from the team army for my championship army (in fact my entire championship army was built around what was in the team’s) so I built a smaller board to fit the same army, but with half the points.
My initial plan was to do something really simple with a couple elements that stood out. With more time ahead of me, and now some practice under my belt, I would go for bigger projects. My championship board is the simplest kind, and is a good starting point if you’re unfamiliar with terrain building in general. Reality-check yourself before you wreck yourself.
The second part of this step is gathering up the materials needed. Let’s say you want to build something similar to mine, here’s a basic list:
Insulation Foam – either 1”, 1½”, 2”, that’s why you need a plan
Sand – Unless you want a city-feel or lava-themed board, any other texture I can think of, you will be better served by a sand texture for your display. More into this later
Cork– This is optional, but it is quite simple to work with and quite cheap. For 1$ you can buy 2 18” squares that will be enough to base your army and board.
Foamcutter – This is mandatory if you’re using foam, don’t try to x-acto you’re way out of this, you will contemplate your wrists at some point. Also, don’t get a battery powered one, they work like crap. There was a vibrator joke material somewhere in there but I missed it…
Sharpie /Black Marker – I always carry one around for autograph purposes, but if this is not your case, get one. Draw out basic shapes on foam with no imprint and maximum clarity.
Wood glue – Like white glue but much stronger and little more expensive. This board is hard to carry around and will see a lot of action, you need your basing materials to hold, so it’s worth it.
Hot glue gun – I’m a great fan of saving every penny possible, and hot glue is the cheapest around and holds like nobody’s business. You can get a gun for 5$ and a bag of glue sticks for 1$. This will last you ages and you will find a lot of uses for it as you go.
X-Acto knife – let me be clear, I’m not talking about your fancy little hobby knife, I’m talking about a massive badass X-Acto with a 3’’ blade that cuts linoleum. Basically, you need the blade to go through the foam otherwise you’ll ruin it. Also, it’s not work ruining good hobby knife blades on this. Save money, buy more beer.
Step 2: Drink thrice, measure twice, cut once.
This step is where the fun begins. Start by measuring out the base of your display, in my case, a 2’ by 3’rectangle base to fit the cart it was going in. Because foam is quite fragile, I would not use only this as a display board, it will most definitely break, no matter how hard you try to protect it. Get some sort of tray- INSTANT BROTIP: those things for breakfast in bed are nice, get one for your girlfriend too, score bf points with your hobby. Can I get a hell yeah? – and model your display inside that tray/box. You can also build it with little to no craftsmanship skills, but you don’t save a lot of money for the time you put in.
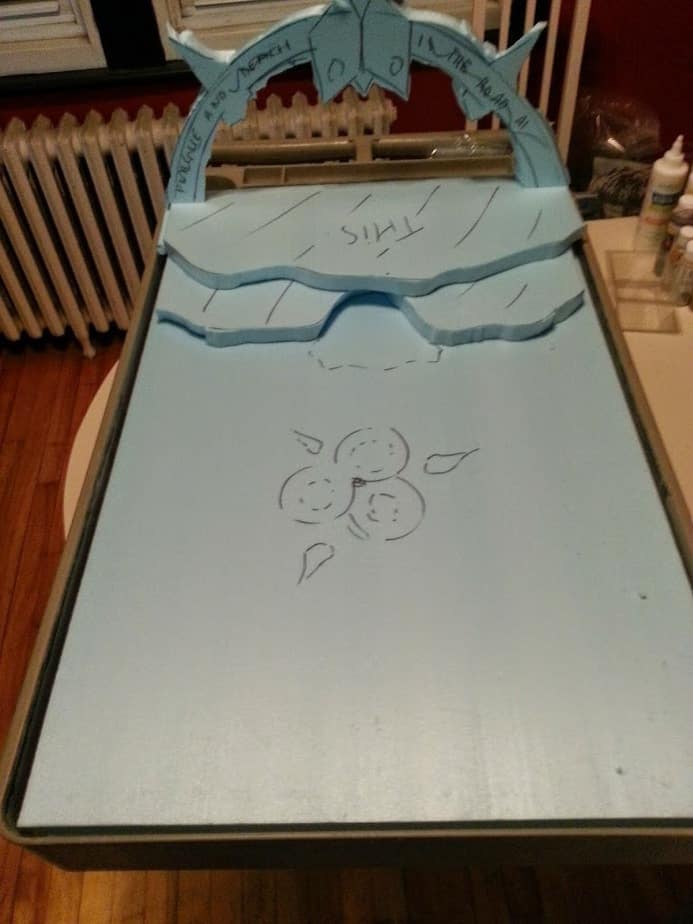
You can then do the same with whatever structure you’re building. Start by drawing out ALL the shapes and pieces you will need first. This not only ensure you have enough foam to complete your project, but also that pieces fit together. Also write down which side you want to use, as usually boards of foam have some slight bruises and you want to hide them when possible. It might seem dumb to mention this, but just to be thorough, try to keep straight edges and corners for when you actually need straight edges and corners.
This step does not need to be pretty, make sure that cuts that should be straight are straight, and that you have the right shapes and size for hills/whatever, the detailing will come later.
Step 3: Go in dry
Once you have carefully cut the shapes you need, place them on your board and sand them down to fit. Re-cut pieces until you are satisfied with the look of everything. While all the pieces are on there, mark out additional pieces you will add with your black marker ( the fly-shape gouges and the puddle, in my case.
When you are satisfied with how everything looks, cut the pieces with the desired texture ( rocky uneven hill side for example ) as this should be the final look before paint.
Step 4: Fluids
The opposite of adding stuff to your board, you are now carving the sonofabitch down! I want a puddle of green goo and more green goo in a nurgly-fly design. You might want a river, blast craters or a trench on yours, this is where you make it happen.
In any case, you want to either avoid going through your layer of foam. If you do, place a piece of plasticard and glue it with hotglue to prevent the water effect or flocking glue you will add later to drip through. In the case of a trench, what I would do I stack 2 layers of foam for the entire board, leaving the under layer intact and cutting threnches from the top layer.
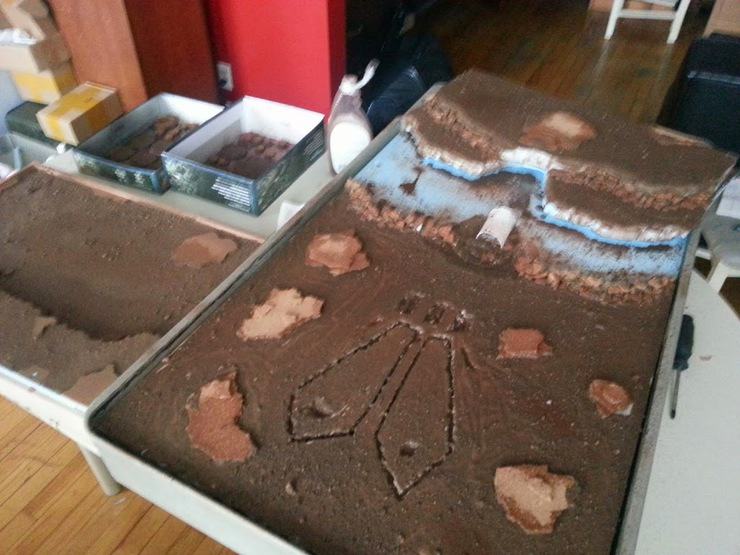
There probably is a smart way to do the carving, but I don’t know it, so here’s how I did my puddle and fly. For the puddle, I did a bunch of horizontal lines 1cm apart in the puddle lines. I then did the same vertically. Then, with the longest possible blade my x-acto could go, cut at an angle a circle in the middle of the puddle. With the cuts that you did previously, a bunch of foam squares will be removed. Continue this process working your way out the puddle, with less an angle in your cuts so the end of the puddle fades in the uncut board. The fly was truly a work of finesse: I took a screwdriver and ran it through the lines I previously traced. Once you’re done with a line, do the same in the opposite direction. This will leave you with the nasty task of removing little pieces of foam from the line. You can probably have a sharper result by angling your xacto knife and doing both sides of every line, but this being nurgle and occult like, random patterns looked better.
Step 5: Spread your white glue all over
Flock it! Start with cork or big rocks and glue these down (basically work your was from bigger texture to smallest texture) Again, before going totally crazy with rocks and cork, you might want to fit your army on the display board first, so you don’t use that much space. Once this is done, get your wood glue and a bunch of sand, a large brush or something to spread the glue with (I used leftover cardboard from boxes ) and go nuts! I started with the hills on mine, applying glue and then flock. Then did the same on the second level of hills. Then finished the whole board. Most people suggest working in small area, but I never seem to get this to look even, so flock them, I go beastmode and do a complete level at a time (the inside of the fly, because it’s separated from the rest of the level ) If you have a bro handy ( or wife, or trained pet monkey…) one of you can spread the glue all over while the other follows with the sand. Do this if you are pretty slow and are scared of the glue drying, but unless you are waaaaaaaaay drunk this should not take that long and you should be fine by yourself.
Enjoy a drink; you need this to dry completely before moving forward. Leave it overnight, especially if you were generous while spreading your white and sticky stuff all over.
Step 6: Brown-town
A classic mistake here is sobering up before this step. This is not fun and requires no skill, which makes it a prefect step to be lightly buzzed. This is a good hangover step. Using cheap craft store paint (mine is a dollar for a pot that’s 3 times GW/Vallejo size ) basecoat the entire thing in a dark brown tone. You can also airbrush/spraygun this step to save some time, especially if your board is not as gigantic as ours. If your foam is all covered by sand and glue, you can use spray paint for the basecoat. Spray paint will eat through foam, so you have to be careful if you try this, you can ruin your good work.
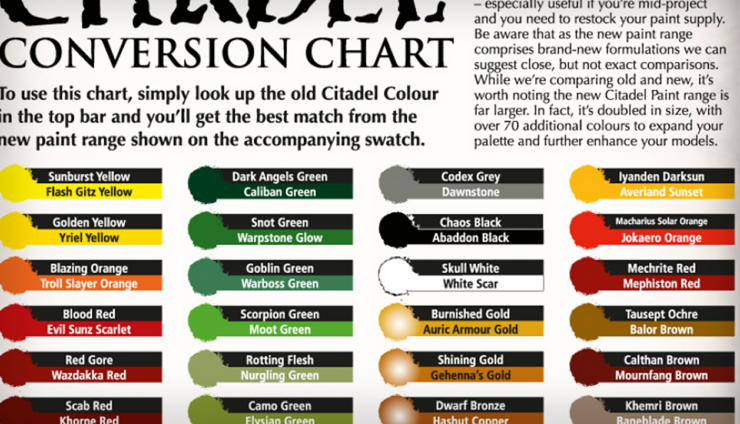
I then preceded to drybrush 2 lighter tones of brown over then entire thing. Then I did the same over the rocks, with black, grey and ultralight grey or straight white. Browns should look like Rhinox Hide, Skraag Brown and Screaming Skull from the GW range. This choice of colors is if you want your project to look like mine. You should do your board to match the bases of your army and vice versa, so keep a note somewhere on what you use. Or better yet, do them at the same time.
By this point, your board should be completely painted and look suitably tight-butthole. Is you did not carve a puddle or did anything fancy, this is it for you, congrats for your new and pimpin’ display board. The remaining steps are the finishing touches and additional details that will truly make it stand out and pop seen from a distance.
Step 7: It’s all sticky
This is the step I wish I could redo. It was the 1sttime I tired this and it did not look like what I wanted at first. It looks suitably nasty, but I would test on some more stuff if I had to redo it. I mixed day glow paint (too much of it ) in Woodland Scenics Realistic Water. Carefuly pour it into the fly and into the puddle. If your coat is more than 1/8th of an inch thick, it will take more than 24 hours to dry, so plan this carefully, as fitting the board in your car and bumpy roads will destroy the resin if it’s not proprelly set.
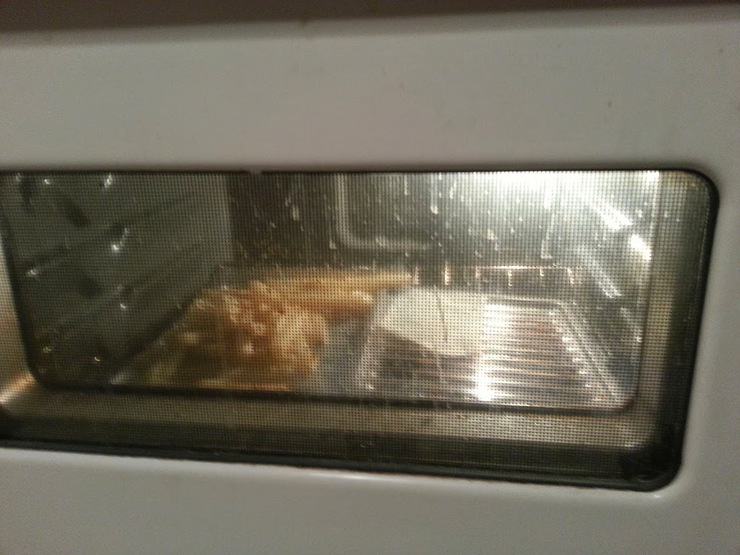
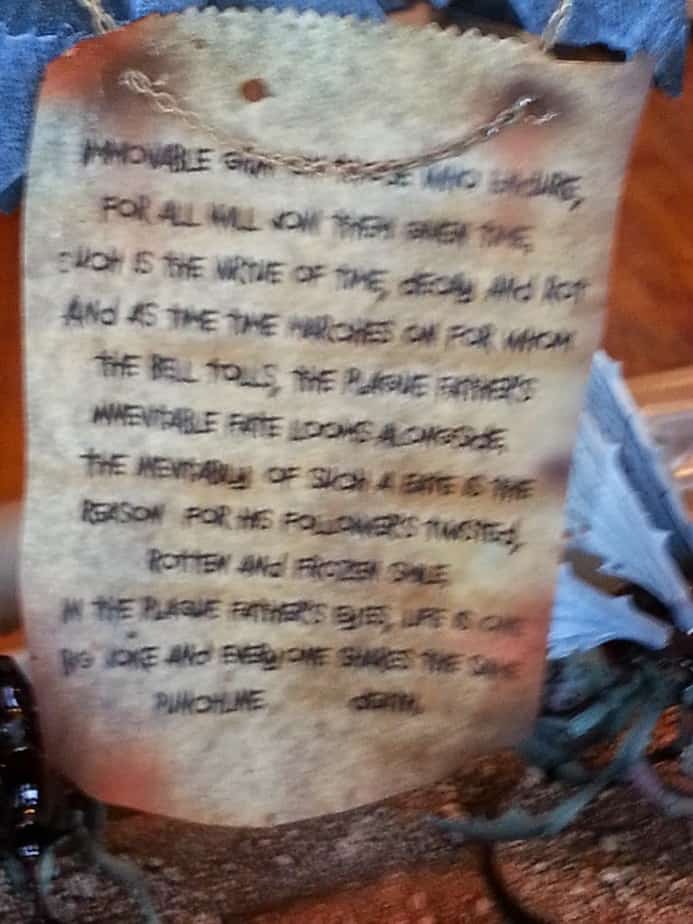
Step 8: It burns!
For a sweet visual effect, I printed out a small piece of fluff on a baking sheet. Cut to a flaglike shape, went in the oven. This was another test for me, it turned ou pretty sweet, I added weathering with an airbrush, poked holes for a chain to go through and voila! Display Board with a side of fries, yes please!
And there you have it. Hope this sends you on the right track to building your own display board!
Max Dubois is a hobby enthusiast from Quebec. Better known as “that French douchbag” in the tournament scene, he has never lost a game of BeerHammer and writes these articles for the sole purpose of picking up chicks at Starbucks. He also does this.