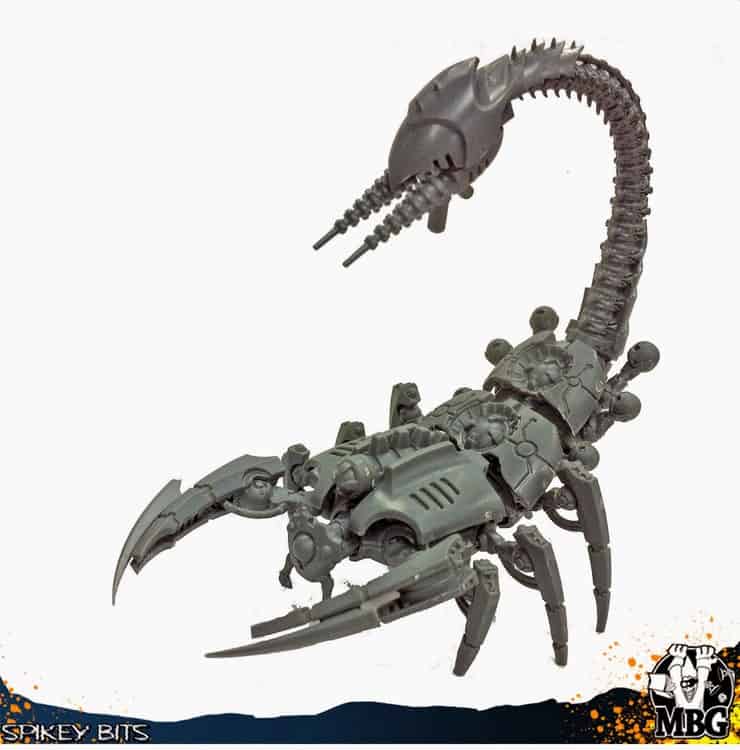
Let’s be honest, the Necron Wraith model may be just a bit too big.
So I tinkered around with the Wraith parts for a little while, until it just hit me to just turn them upside down and create something new!
I hope you like the result, I call it the Canoptek Scorpion and I use them for my Spyder models.
You can of course use them for whatever really, however their “footprint” is just a little too big to mount to a 40mm base for using as Wraiths.
One Necron Canoptek Wraith Sprue
Optional Necron Spyder Head

The Conversion
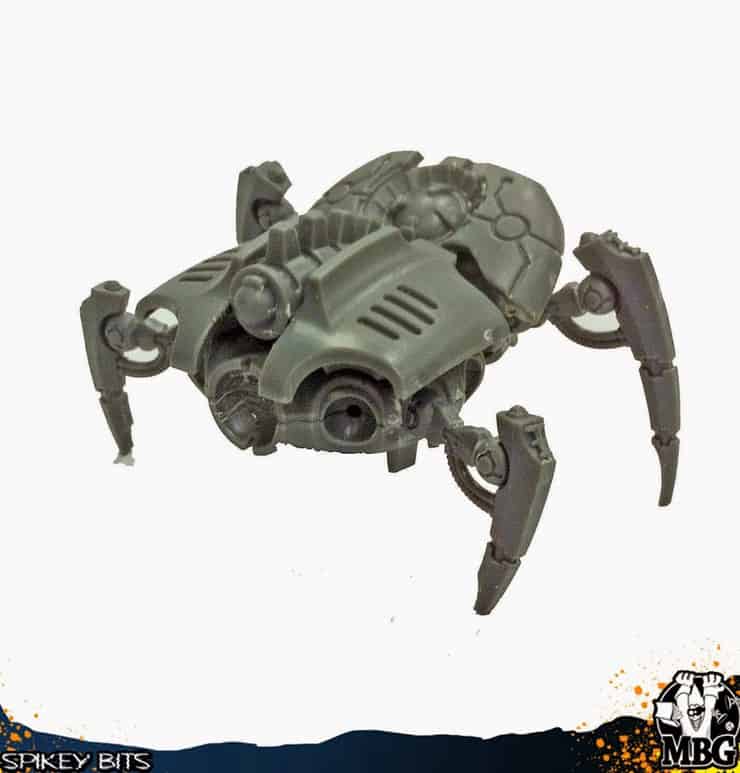
You can pretty much see what I did with this model in the picture above. I basically just reversed the curve of the Wraith model and made their “belly” the top of the model.I also made some baby scorpion models to use as scarabs out of some spare Necron parts I had lying around to go with whole Spyder counts as theme I have in my army as well.
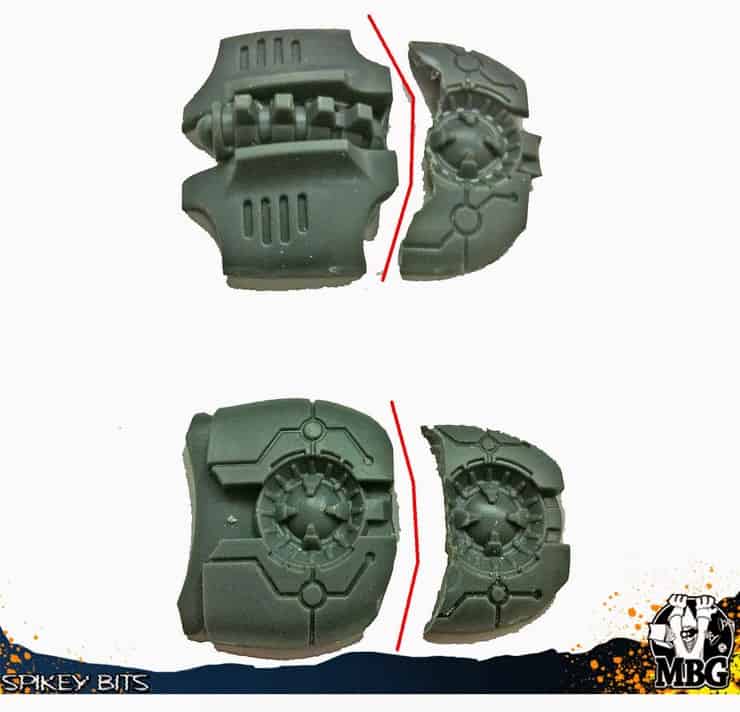
First off you need to cut down the two armor plates that normally go on the top of the model, as shown.
They need these cuts to be able to reverse their angle and go from curving around the back to curving around the front of the model.
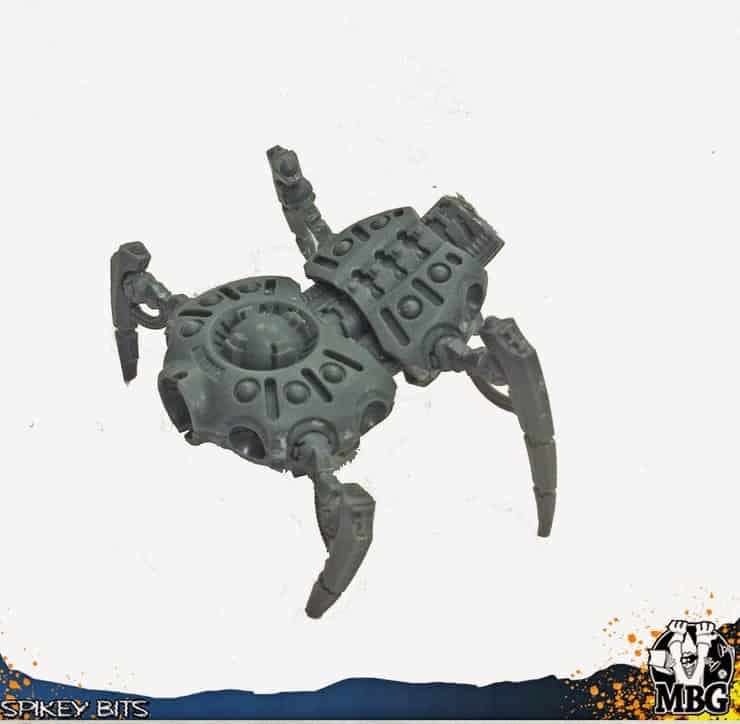
Then just start building the wraith as normal attaching the sections of it’s torso together. As you can what is normally the “belly” of the wraith is now the “top”.
I also started adding sets of legs at this point so the assembly would hold itself together as it got build up, and hold the weight of the tail that would go on top when the time came.
Next you can add the armor plates that normally go on the back of the model to what is now the top of the model. If you cut them down carefully, they should fit right over what is now the top of the model as they are mirror images meant to go on the old top of the model (which is now the bottom).
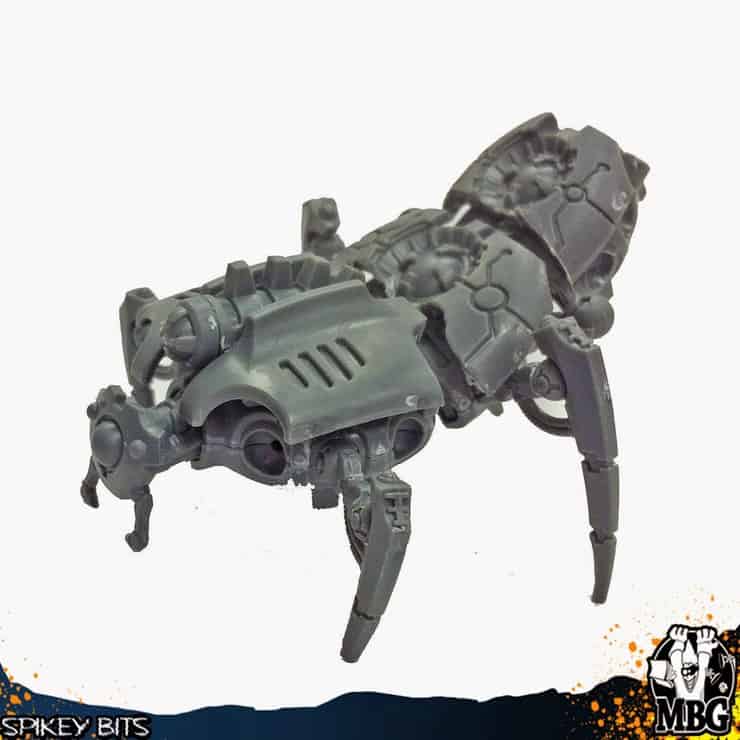
Just keep building up the back of the model, adding sections and armor plates. Here I also added a spare Spyder head I had to the front of the model to check the proportions.
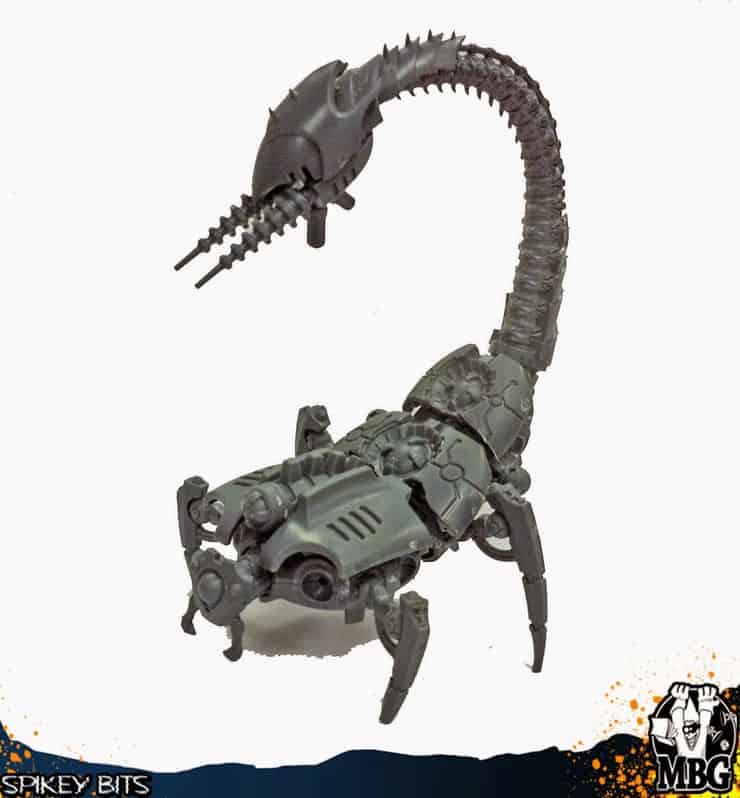
Next just clip the little nub off the Talos tail, and glue it flush to the socket where the Wraith tail would normally go. By now the glue from the legs should be dry and the model should be able to hold the weight of the tail.

Then just plug and play the rest of the parts into the correct sockets as pictured above. Don’t forget to add the middle set of legs!
That’s pretty much it, you can play around with the angle of everything to simulate motion and such, but the basics of the assembly are done. I made a few with their claws opened wide, and some more in a guarded position like above.