Ever wanted to make a super heavy from scratch? This is the article for YOU!
John Donagy recently hit me up with some pics of a scratchbuilt Fellblade and I was absolutely floored by it. I hope you are as impressed with it as I was. He was even so kind as to include a guide to how he made it as for you guys as well!
My scratch built Fellblade started as I like the model but I couldn’t afford to spend the large amount of money forge world are after for there model, so i decided to build one of my own.

I’d already scratch built a forge world Sicaran tank and this prompted me to build the Fellblade as well.
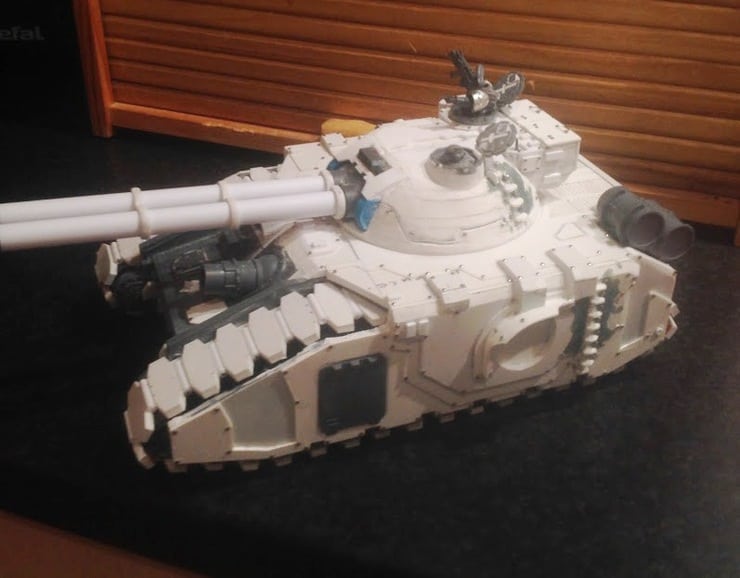
I started by collecting as many photos as I could for reference, I based my model on a Baneblade chassis that I had been given this meant I wouldn’t have to model the running wheels.

The chassis was stripped back to bare plastic and then construction started by building up the body with 0.5mm, 1mm plasticard and 3mm, 5mm foam board.
The dimensions were taken from a side view in the imperial armour second edition volume two book and scaled accordingly.

The main chassis went together quite quickly as its mainly built up plates, the steps in the left side were a bit of a challenge but once they had been marked and cut out it was only a case of tidying them up with green stuff and creating the steps.

The rivets across the tank are sequin pins, each pin had a hole drilled with a pin vice and if needed the pin was trimmed before being stuck in… I hate pins….
I left the side sponsons off until construction had finished to make it easier to paint the body and it also meant they would not get knocked off!

The tracks were made from 3mm foam board and plastic tubing, each track link was cut and then glued in sections to keep the tracks rigid.
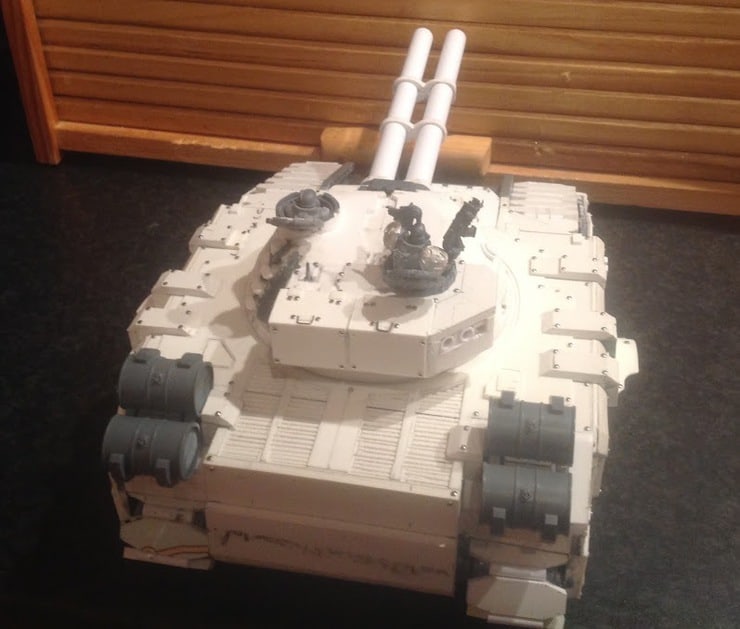
The turret was constructed by cutting discs of foam board with smaller diameters as they went up, I put in a cut out for the main gun and also left a flat surface on the rear for the turret stowage to fit onto too.
The smooth surface was achieved by applying quick drying filler to the disc’s then sanded to a smooth surface, once the surface was complete I marked out where the steps, sighting unit and cupolas would go.
The main guns were made from plastic tubing and the mount is a plastic exhaust piece from the stormraven kit that allows the guns to elevate in the turret.
Overall the turret took as long as the rest of the chassis so far…
Once the turret was complete I moved onto the exhaust unit, this was constructed in the same way as the body where there is a central box and the rest of the components are added on, the biggest issues was getting the detail on the rounded parts, lots of sticking fingers together happened here 🙁
The exhaust stacks are again plastic tubing with holes drilled to replicate the pattern, once this was complete it was mounted onto the back of the chassis and the detail around it built up, the tubes running from the chassis to the exhaust’s are flexible plastic tubing to get the curve.
The final job was make the side sponson’s for theses I sourced the 8 lascannon’s matching the forge world model from eBay and trading groups as I tried making one and failed miserably…

The sponson’s are made up of a mounting disk that fits into the holes left in the chassis sides and mounting plates to hold the lascannons.
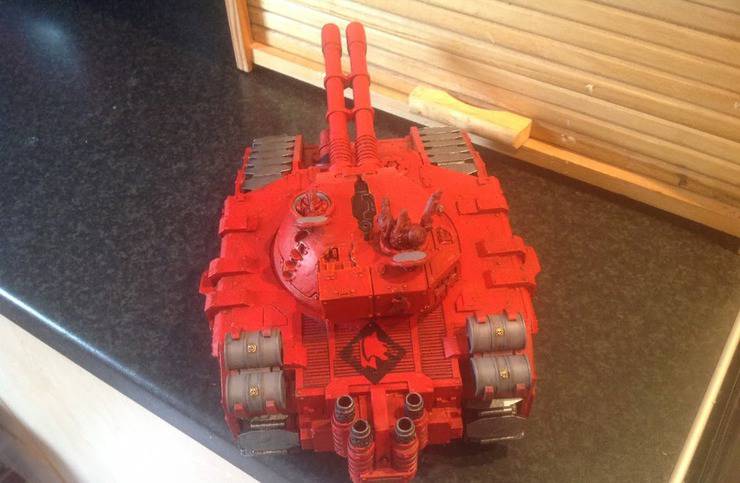
The chassis and turret were primed with red car primer then pre-shaded with nuln oil wash and the red colour was built up with successive layers of paint, then highlighting and once it was tidy made to look dirty with wash’s again then drybrushing.
Mud effect is artists pastels ground up and held in place with a drop of water then sealed with varnish.
In total the Fellblade took me 3 months of on and off work, it was definitely a challenge and I have learnt a lot from building this model, the main being that nothing is impossible!
Anybody else feeling inspired? I know I am!