If you’ve got big bad beasties to paint for your Age of Sigmar army, keep it icy with these wintry color schemes for any army in the mortal realms.
Another General’s Handbook has arrived, as Age of Sigmar is back in full swing with newly revised points costs and rules. If you’re looking for a icy color scheme to paint any of your big bad beasties, checkout this wintry color pallet I used to paint my Ogor Beastclaw riders. From Ogor flesh, to beast fur, and even icy horn fades these tutorials got you covered!
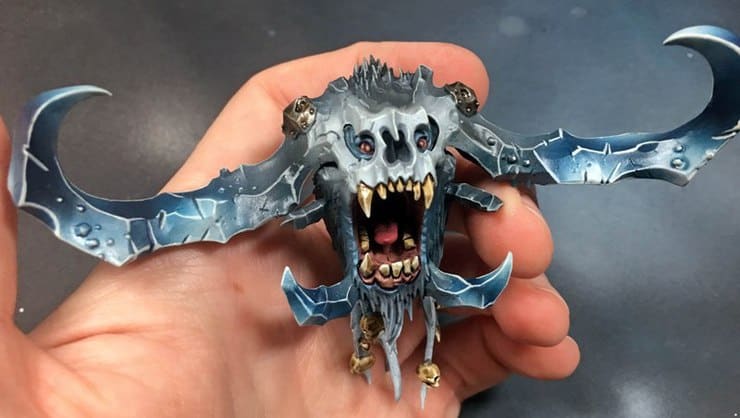
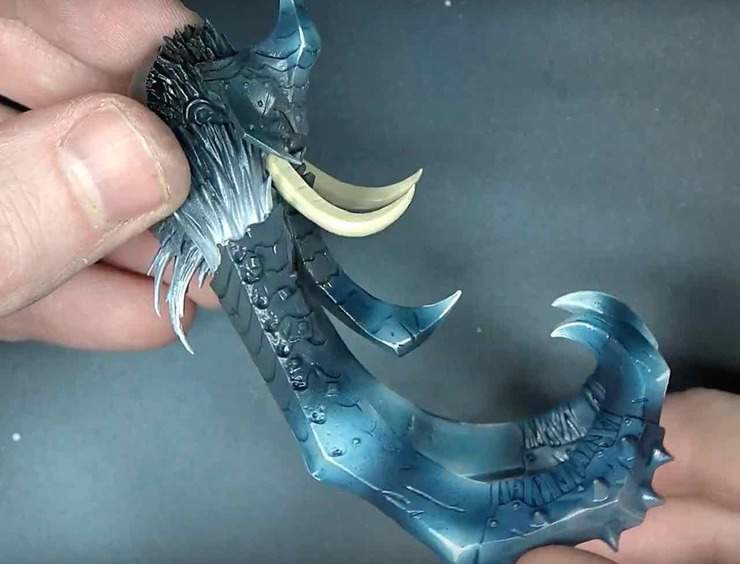
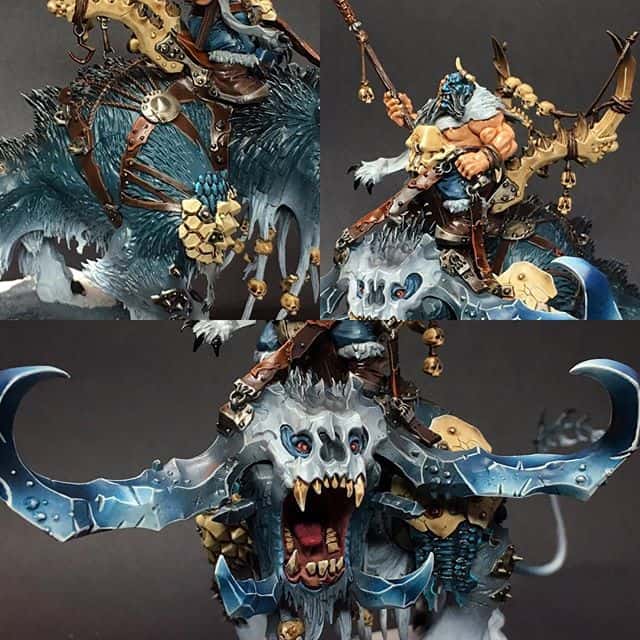 I feel like the most striking quality of my army is the Ice detail work that I did on all the Beastclaw horns, so here’s the in-depth breakdown on how I did it, along with two video tutorials on how to paint your beasties to the tabletop level, and then above!
Start by laying down a base coat of Mechanicus Standard Grey at the base of the horns. Then lay down the base blue using some of GW’s Air Macragge Blue, the air versions of GW’s paints are easy to use and can go right into the airbrush without any prep work.
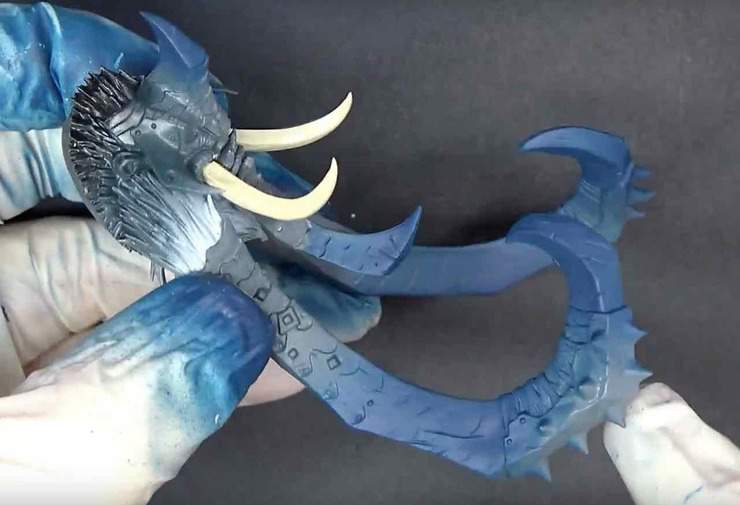
Once the base blue is dry start the highlight process using another of GW’s air range, this time with Lothern Blue, cutting the highlights in using your airbrush.
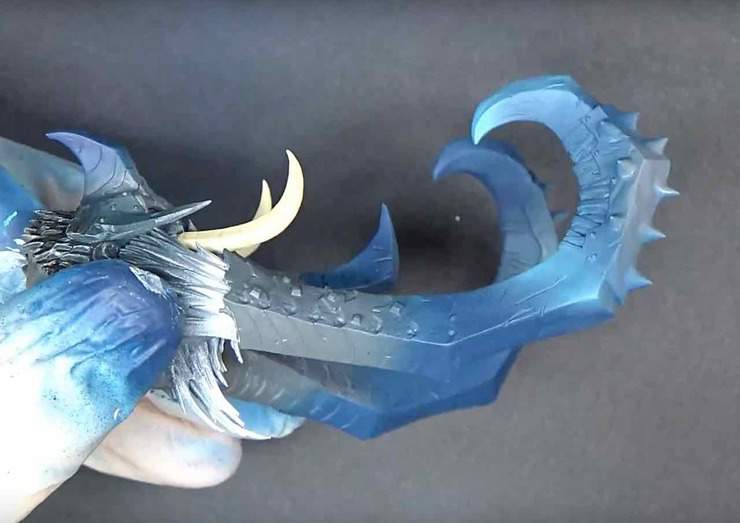
Next up is another highlight using a GW air paint. Instead of using pure white for the final highlight, we’re going to use Ulthuan Grey. This nearly-white color is great for highlights, and covers significantly better than plain white.
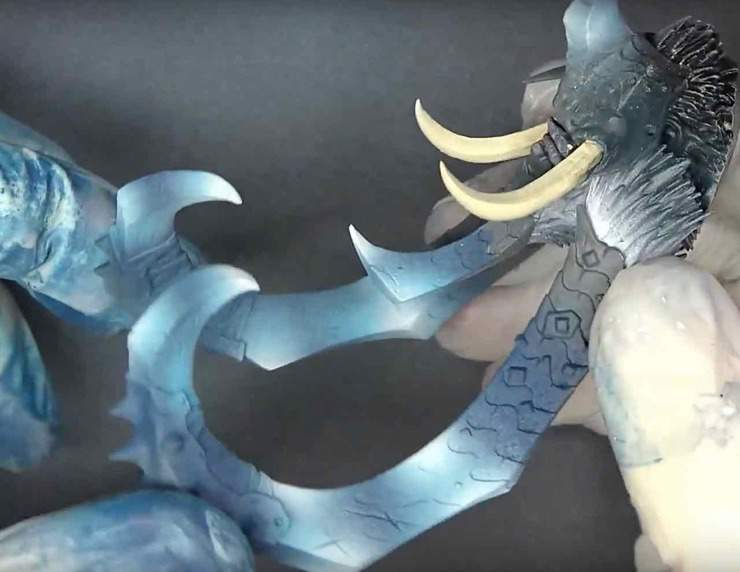
After the final airbrush highlight is dry, it’s time to tie everything together with a glaze of Drakenhoff Nightshade mixed with a little bit of Pledge with future floor wax. Before applying the glaze it’s important to coat the model with a semi-gloss or full gloss varnish.
The floor wax helps to break up the surface tension and stops the glaze from pooling as it dries, ensuring a smooth even coat.

Once the glaze is dried its time to apply a final edge highlight using a little more Ulthuan Grey. This razor highlight is applied using a detail brush.
Now it’s time to paint the rest of the model!
To see how to take your big beastie from plastic grey to beyond table top level just click play on our TWO video double feature below:
About the Author: Rob Baer

Rob Baer
Job Title: Managing Editor
Founded Spikey Bits in 2009
Socials: Rob Baer on Facebook and @catdaddymbg on X
About Rob Baer: Founder, Publisher, & Managing Editor of Spikey Bits, the leading tabletop gaming news website focused on the hobby side of wargaming and miniatures.
Rob also co-founded and currently hosts the Long War Podcast, which has over 350 episodes and focuses on tabletop miniatures gaming, specializing in Warhammer 40k. and spent six years writing for Bell of Lost Souls.
Every year, along with his co-hosts, he helps host the Long War 40k Doubles Tournament at Adepticon and the Long War 40k Doubles at the Las Vegas Open, each of which attracts thousands of players from around the world.
Rob has won many Warhammer 40k Tournaments over the years, including multiple first-place finishes in Warhammer 40k Grand Tournaments over the years and even winning 1st place at the 2011 Adepticon 40k Team Tournament. He was even featured for his painting in issue #304 of Games Workshop’s White Dwarf Magazine.
With over 30 years of experience in retail and distribution, Rob knows all the products and exactly which ones are the best. As a member of GAMA (Game Manufacturers Association), he advocates for gaming stores and manufacturers in these difficult times, always looking for the next big thing to feature for the miniatures hobby, helping everyone to provide the value consumers want.
While he’s played every edition of Warhammer 40k and Warhammer Fantasy (since 5th Edition) and has been hobbying on miniatures since the 1980s, Titans of all sizes will always be his favorite! It’s even rumored that his hobby vault rivals the Solemnance Galleries, containing rulebooks filled with lore from editions long past, ancient packs of black-bordered Magic Cards, and models made of both pewter and resin.