After learning that yellow was easy to paint, the details will be a piece of cake! Take your Imperial Fists to easy table top quality with this tutorial!
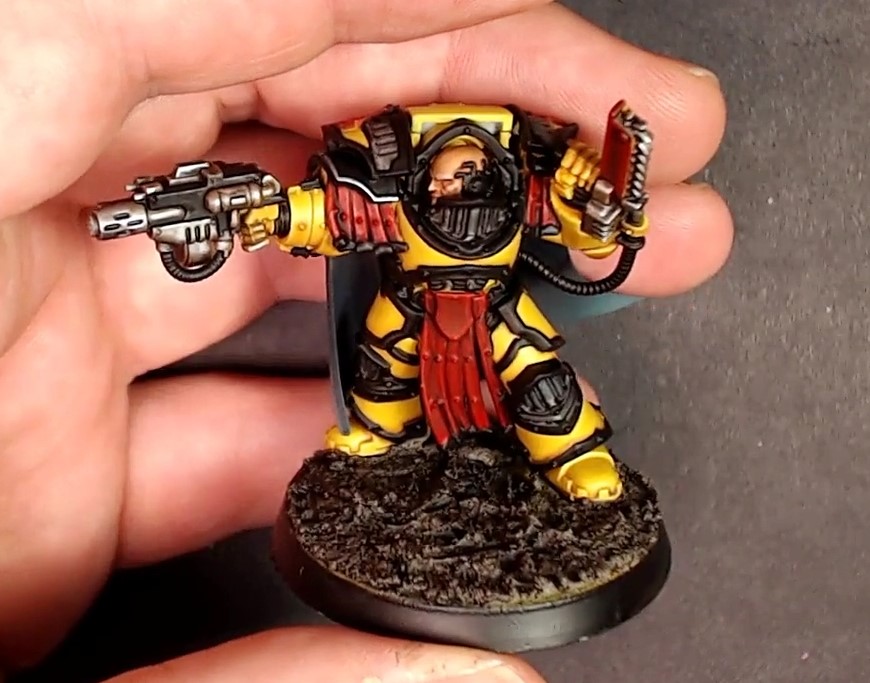
The guide to assembling and painting Imperial Fist models is nearly complete. Part 1 showed how to assemble and prime the model and part 2 showed how painting yellow is secretly easy. Now, time to take the model to tabletop game ready and still show hobby love to the model. Be sure to scroll down and press play on the video below to see the last step in the 3 part tutorial.
First off, Thamar Black by P3 is applied along the trim. Using a small brush, the paint is easier to apply along the small areas and helps prevent the paint from getting on the yellow. Go slowly in this area and use slightly thicker paint than usual, if needed. If needed, apply a second coat until coated.
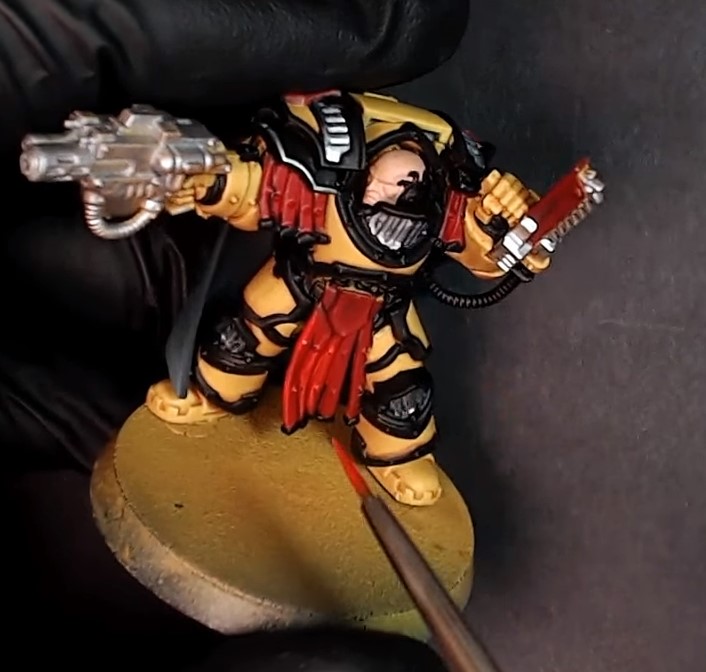
Sanguine Base by P3 is used to slowly building up the iconic reds that stand out on the Imperial Fists. Don’t build it up too quickly, add several thin coats in order to make the final coat be smooth. Mephiston Red by Games Workshop is applies over the Sanguine Base to make the reds even brighter in thin coats. Over the shield, trace around the edges so it applies a highlight rather than overpowers the entire model. Evil Sunz Scarlet by Games Workshop is edged onto the red parts to add a bright highlight, as well as other spots where light would catch.
Scale75 Heavy Metal is brushed on the weapons to get a good, smooth base down. As well, it is added onto the face guard in order to make it stand out. Midlund Flesh by P3 is added over the face to get the base of his skin down.

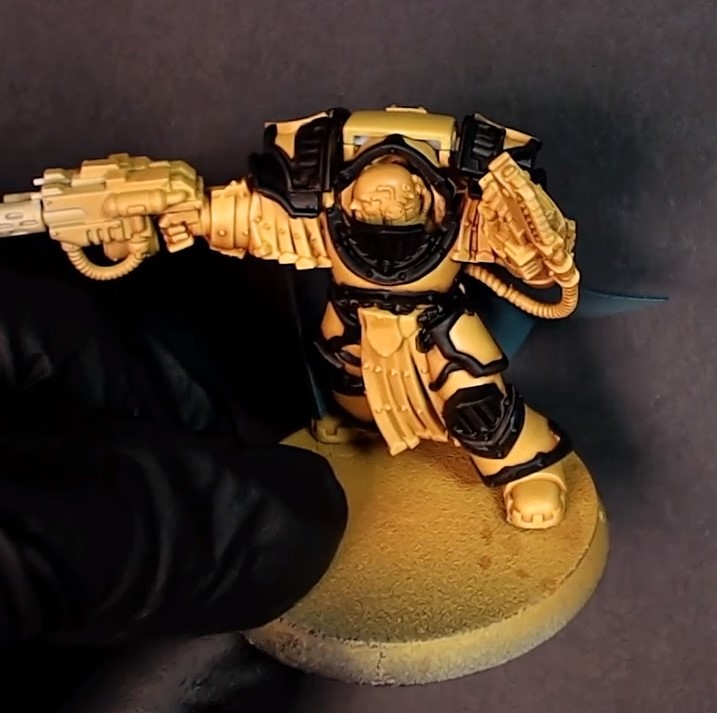
Vallejo Dark Earth is slathered onto the base to add texture and character to the base itself. Using a buster brush to slather it on then a texture tool to push the pumice around and get the pumice into the details helps make the base look awesome.
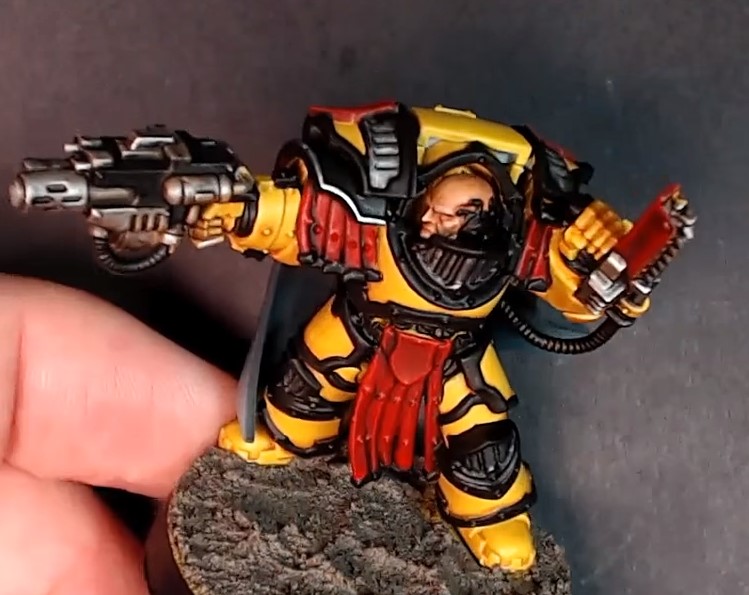
Army Painter Strong Tone is applied over all the reds, getting the wash into the crevices and around all the nuts and bolts around the model. Dark Tone is added around the metals, blacks, and silvers to get great contrast on the metals. Be careful not to get any of the washes on the yellows, or you will have to redo the highlights! Flesh Wash is applied onto his face to add contrast and clean look to his skin. Strong tone wash can be applied to the pumice to get great shadows on the base and make things pop.
Finally, rim the base black! After that, you have a model completed to tabletop standards. There is more you can do to take the model to the next level, but it currently pops and looks amazing! To see the entire process of bringing this model up to tabletop quality, be sure to press play on the video below!