Today Max Dubois of Hellfire Painting is going to be showing us his 10 easy steps to weathering models with hairspray that is perfect for beginners and veterans alike.
Learn how to master this simple weathering technique that smells delicious!
In last week’s article on dozer blades, one of the steps used the hairspray technique. I’ve been using it for so long and for so many different projects, I didn’t expect it to raise so many questions.
Always one to please my faithful readers (all 4 of you) here it is broken down into easy steps and explanations.
The Hairspray Technique: 10 Easy Steps
First and foremost, the hairspray technique is used for weathering. It’s perfect to make paint look beaten down and worn out.
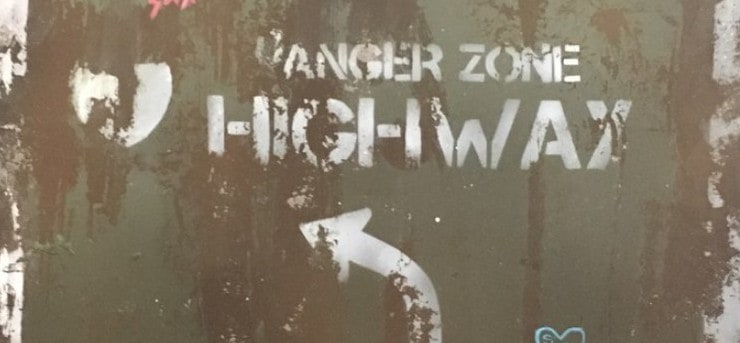
The dozer blade from last week’s tutorial or the street sign from my ultramarine army are both done with this technique.
How to do it
- The steps are pretty simple:
- Pick a base color and apply it. So far so good.
- Varnish.
- Apply hairspray over your model in 2-3 light coats.
- Airbrush the color you want to weather the crap off on top of this.
- Apply a thin coat of water over your model where you want to peel away the paint.
- With a large old brush, brush over the areas you want to weather.
- You can keep a paper towel nearby, to add and sponge away water as you work on your weathering.
- Once you are satisfied with the chipping paint look, set your model aside and wait for the water to evaporate.
- Varnish over your model once again.
Why it works
- This technique is pretty effective to create the worn paint look because it’s actually how it’s made: by hacking paint and removing it.
- The key to this technique is the hairspray, as the name suggests and the water. Hairspray is very fragile to water, so when we add it with a large brush and strike it around, the now wet hairspray lifts of peels with the paint that we laid on top of it; revealing our base color, painted a suitable rust or metallic hue.
- Because we want the water to reach the hairspray under the paint, it’s important to use light and thin coats with your airbrush. I also try to limit the highlights to 1 or 2. For example, the dozer blade yellow is 4 coats thick ( Black, Black’s highlight, Yellow and yellow’s highlight ) and is harder to peel off.
- The base color stays in place because we were smart enough to varnish before adding the hairspray.
- You can control how much paint you remove by having more or less water on your model and brush. Less water will make it harder to lift the paint.
Get the best results
Here are a few pointers learned from my extensive use of this technique:
1. Basecoat is the best coat. The color you lay on first plays a huge impact on the overall look of the model. And because we’re varnishing it anyway, you can add as many layers of shading and highlight as you wish.
2. Use the most generic and odorless brand of products. Things like hairspray are not built with miniature painting in mind, and all these chemicals can alter how it works on the paint. One such example is lavender-smelling products, that seem to retain their intrusive smell for decades and through layers of varnish and products.
3. Additional work not required. In some cases, you can paint your model with only the steps shown above and get decent looking weathering. But you can do more if you want to. The last coat of varnish sets up your next steps, whether it’s oil washes or edge highlights and seals off the weathered look so you don’t mess it up during these latter steps.
4. Too much > Too little. At least when it comes to the hairspray. Nothing beats just the right amount, obviously; but if you’re not sure, this is the one place where going a little heavy-handed pays off. If you don’t have enough on, the paint will stick on your models and you won’t be able to remove it; which is kinda the point here.
5. There is a similar technique floating around the internet using salt. I’ve only tried it a few times and it was not my favorite thing. I might give it a try later, but I strongly advise to stick to this if you’re beginning in the weathering department.
6. I use this on everything from bare metal to rusted billboard, but also on tank markings. This technique is probably the easiest to get the look that your squad markings are damaged on top of your paint.
