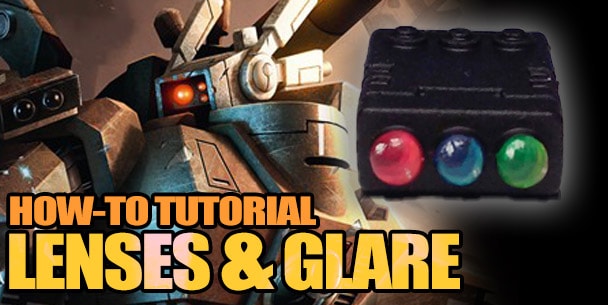
 Come see 3 great recipes for painting lenses, glare, and more on your miniatures to pull out every last bit of detail that you can!
Welcome to one of our throwback tutorial posts we’re publishing again for readers to enjoy as they spend more time hobbying while social distancing. You can check out all of our past tutorials for the last 10 years at this link here.
Hobby Tutorial: Putting a Realistic Glare on Your Lenses
 If you’ve got your paints ready and you’re looking at your model wondering “what can I do to make it pop?” we’ve got some answers for you here. Taking a look at the lenses, you’ll need these colors. Note: You can create a glare for any lens color you’re working with. You’ll just want to use progressively lighter colors.
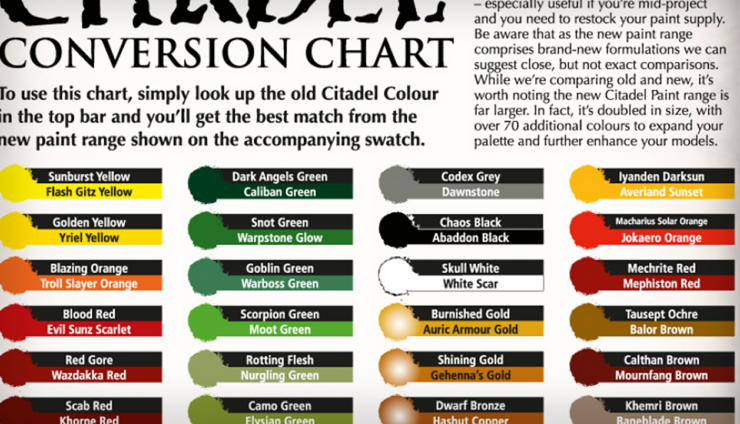
The colors required are as follows:
Red-
1. Mephiston Red
2. Evil Sunz Scarlet
3. Wild Rider Red
4. Troll Slayer Orange
Blue-
1. Macragge Blue
2. Teclis Blue
3. Temple Guard Blue
4. Baharroth Blue
Green-
1. Warpstone Glow
2. Warboss Green
3. Moot Green
4. Yriel Yellow
All-
1. Ceramite White
2. Ardcoat
Start With A Crude Base Color
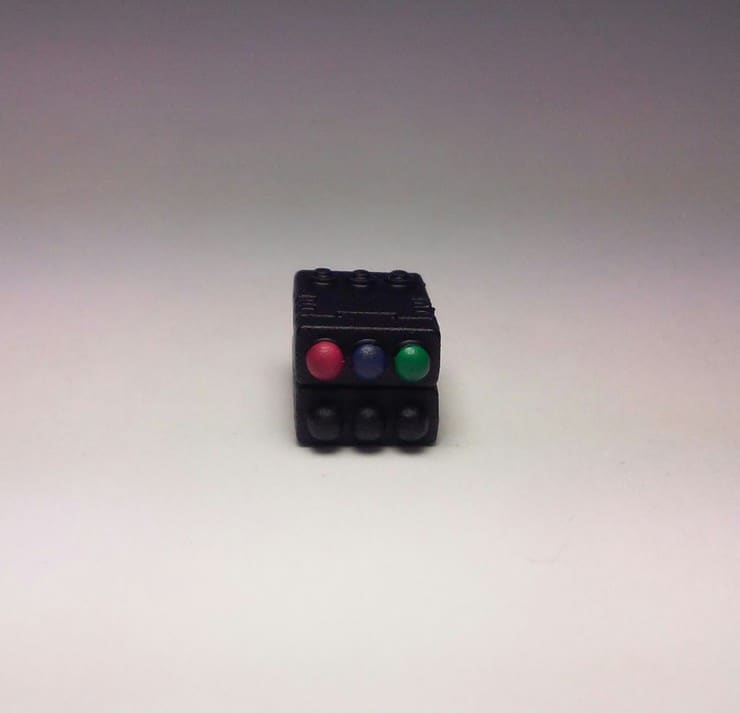 To start, base the first color over the whole lens/gemstone area. This doesn’t have to be pretty. Just pick a solid color to roll with.
 After your basecoats are applied we’re going to want to start making the gemstones look reflective. This is easier than it sounds. You will want to take your second (lighter color in the list from above) for the gemstone and apply it in a crescent moon pattern over the first color. leave a small circle in the top side the original color. Red- Evil Sunz Scarlet, Blue- Teclis blue, and Green- Warboss Green.
More Layering Lighter Colors
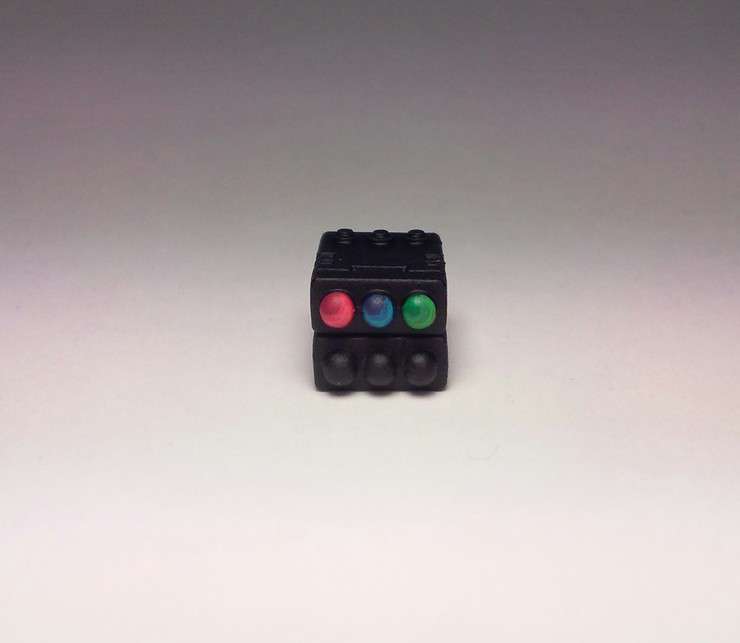 Now you will take the third color for your gemstone and apply it just to the outer edge of the crescent moon. So it appears to be getting brighter towards the bottom of the gemstone. Red- Wild Rider Red, Blue- Temple Guard Blue, and Green- Moot Green.
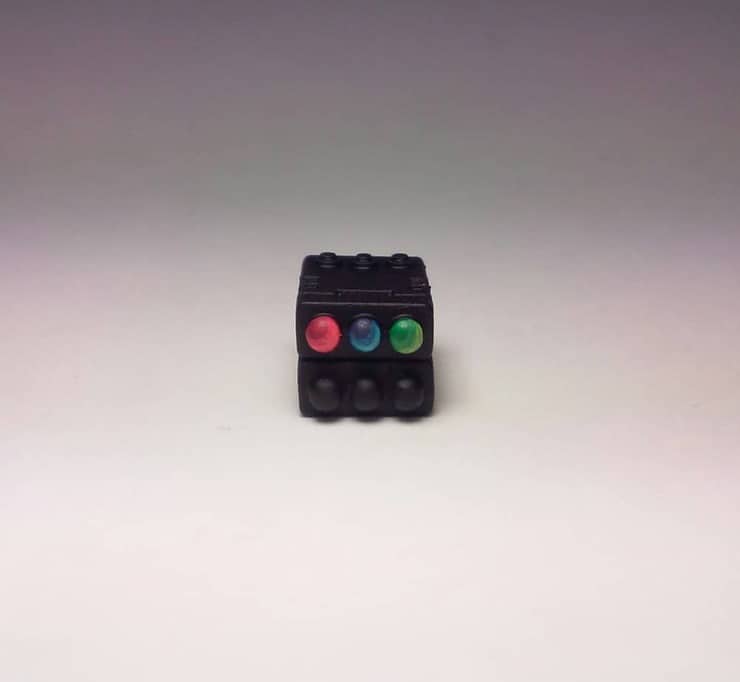 Once that is done you will be ready to use the fourth and lightest color for each gemstone. Just like the last step, you will want to apply this color just to the outer edge. This time, however, only do a small portion of the outer edge in the color. Red- Troll Slayer Orange, Blue- Baharroth Blue, and Green- Yriel Yellow.
 Now you will want to make it look like the light is bouncing off it. To accomplish this you simply add a dot of Ceramite White to the top of the dark circle that we left. Then, add a smaller dot of Ceramite white on the opposite side of the gemstone in the brightest part.
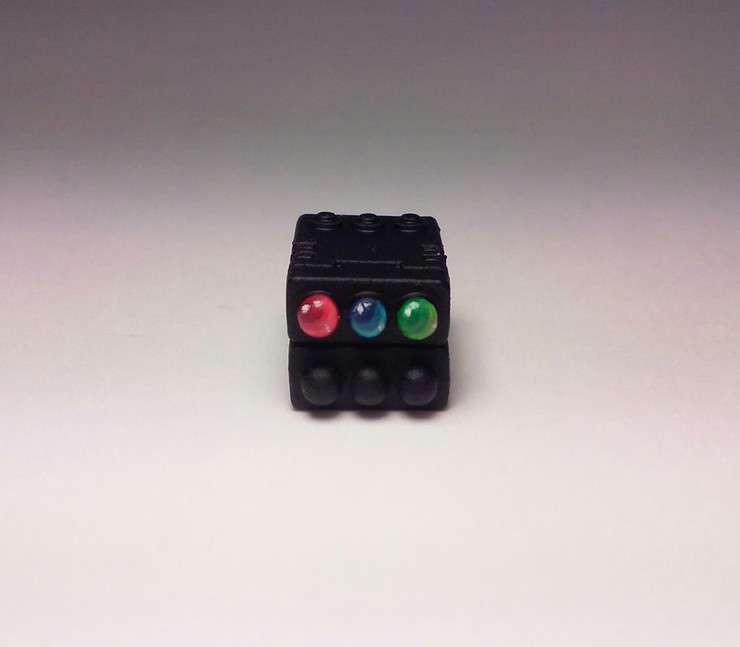 This last step is optional. You can add Ardcoat once you’re finished to give it that last bit of REAL light bounce.
As we said, it’s a lot more simple than you might realize and doesn’t take too much time in the grand scheme of things. Just don’t be heavy-handed with your brush strokes and try not to cover up the darker layers you’ve just painted when you’re applying a lighter layer.
Has this tutorial been helpful to you? Have you used this technique on your models?
Let us know in the comments of our Facebook Hobby Group, and make sure you enter the latest monthly giveaway for FREE today!