Learn how to get your old school Plague Marines fitted for the Death Guard with this awesome painting tutorial from Jack of Clubs Painting.
Jack of Clubs Painting is a regular here and today he’s giving us some advice on turning your old OOP Plague Marines into Deathguard. Those old minis are super cool and if you have them lying around from 1996, might as well use them! Don’t worry, 1996 wasn’t that long ago, was it?
Follow along with the video for a detailed tutorial to get these minis done right! Or you can use our notes to check out all the highlights.
Painting Death Guard Plague Marines: Tutorial
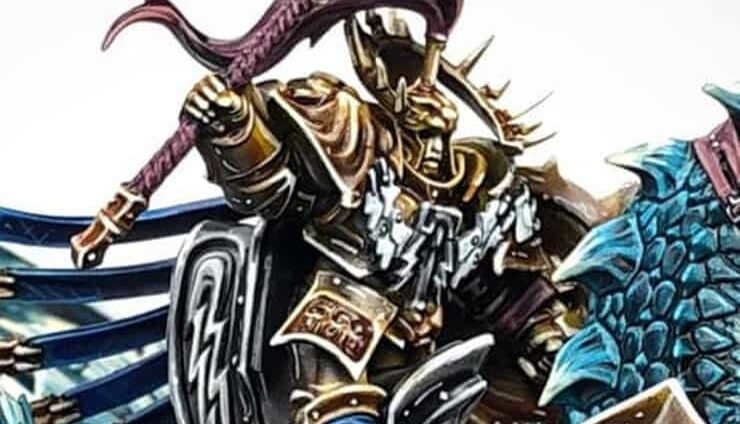
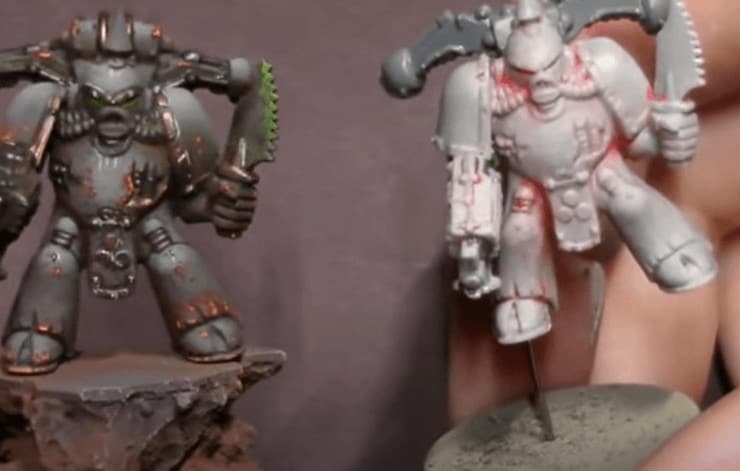 He’s going to show us how to take a mini from the bare plastic to the mini on the left. Oh, the nostalgia is already kicking in! You can get yours from Pop Goes the Monkey right now!
Priming
 Start with a Stynylrez black primer and cover the whole model. Then put Monument’s Burnt Sienna into your airbrush and spray the model from underneath. You want to cover the majority of the underside here so when you spray the other colors from the top it will give it depth.
 The next step is to put Dark Camo Green in your airbrush and hit the model from the top down this time. Cover the majority of the model here, nothing fancy. Once dried add some Bright Neutral Grey to the green and start a broad highlight from the top down. Be more precise here than the last stage, but you don’t have to be super careful.
The final step of the priming is to mix Bright Warm Grey with the green. Do spot highlighting with this color and make sure to get all the raised areas. Don’t worry if it seems to grey at this stage, we’ll fix that later.
Chipping
 Start with Monument’s Burnt Sienna. Take a hobby tool (or use the ole trusty tweezers) and put a sponge on the end of it, then dip the sponge in the paint. Just make sure to wipe most of it off before you start, you don’t want too much on the sponge at any one time. Then just start hitting little spots all over the marine to give it a weathered look.
Once done, take a brush and smooth out the areas of the Burnt Sienna that need it. Continue with the brush and push the Brunt Sienna into the cracks and details. You can really see the initial coat when looking at the bottom of the mini.
Blocking in the Details
 With Monument’s Bronze Metallic hit all the areas of metal on the mini like the edges of the shoulder pads and body armor edges. Make sure to get a good base coat here. It should go on easily because of the lighter paint scheme. Next, take Monument’s Dark Silver Metallic and hit all the tubes, swords, and hoses. Pretty simple base coating stuff here. The last stage is to grab a brown and block in the wood detail on his bolter.
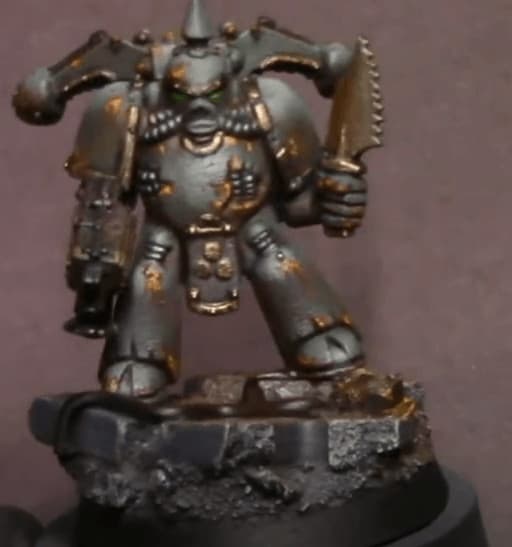
Full Model Wash
 This stage is pretty straight forward, give the whole model a wash with Mr. Weathering Color Multi Black. First, you cover the model with the solvent, then slowly add more and more of the wash to the model. Just make sure you don’t get buildup on any one part of the model. This really brings out the detail of the Marine.
Highlighting
 Grab some Pro Acryl Orange and start detailing the armor chips with it. Use a very small brush here and just hit it quickly. There’s a lot of rust so take your time on this stage. Then mix some grey and brown and highlight all the wood bits. Next, grab some Bright Pale Green and hit the bronze and rivets with a tiny bit of paint.
To finish the model off, take a Bright Yellow-Green, and hit the eye slits. And that’s it! Pretty simple and the end result looks amazing.
With that, you’ve transported the model from 1996 and it’s looking ready for 9th! If you want to learn more from Jack Of Clubs insight, watch the full video! And if you love his work, check out another great set of painting tips here.
Follow along with the latest from Jack of Clubs on YouTube or LIVE on Twitch four nights a week!
This post contains affiliate links, as an Amazon Associate Spikey Bits earns from qualifying purchases.
About the Author: Travis Pasch

Travis Pasch
Job Title: Head Writer & Editor
Socials: @paschbass
About Travis Pasch: Travis has been a Warhammer 40k hobbyist since the 1990s, playing the game since Third Edition. Through extensive traveling, he’s seen a lot of the miniatures hobby from across the world, giving him a unique perspective on the latest gaming topics and trends.
Travis’s brother even owns a commission painting studio, where he’s picked up a lot of good advice and techniques for painting Warhammer and tabletop miniatures over the years, as well. Travis joined the Spikey Bits team in 2019 and has been the lead writer since 2020.
Currently, he’s working on converting all his 40k Adeptus Mechanicus models and becoming a true tech enjoyer, complete with both sad and happy robot noises!