Painting Nurgle Poxwalkers can be daunting, fear not! Here is a quick and easy tutorial for painting hundreds of them all at once!
These Nurgle Poxwalkers, identifying as Malefic Lords, are painted using Army Painter’s line of paints. These paints have been fantastic to airbrush and brush paint with, and their washes have improved greatly.
This tutorial uses a lot of airbrush work, however, if you don’t have an airbrush, you can still use this tutorial easily by using primers and the Army Painter color matches. For example, Army Painter Necrotic Flesh Primer is color-matched with the Necrotic Flesh straight from the bottle and you’re good to go. The Army Painter color line is robust and growing, with great quality products. The metals have been fantastic as well to use an airbrush with as well. Let’s jump into it!
Painting Nurgle Poxwalkers Made Easy: Tutorial
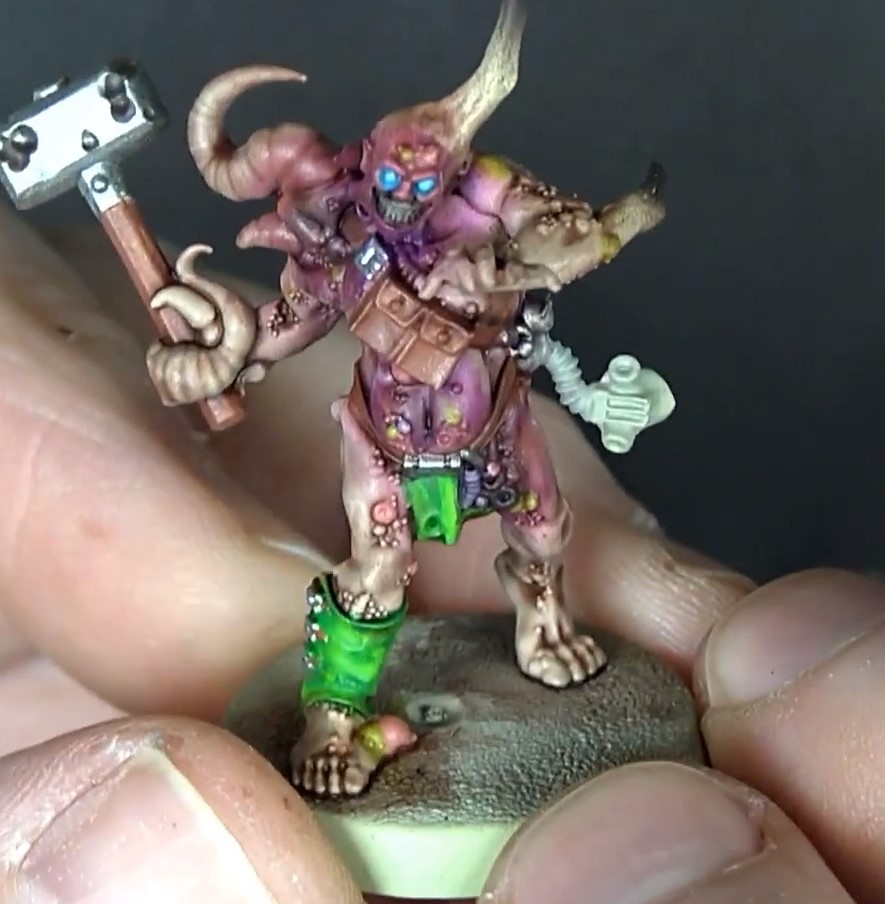
 Here is the end result we’re going for! They look great and are super easy! Let’s see how to do it.
Applying Basecoat
 The first step is to prime with Necrotic Flesh. Corpse Pale is then used to basecoat the model with the airbrush. The Necrotic Flesh lays underneath the Corpse Pale nicely. It enhances the sickly look that is uniquely Nurgle.
These steps can be bypassed if you do not have an airbrush by priming with Necrotic Flesh or painting on Necrotic flesh. Then washing the model and building the color up with the brush. To produce fades with the exact same colors.
Layering & Details
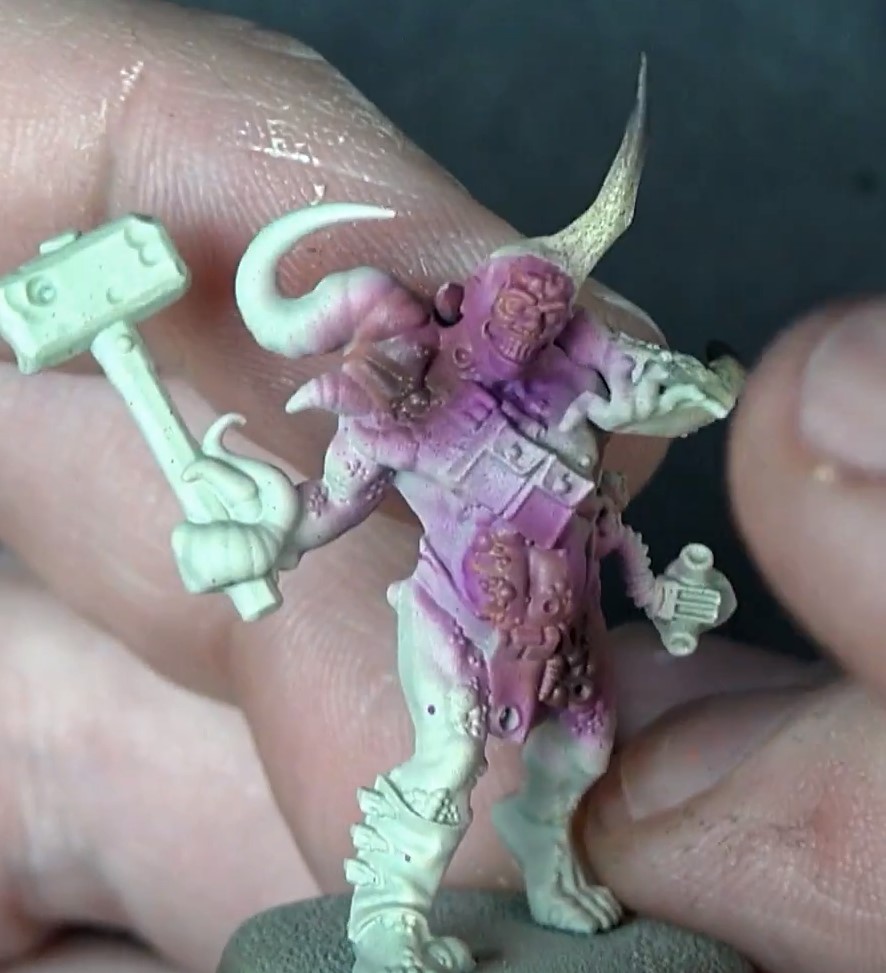
Once the Corpse Pale is added, disease detail will be coming next. Such as bruising around open sores and a gory look to those sores as well. Using the Airbrush, apply Orc Blood around and on the open soars, spraying wide around the sores as tans and fleshes will later be applied to get in the great bruised feel. Tanned Flesh is then sprayed over the purples towards the center. Skeleton Bone was sprayed onto the bone spikes as well. Dark Stone was then added as highlights to the tips.
These same effects can be done with a brush, using these same colors and the glazing technique. After these steps, either via brush or airbrush, Matte Varnish is added to seal the paint to prevent the paints from accidentally rubbing off.
Hitting the Leather and Metal
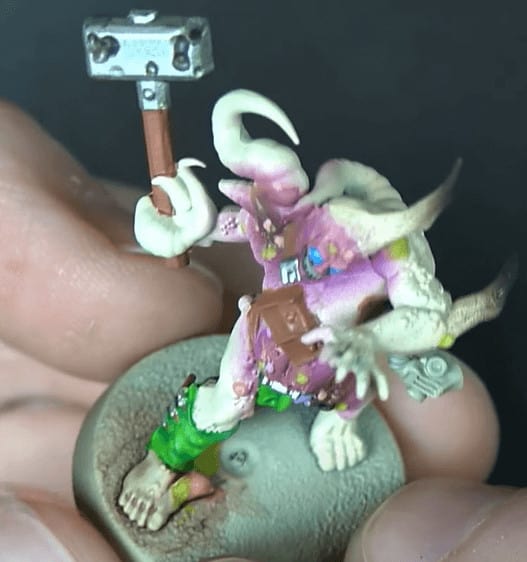 With the paintbrush, lay down Fur Brown as a basecoat on the leather straps and the heft of the weapon. Greenskin is then used to block in the grieves and tabard. Plate Mail Metal is added to all metal bits and Filthy Cape is applied to the mask. Dark Stone is added to the mouth area and enhancing some areas on the metals.
The colors Toxic Boils, Witch Brew, Babe Blonde are used to dot all the boils and skin bubbles to accent prior to the washes enhancing the shadows. Poisonous Cloud is then used to add traditional highlights on the tabard and greens. A light drybrush of Skeleton Bone is added to the teeth to add definition and bring out the details. Crystal Blue and Voidshield Blue are used for the eyes.
Wash Work
Flesh Wash and Purple Tone will be primarily used to bring out the details and shadows. The first mix is 80% Flesh Wash, 20% Purple Tone, and are mixed in a separate palette. The wash can be cut with Wash Mixing Medium, which is a tension breaker. Then the wash is added to the pale flesh areas of the model from top to bottom, allowing gravity to help the wash drip down into crevices. The wash can be built up over consecutive coats to add neat tones to the flesh as desired.
After it dries, Purple Tone is added straight to the purples prior to the model being coated a second time with the previous mix. Strong Tone is mixed 50/50 with Dark Tone to wash all the metals. The leathers are washed with Strong Tone directly. Dark Tone is used for the greys.
Military Shader is used on the greens directly, giving it some depth and toning the greens on the cloth down.
Allow your washes to dry completely between coats, unless you are looking to specifically mix washes, as was done above! If your washes say “Ink” on the bottom instead of “Washes”, do not use them in this, as they will not function the same way as these are used.
Final Result
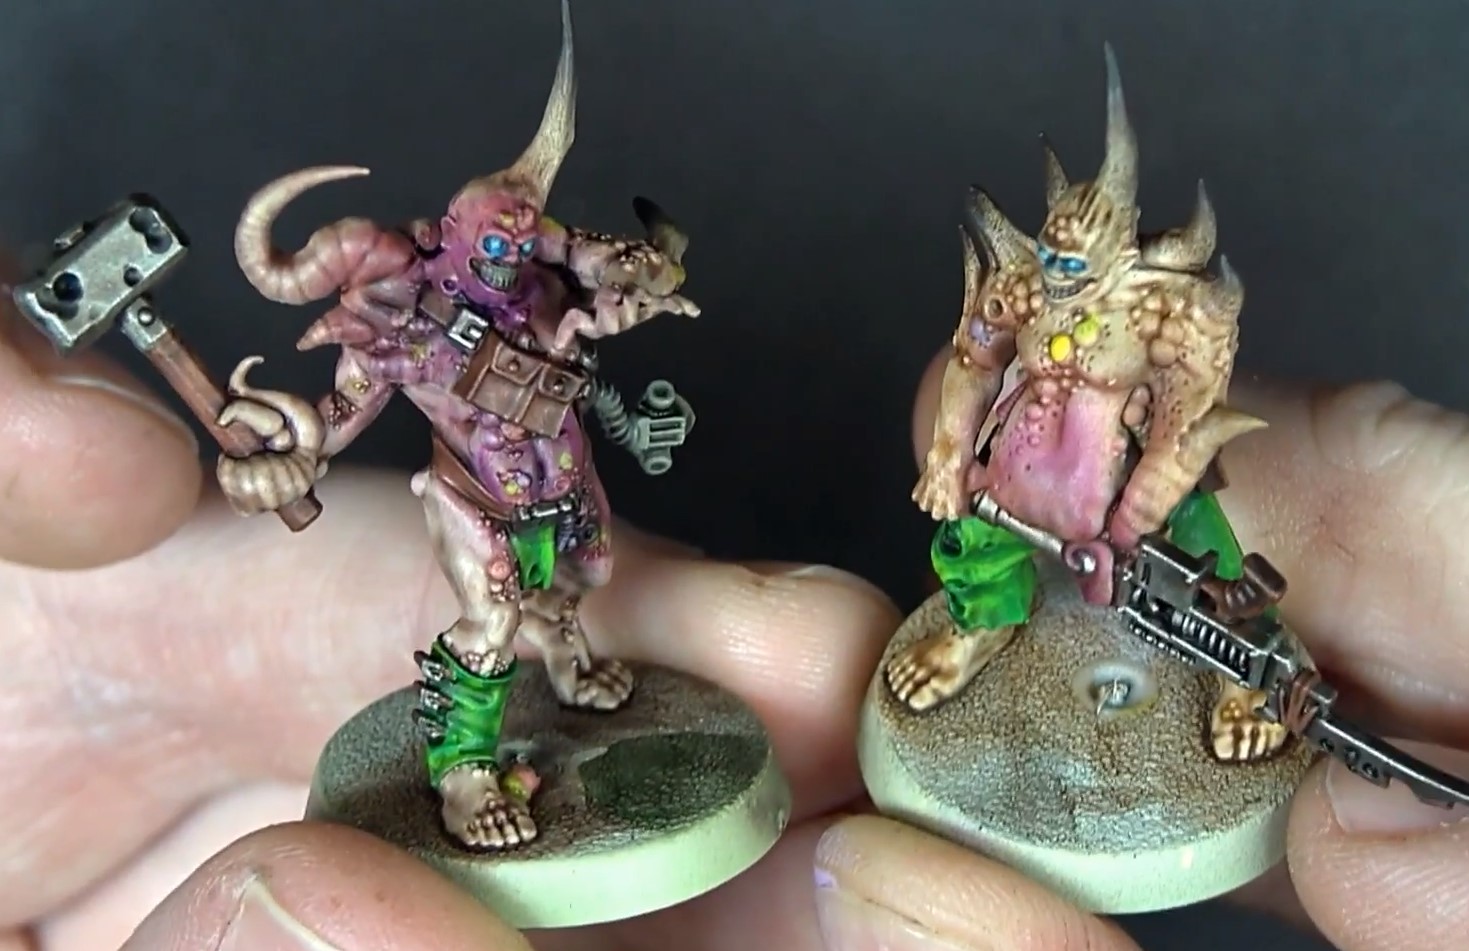
With a few easy steps, these look amazing! Adding the highlights to all raised edges vibrantly then toning things down with the tint gives the model a sickly, bruised appearance. The final step is to add Matte Varnish to set everything and add a base. Overall, the Army Painter system is easy to use and allows for washes to really enhance the color tones of all their paints.
How many Poxwalkers do you have currently to paint? What’s your favorite method for painting a bunch at once?
Let us know in the comments of our Facebook Hobby Group, and make sure you enter the latest monthly giveaway for FREE today! You can also support us on Patreon and get ad-free access to the site, plus a ton of minis that helps support some of the best creators out there!
About the Author: Travis Pasch
Travis Pasch
Job Title: Head Writer & Editor
Socials: @paschbass
About Travis Pasch: Travis has been a Warhammer 40k hobbyist since the 1990s, playing the game since Third Edition. Through extensive traveling, he’s seen a lot of the miniatures hobby from across the world, giving him a unique perspective on the latest gaming topics and trends.
Travis’s brother even owns a commission painting studio, where he’s picked up a lot of good advice and techniques for painting Warhammer and tabletop miniatures over the years, as well. Travis joined the Spikey Bits team in 2019 and has been the lead writer since 2020.
Currently, he’s working on converting all his 40k Adeptus Mechanicus models and becoming a true tech enjoyer, complete with both sad and happy robot noises!