 Kenny from Next Level Painting is back to help us paint 3 Plagueburst Crawlers in a fast and efficient batch painting style!
Today Kenny helps us tackle a bunch of Plagueburst Crawlers. This video is all about getting your units to a battle-ready standard. If you want to see how to fully finish the mini off, you can go see the rest on his Patreon here! Or if you want to see his previous tutorials, you can check them out here!
He’s going to be using techniques from his awesome 101 painting curriculum, which is a set of three easy lessons to get your minis on the tabletop fast and looking good! Get your paints and brushes out and let’s go!
How to Paint 3 Plagueburst Crawlers: Next Level Painting
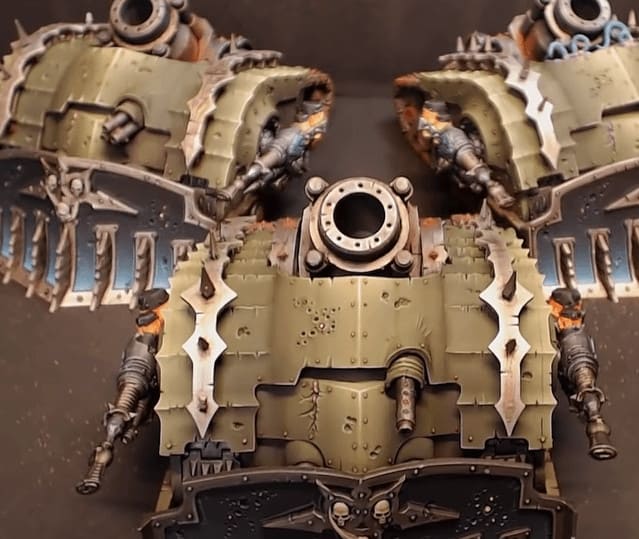 Because Kenny is a marketing mastermind, he’s showing you the end result first! Let’s see how to do it.
Laying Down the Metal
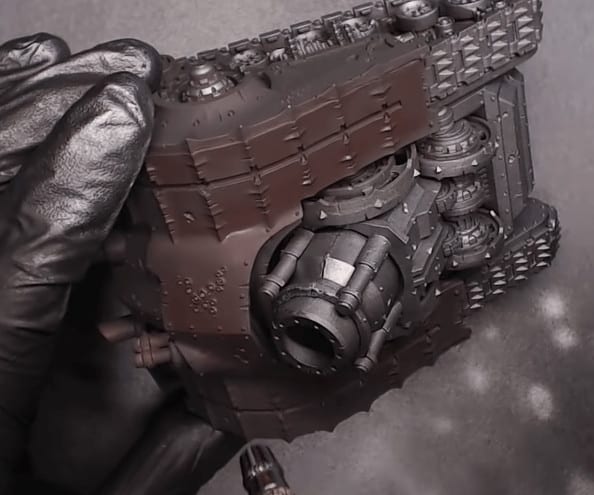 He base coats them with the Black Brown from Monument Hobbies to start. Then he goes a little out of order, in a way. He takes a Dark Silver and lays down a layer of thin silver over all the metal bits. This will save you time later. Then he washes the brush out and goes back with the Black Brown and cleans up all the areas where he had some overspray.
Airbrush Fades
 He uses Bright Yellow Green and mixes it with the Black Brown in the airbrush. He just tries to hit brighter and brighter layers by adding more and more green in very thin layers. Just incrementally raise the color as you do more and more passes. Just keep the opacity lower and lower the brighter you go. The final color, he adds to the mix here is Bright Warm Grey.
Weapon Effects
 He loads up the airbrush with some yellow and hits all the weapons canisters with it. Then add some orange (by brush) and hit them at the top to give them some contrast like it’s a glass canister. Lastly, he hits the very top of the canisters with black to show its liquid in the glass and then does a tiny line to give a little shine.
For the tubes, he does some highlights with Bright Warm Grey.
Details & Drybrushing
 First, he cleans up the green overspray with the same metal color as before. Next, take some Bright Silver and hit a drybrush on all the metal to just bring out the detail, just make sure it is very dry before applying.
For the bronze, he mixes a bright silver with bronze and hits everything he wants to be bronze. Then he switches back to the airbrush and hits all the spines with the same color mix but this time with the airbrush.
Dozer Blades
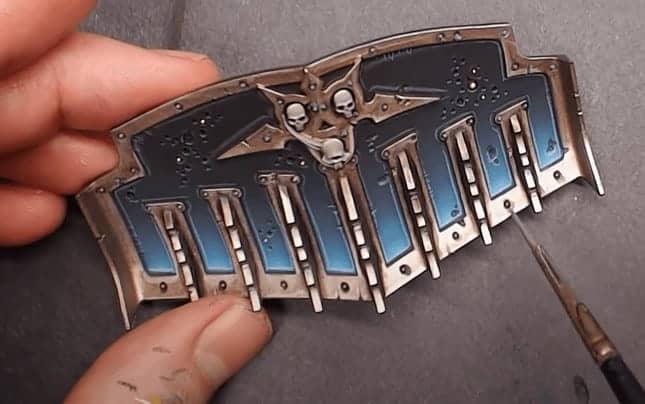 He’s going to paint these a little different than most people to capture attention from across the room. He uses a sort of Cyan blue, a mix of blue, dark gray, and a little actual cyan. He starts with the mix and hits them from the bottom up using the airbrush. He just keeps adding a little more cyan with each pass and moving the highlights further and further up the dozer blades.
Then he uses the bronze combo from above and hits all the bronze areas. Just be very careful here to not mess up your blue paint from before. After that he just brute force highlights the skulls. Next, he does some crips line highlights with grey to bring out all the contrast and just hits a bunch of highlight lines around the whole dozer blade.
While that’s drying he does a quick highlight on all the bronze. Then, he takes the Army Painter Quickshade and runs a quick wash on all the dark areas. To finish it off, he takes magenta and hits all the boil spots.
Weathering for Battle-Ready
 For this, he takes the Multi-Black and Orange from Mr. Hobby and hits the black on most of the metal, and then some of the orange on where he wants it to look rusted. Places like all the nuts, some of the bullet holes, and whatnot. Then he takes some odorless spirits and hits lines falling down from the rust spots and nuts. This will create a super cool effect in just a few seconds.
Battle-Ready Minis
 If you want to see how to take it to the next level with all the highlights, check out Kenny’s full video on them on his Patreon! If you liked this tutorial, you can also support Kenny on his Patreon page, and stock up on all the great Chaos gear over on his Heretic Swag store.
Join The 101 Painting Curriculum From Kenny
This post contains affiliate links, as an Amazon Associate Spikey Bits earns from qualifying purchases.