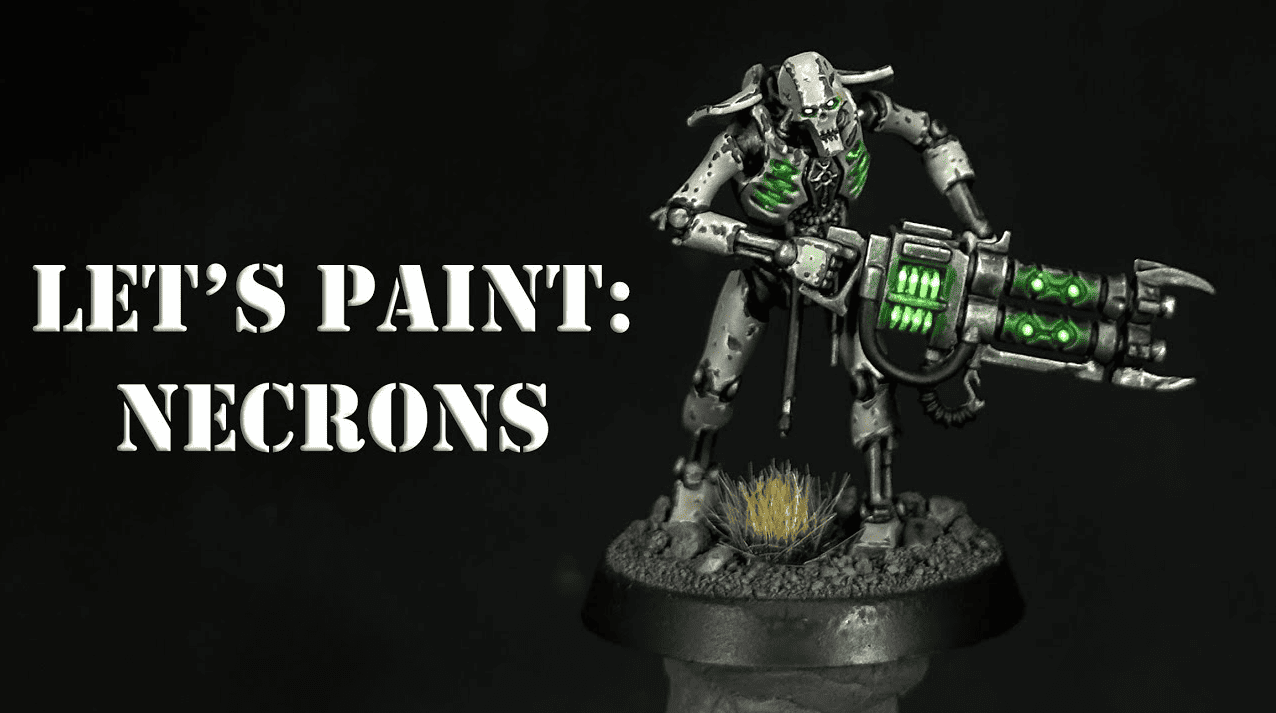
 Don’t miss this corroded metal and green style of painting Necrons up quickly yet effectively in this how-to-paint tutorial!
Col Festus has some unique hobby content, and if you need some sweet painting tips, you should follow him to get up on all your painting and conversion techniques!
He also paints up a ton of Makers Cult files, which are always fantastic, and you can score yours here!
This time, he shows how to paint up a corroded metal style of Necrons with green Highlights; let’s see how to do it!
Painting Corroded Metal & Green Necrons: Tutorial
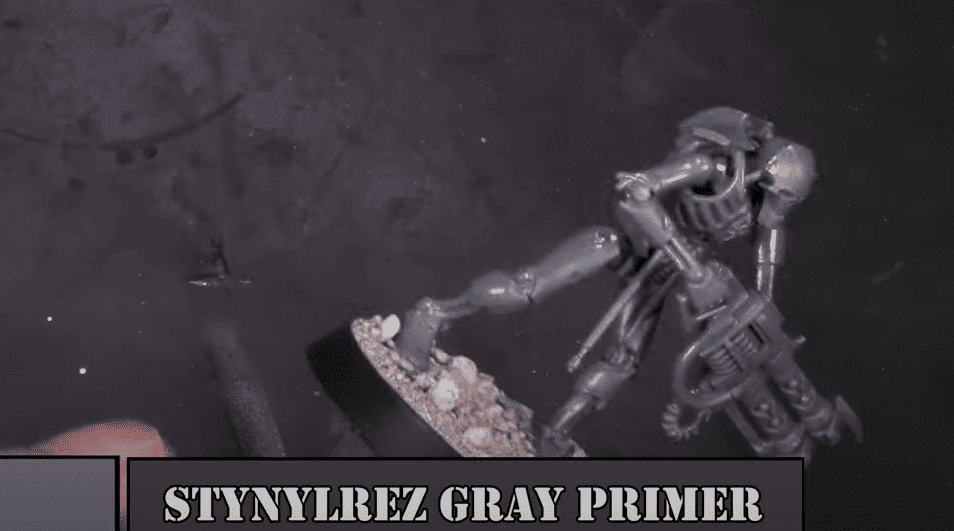 He primes the model initially with a Stynylrez Grey Primer, but before we get more into the tutorial, here are all the paints that he uses for this:
- Rakarth Flesh
- The Army Painter Speed Paint 2.0 Gravelord Grey
- Speed Paint 2.0 Broadsword Silver
- Speed Paint 2.0 Hoplite Gold
- Speed Paint 2.0 Shamrock Green
- AK 3rd Generation Acrylics Deck Tan
- AK 3rd Generation Acrylics Grim Brown
- White
- Black
- Basalt Grey
- Fluorescent Green
- Vallejo Model Air Metallic Steel
- Liquitex Inks Fluorescent Green Ink
Step 1:
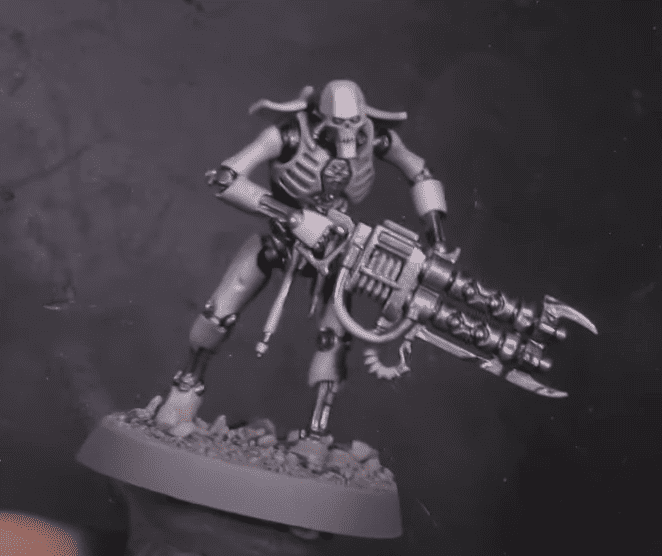 He starts by spraying the model with the AK Grim Brown and then does a zenithal highlight with Rakarth Flesh. Just be sure to do this from a top-down angle, as you want to keep the brown for your shadow tones. However, this is the main color of the model, so you do want most of it covered. To basecoat all the silver, he uses the Speedpaint Broadsword Silver; this is a super fast way to get a great-looking silver basecoat.
Step 2:
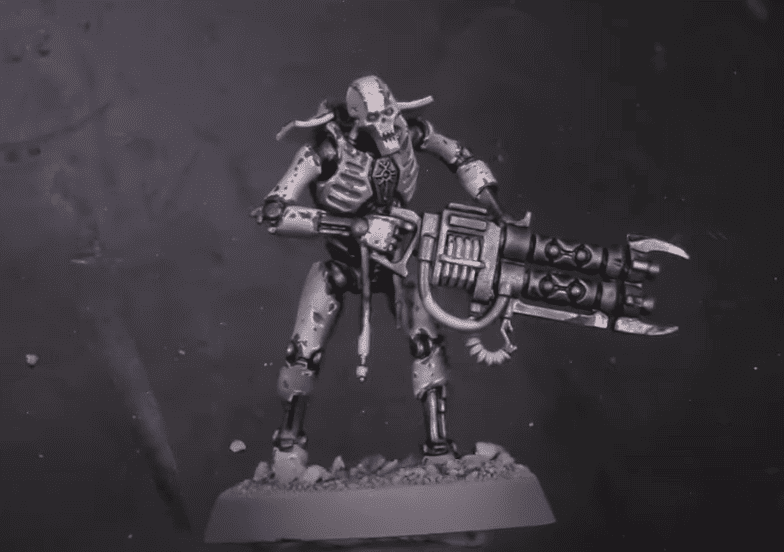 To start adding some depth to the silver, he mixes Gravelord Gray with the Speedpaint Medium and hits all the silver with it. Chipping is a big part of this paint scheme, and we’re doing that next! He starts with AK 3rd Generation Acrylics Deck Tan and adds chips anywhere he thinks looks good but focuses on the light source coming from above.
To add some depth to the chips, he takes AK 3rd Generation Acrylics Grim Brown and simply puts a dot anywhere there is lighter chipping.
Step 3:
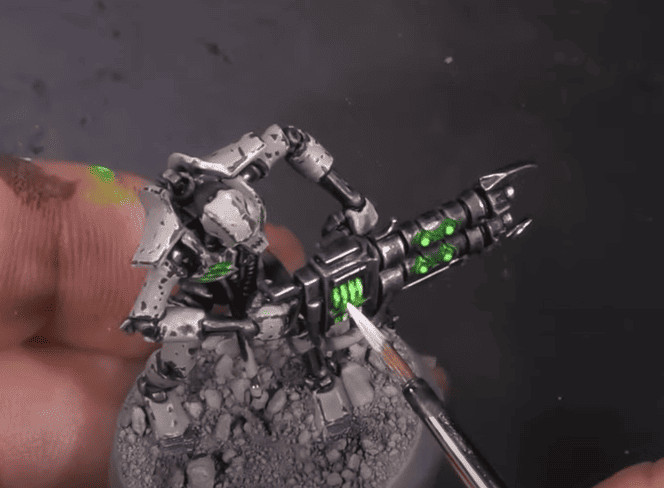 Now it’s time to start adding glowing effects! He basecoats everything he wants to be glowing with white; just get a good solid coat here. While that’s drying, he starts highlighting the silver with Vallejo Model Air Metallic Steel, just where the light would hit it the most, but you could also add some chipping effects here as well.
Now go back to the glowing areas and hit all the white with Speed Paint 2.0 Shamrock Green. Then establish your bright points, so go back to white and paint over the green where you want it to really glow. Finally, go over all the white areas with Fluorescent Green.
Step 4:
 While the green looks good, we’re going to make it pop even more! So, in the very, very brightest areas, go back to white again. He then blocks all the cables around the gun. Once Dry, he loads the Fluorescent Green into the airbrush and lightly hits all the brightest areas and some spots like the cables to truly give that glowing effect.
To push the pop over the top, he takes white again and hits the utmost bright areas to really give it a glow effect.
Step 5:
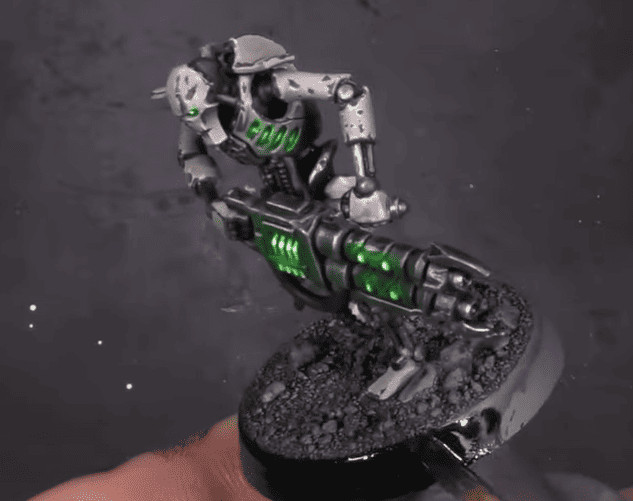 Now, onto the base. He takes Gravelord Grey Speedpaint and just puts it all over the base. Then, he just does a quick drybrush over the top with Basalt Grey!
That’s it, well, other than painting the rim black and varnishing the model.
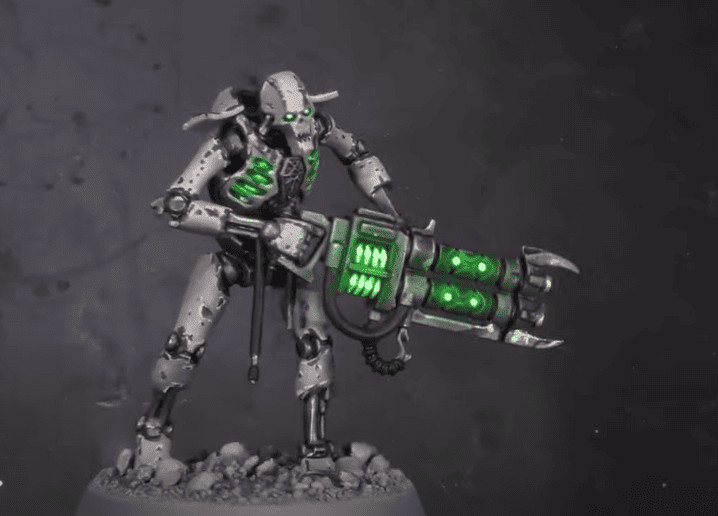
Finished Model
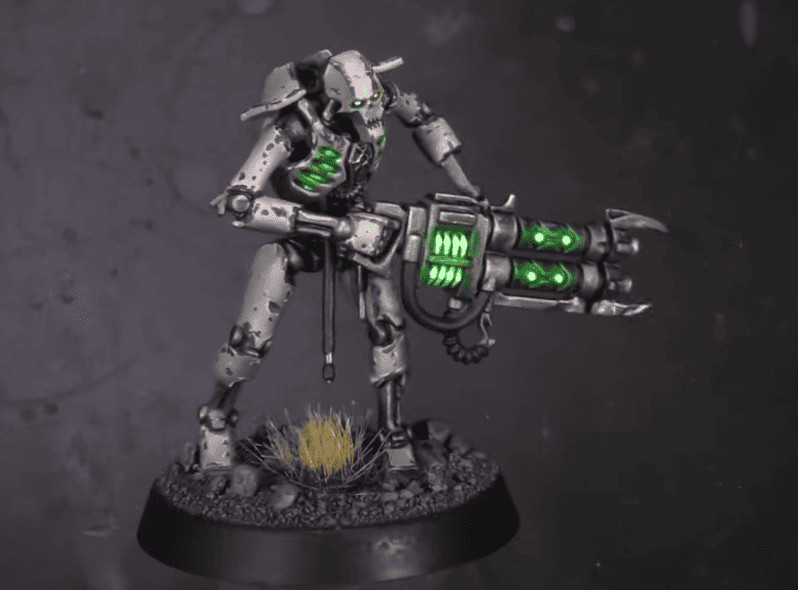 There you have it, a great-looking model in no time at all!
Follow Col Festus on YouTube Here!
What do you think of this how to paint Necrons in this painting tutorial?
Let us know in the comments of our Facebook Hobby Group, or our new Discord server, and make sure you enter the latest monthly giveaway for FREE today!
Get ad-free access to the site, a monthly crate of miniatures, and support some of the best creators out there for as little as $6 a month on Patreon!

 Click Here For All the Hobby Products & Tools We Swear By
This post contains affiliate links, as an Amazon Associate Spikey Bits earns from qualifying purchases.
About the Author: Travis Pasch
Travis Pasch
Job Title: Head Writer & Editor
Socials: @paschbass
About Travis Pasch: Travis has been a Warhammer 40k hobbyist since the 1990s, playing the game since Third Edition. Through extensive traveling, he’s seen a lot of the miniatures hobby from across the world, giving him a unique perspective on the latest gaming topics and trends.
Travis’s brother even owns a commission painting studio, where he’s picked up a lot of good advice and techniques for painting Warhammer and tabletop miniatures over the years, as well. Travis joined the Spikey Bits team in 2019 and has been the lead writer since 2020.
Currently, he’s working on converting all his 40k Adeptus Mechanicus models and becoming a true tech enjoyer, complete with both sad and happy robot noises!