Today we’re coming in hot as I take something I got off eBay, an epic Bloodthirster, applied my protocols to the model and got it looking fresh with almost no effort.
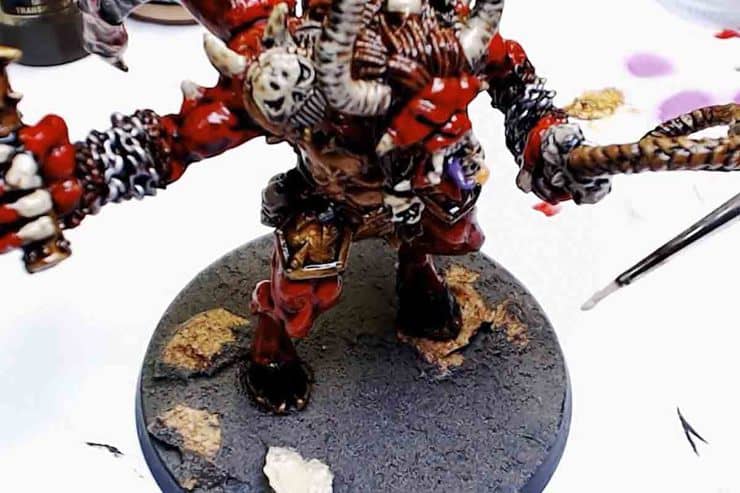
Here’s the Blood Thirster I got off ebay; this is the Original Gangster, pewter, model from way back in the day. I’m pretty sure I owned this model back in 1999 and now I’m super excited to have him back in my collection.,
Step 1: Color match, fix the chips, find all the things that need repairing and don’t over think it. This isn’t too far from what I normally due in getting like shades of color and building it up into sick transitions. I’m using random reds and random whites getting this up to par. The original painter stayed inside the lines and I can work with that.
Pro-tip: I purpose bought this model. I wasn’t looking for the worst or the best Blood Thirster. I was looking for one that had a solid coat of paint on it already. I wanted it to have been painted with colors I was comfortable working with. I didn’t want to throw a ton of time, which I just don’t have, into this model.
Step 2: Add any Embellishment bits. For this, I had a spare shield from a dwarf lying around. I glued it around his “crotchel region” and painted it up. I used bronze and some brighter golds.
Step 3: Touch up the other colors. While I’m on the brass I’m using the brighter gold and highlighting the armor. Then I’m going over the chains with my own silver colors. I’m adding some dry brushing to the hair and building up some depth. I’m getting the fur on his wrists. I’m building up these paints before the wash.
Step 4: Next up we’re going to gloss him over and seal him up. Then we’re going to hit with the wash. Hit it heavy. hit it often. Let the Games Workshop Gloss wash do the work build it up and get those big chunky details popping. This is legitimately real easy. Yes, it looks hideous because that shine is out of control., but we’ll fix that, don’t’ worry.
Step 5: Rebase. I add some cork, some pumice and painted it up. I use the Vallejo black wash, it’s basically an ink and darkens everything up.
Step 6: pick out the highlights and dry brush the base.
Step 7: The secret tech, Testors Model Masters, lusterless. Bam. Sexiness in a can.
Step 8: Hit some highlights. Use that same reds and then add a something a bit brighter. Work that highlight in by adding more orange and less reds and then thinner and thinner lines. Get the claws and the teeth you can go to town.
But wait. There’s more.
Step 9: Oxide on the Brass because that’s what brass does.
This isn’t the normal Next Level Paint job, but it’s solid, this is exactly what I needed and I’m happy with it. I hope you learned something new and I apologize for raising the prices on Ebay because now all those eBay guys are going to be able to charge us more.
To see first hand all the techniques check out the video and prepared to be amazed:
