Don’t miss the makings of GMM Studios Hexfleet Virules custom display board, as he shows you the beginning steps to creating a masterpiece out of foam and balsa wood.
GMM studios is responsible for some of the most creating eye-popping display pieces that really add another level of depth to the miniatures involved in the game. He recently shared this post on where to start when making a display board with us.
Hexflett Virules
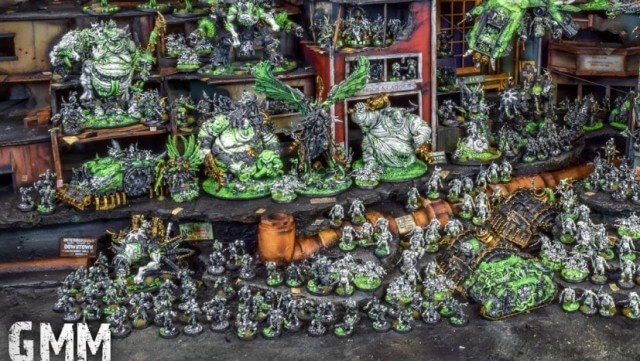
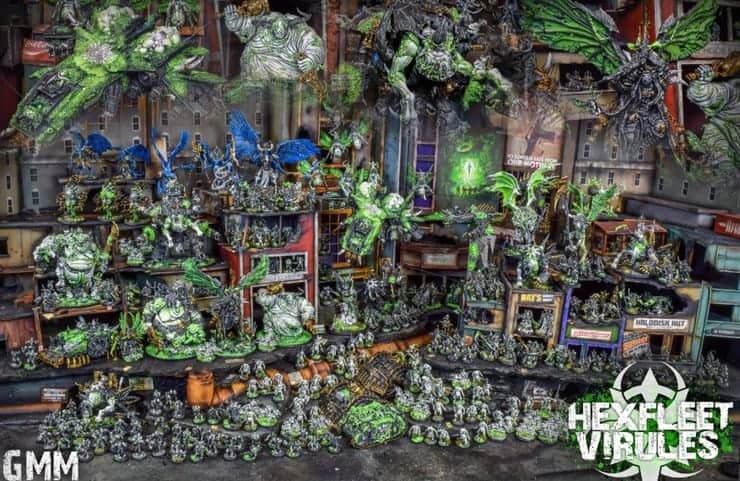
With an army of this size, you’re going to need a massive board. This isn’t something you can just walk around from table to table at a tournament. So let’s look at what you have to plan for when making a board.
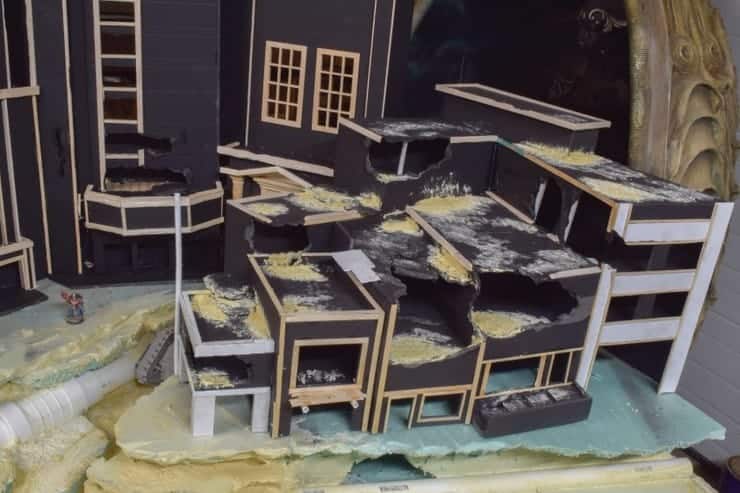
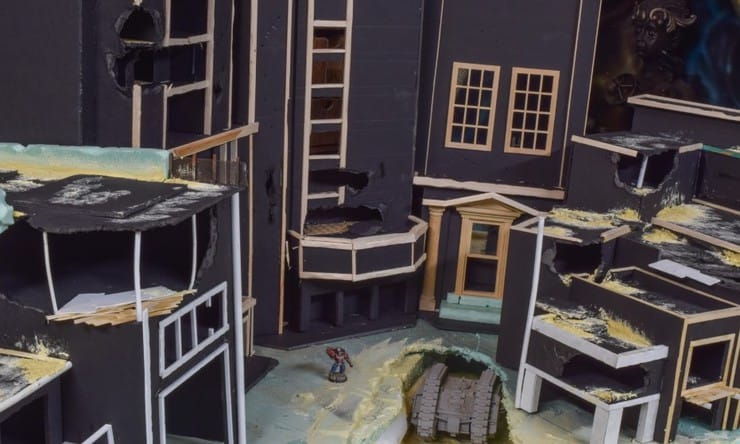
The giant Hexfleet Virules Nurgle army is pretty much a wrap! That means backdrop time. This is my biggest one yet, at seven feet wide and five feet deep. Needs to be quite large and also structurally stacking with “shelves” of space in order to get the army in there, and also give good images of every model. Each model being much more accessible than on a flat plane. Couple that with always wanting a really good and solid urban backdrop, and you have most of the inspiration for the work so far.
Building the Framework
Display boards can come in all sizes. Usually, they’re on the smaller side so players can carry them back and forth on game day. However, this massive board is clocking in at seven feet wide, five feet deep. Some key points to remember when you’re making a display board is you have to make sure there’s a place for every model.
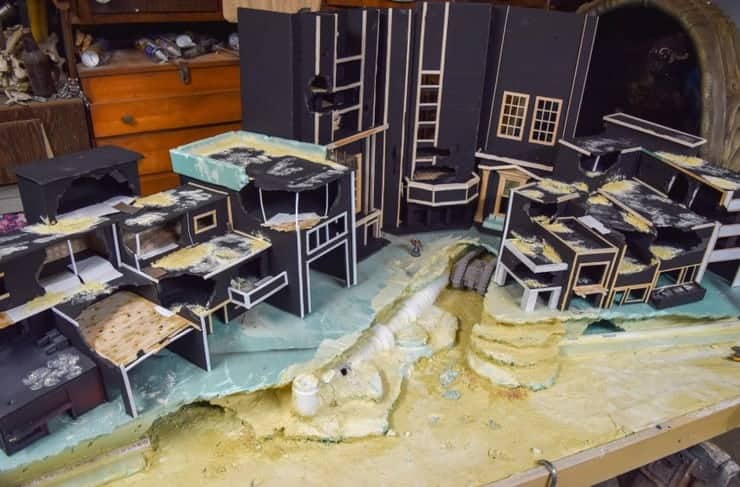
Will post paint updates with before and after as progress is made. The display is so large, in order to paint it each block of buildings is a separate sub section. Two clusters on each side, back buildings split up, and the base for a total of five.
You don’t want to cram a model in a corner somewhere and have it look awkward. Make sure that you add depth to your board with models standing on different surfaces/elevations. You want this to be your icing on the cake, your masterpiece!
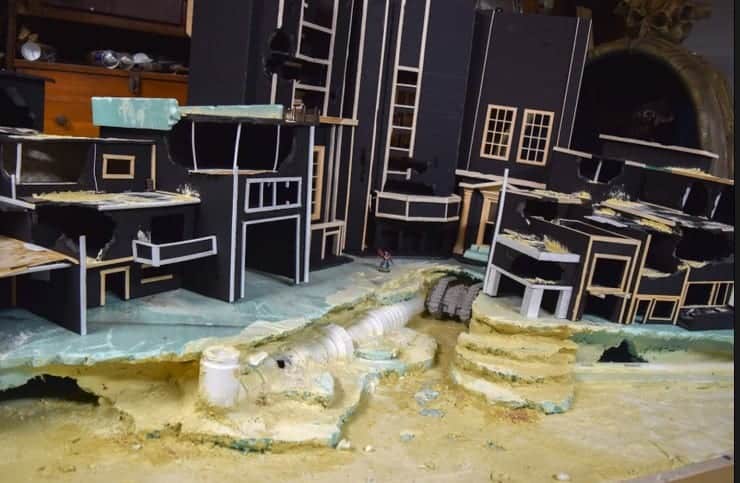
Looking at the display, it seems like GMM studios used blue foam cut up and layered on top of each other to create the raised ground level. PVC piping makes for great sewage systems as well as an old Mk1 Land Raider cruising through a tunnel.
Plastic card and thin pieces of wood look to be the makeup of the building. Remember, in the 41st Millennia, there’s not a lot of landscape that’s been untouched by artillery. Things should be looking pretty run-down thanks to all the Grimdarkness.
Remember that your buildings will probably be supporting all different kinds of units so use strong glue and other materials to prevent your models from falling after getting bumped!
Remember when we were talking about how you should design the display boards with different surfaces, levels, elevations, and nooks and crannies? Well, this points out exactly what we were talking about. Once the display is painted up, you can fit Marines and other small units in the buildings to look like they’re taking cover and searching for things.
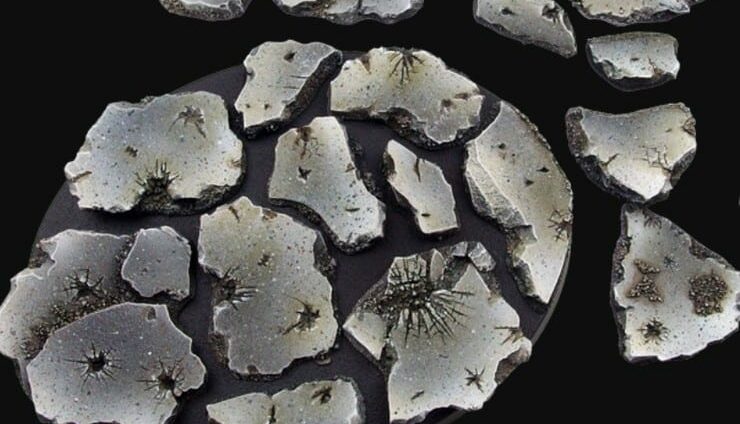
Once the buildings are painted, they will be attached and the concrete finished. This will also correct the uneven bits as they arent glued down flat in these photos.
Remember, displays don’t always need to be this big. Scale it to your army. But also remember to design the layout with your units in mind. You may not be able to fit a tank on your board if you make too much of a dense city-scape!
What do you think about the sheer size of the board? Are you working on a display board right now? Has this inspired you to try your hand at it? Be sure to check out GMM Studios gallery and hit him up if you are looking for that one of a kind piece of miniature art!
