If you’re looking for a way to paint realistic rust, check out this awesome guest hobby tutorial! It’s easier than you might think.
Coming from David in Alaska, he’s submitted this guest tutorial to help with getting your rust effects just right. Check out this step-by-step process and get your models looking worn and ready!
You’ll need:
- Typhus Corrosion
- Vallejo Dark Rust mixed with water
- Vallejo Light Rust mixed with water
Getting That Realistic Rust Effect

Working on a Knight, he first put on a layer of Typhus Corrosion. This is a Citadel Technical paint that is the go-to for any kind of worn metal look. But there are a few key tricks you can do with it.

Once you let the first layer dry, add a second layer on various parts to get more depth out of the model. This shows different stages of rusting.
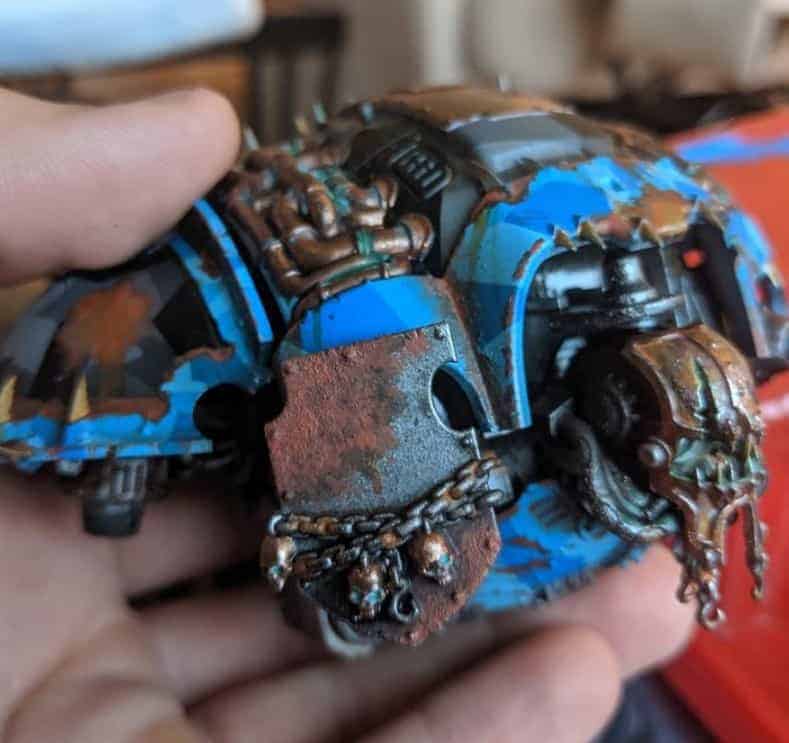
Here are two layers of stippled rust.
Apply 1part water to 2 parts paint to make the dark stipple solution. Stipple Dark Vallejo rust into the largest area, especially the recesses. Then apply 1 part water to 1 part Vallejo light rust, and do several layers of batches of stippling.
Make sure dark rust can be seen on the edges, but also go past to the steel. Many layers are important to create the illusion of depth as well as various colors. Stippling over a previous layer makes it more vibrant.
Do a LIGHT dry brush of metal over the surface to create the illusion of scratches in the rust. Make sure to hit the edges.
Do not get the steel in the recessed areas. Scratches don’t hit them.
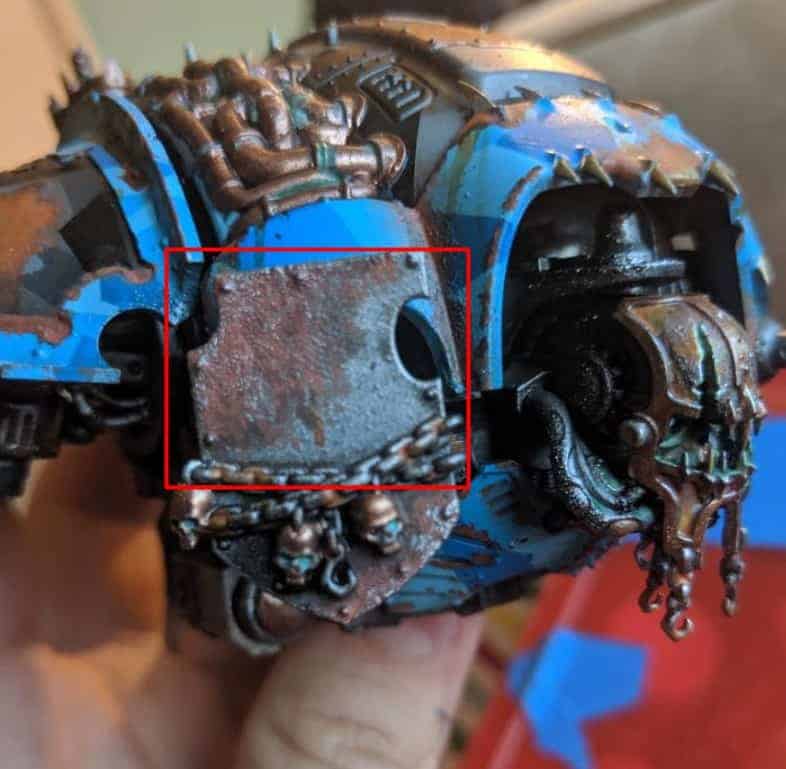
Notice the color change on the shield? It went from a dark, single layer pattern to a mixed-light/dark rust effect, to now. An abrased flat surface being worn by the elements/gunfire. Making your models look real is tricky because you have to think about where they would see the most wear and tear. Obviously, they wouldn’t have too many scratches in their recess so make sure you don’t go overboard with the metal dry brush.
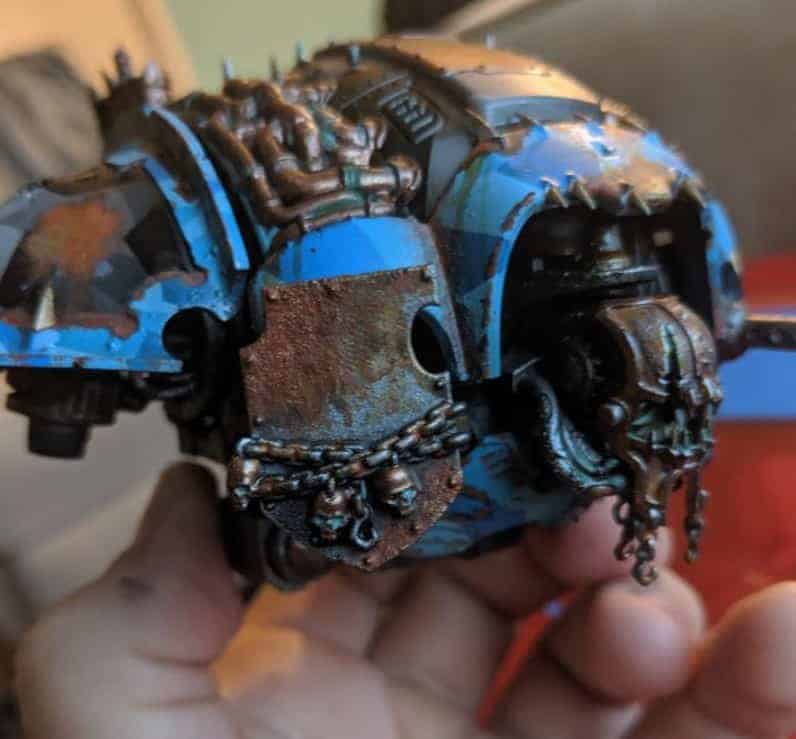
Finally, paint Vallejo rust wash into the recesses. However, you also stipple it over the entire area, making sure to get some over the steel to create the illusion of rust streaks.
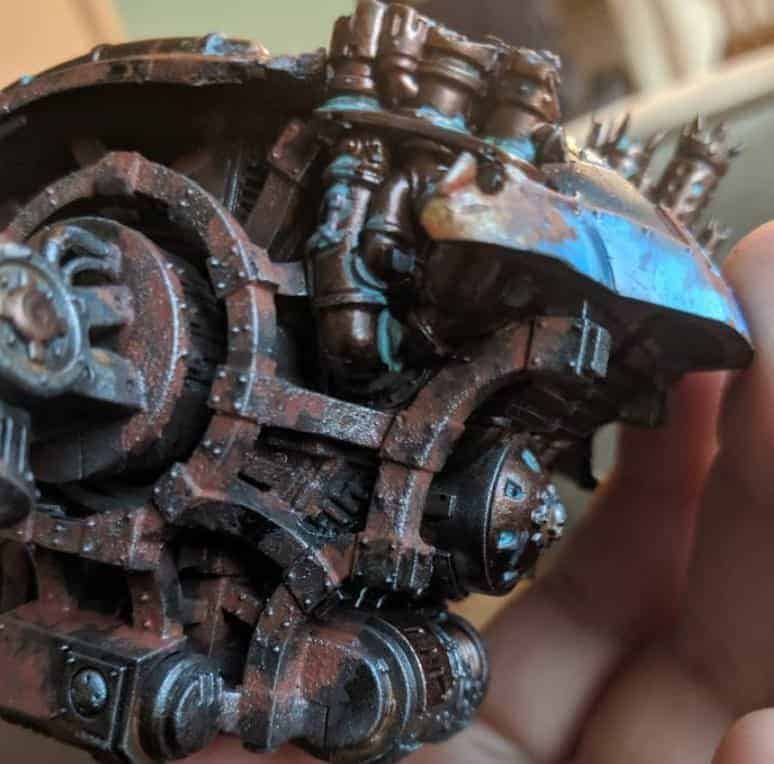
For the heavily-metal parts that don’t have any kind of paint job, you can apply the rust effect to the joints/nuts and bolts. He went with a splotchy design here making sure not to get any real specific pattern.
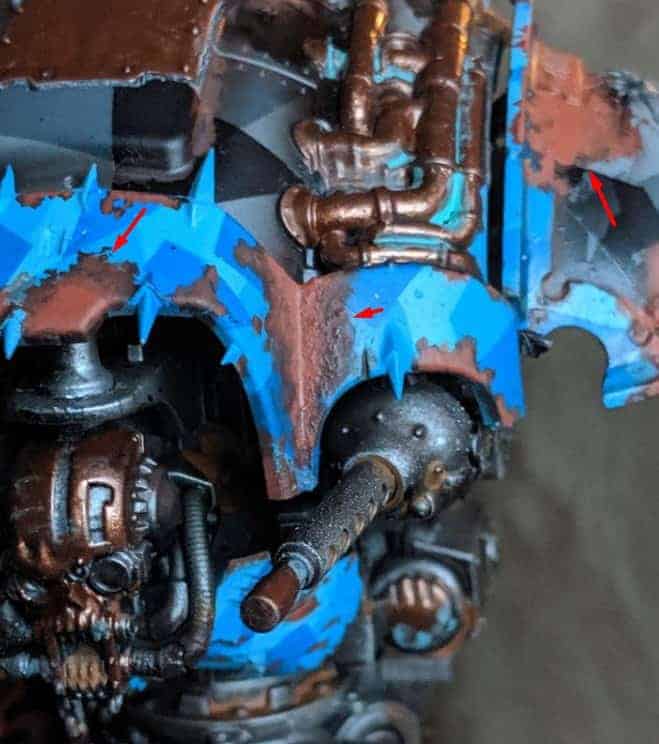
Final result. Note that if you apply to painted areas you have to do the following changes: Apply the dark rust over an area. Then do the light rust in the thicker 2 to 1 ratio leaving dark rust at the edges. Then put metal chips into the edges where impacts would remove paint and rust.
Notice the rusty color fade from dark to light on the highlight areas. You can also, as the final step, throw in some metallic chipping effects to make it look like debris took some of the rust off that’s been sitting on the surface for a while.

There’s something about Chaos Knights that just give off a really fitting vibe to the rust effect. Keep in mind, however, that you can do this on any model you want! If they have metal armor plates in AoS or you’re wanting to do some deep-sea rusted Necrons, they all fit the bill for this rust technique! Great job on this awesome tutorial.
If you are currently publishing hobby content and would like a shot at getting featured on the site, or getting on our publishing schedule, we would like to hear from you! Please email Rob at spikeybits.com with examples of your work!
What do you think about the steps in making a rust effect? Do you have your own rust-making method? Let us know in the comments of our Facebook Hobby Group, and sign up to get your free hobby updates newsletter each morning as well!