 Galharen walks us through using the Warhammer 40k-compatible Grey Knights Nemesis Dreadknight conversion kit to get rid of the baby carrier!
Updated on April 3rd, 2025, by Rob Baer with new information and links to relevant content.
This is a super helpful tutorial using parts from the Warhammer 40k Compatible DeamonSlayer-Knight conversion kit from Antonis Bouras, which you can actually get the Mark II version of here! On his YouTube channel, the talented Galharen walks us through the whole process, and it really shows just how much cooler these plastic kits will look after the conversion.
If you’ve been wondering what to do with your Warhammer 40k Grey Knights Nemesis Dreadknights, this conversion is perfect! Just to note, he’s doing this with a pre-built model; it’s much easier if you watch the video and leave off the parts (that he has to remove) as you assemble your 40k Dreadknight conversion.
Warhammer 40k Grey Knights Nemesis Dreadknight Conversion: Tutorial
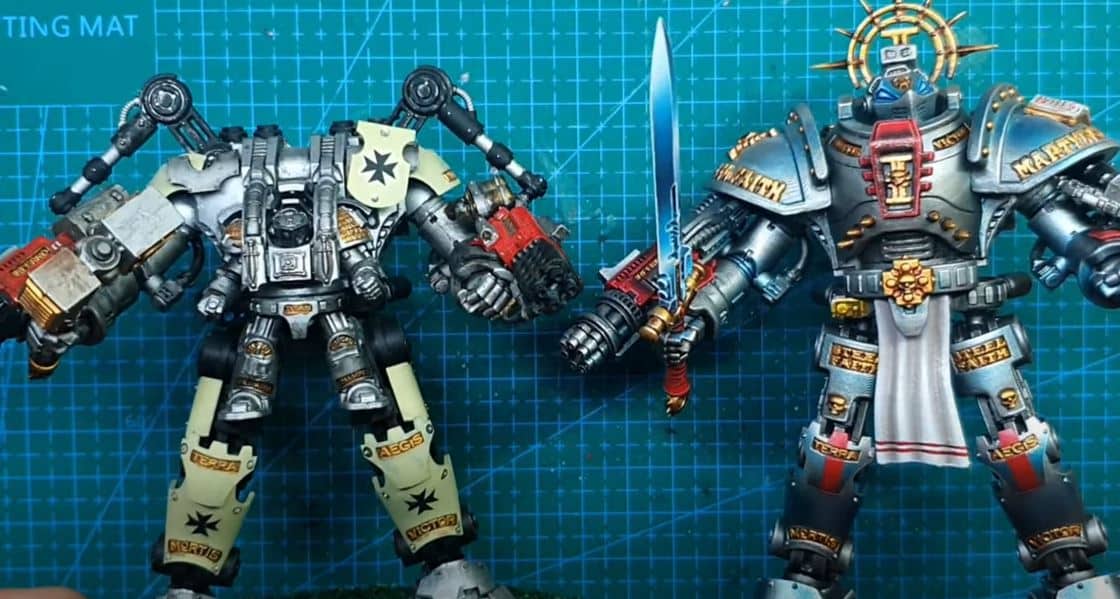 This is the difference this kit can make, and you can see it changes the look completely but still keeps the integrity of the old model. Here is how to do it!
Disassembly
 He starts by disassembling the old model, but if you haven’t built your Warhamemr 40k Dreadknight yet, you can follow along to see what parts to not put on. He takes a hobby knife and removes a bunch of the front plates, such as on the knees, shoulder pads, and feet.
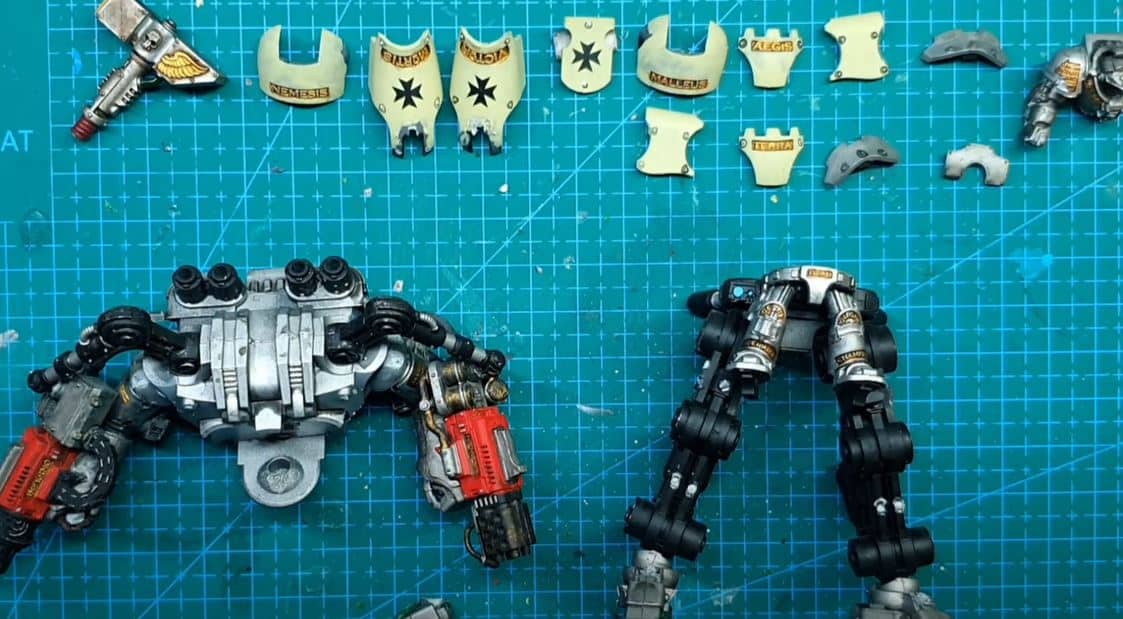
Next, he basically cuts the model in half from the waist and takes out the Grey Knight in the carrier. This is how your model should look at this point, whether you broke it down, or just built it to this stage.
The Parts
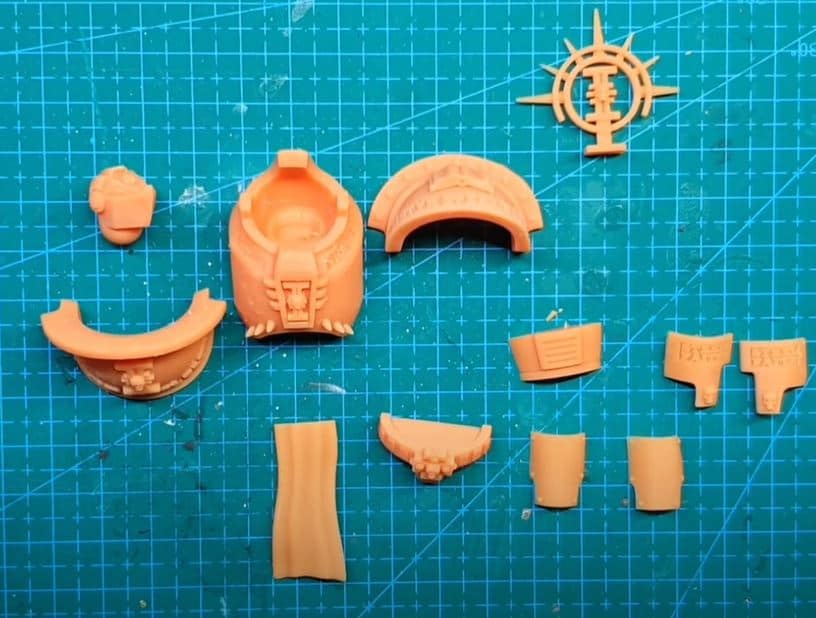 He printed his own parts out, which, if you have a 3D printer, you can get the STL files here from Antonis. On the other hand can buy the Warhammer 40k Grey Knights Nemesis Dreadknight and this compatible conversion kit here. If you get them from us, they come printed in our new, stronger resin that acts more like plastic even! You would just need the standard plastic GW model kit to convert.
More Cutting
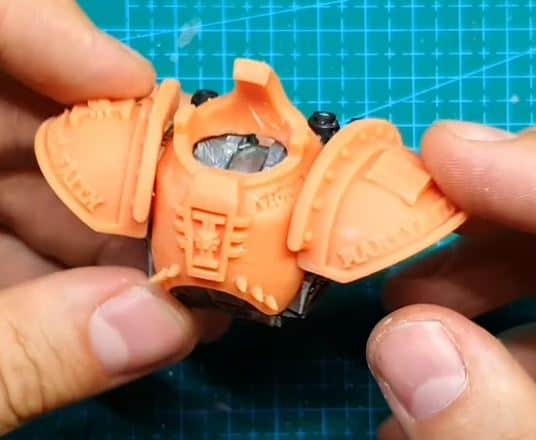
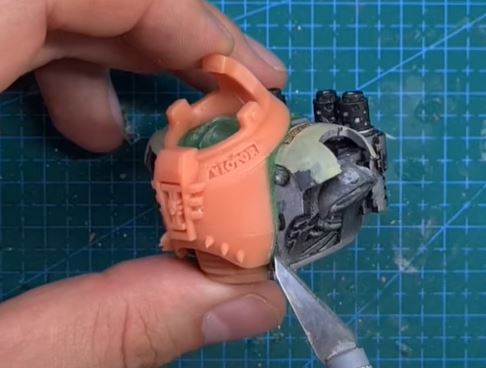
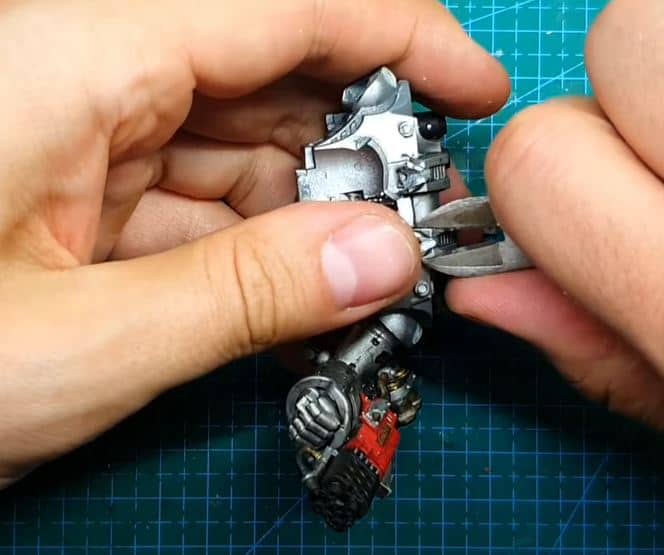 To fit the belt, you must first remove the legs of the Grey Knight driver and do some further sanding to get everything to fit. Next, you have to cut out the front lip on the torso to make it fit on the legs. Then, to get the new torso piece to fit, you have to cut the little nubs on the front of the Dreadknight, which is pictured above.
Building the Kit
 Once everything is cut, the pieces should fit on pretty well, but depending on how you print it, you may need some Green Stuff or Plastic Putty later for fills and potential gaps.
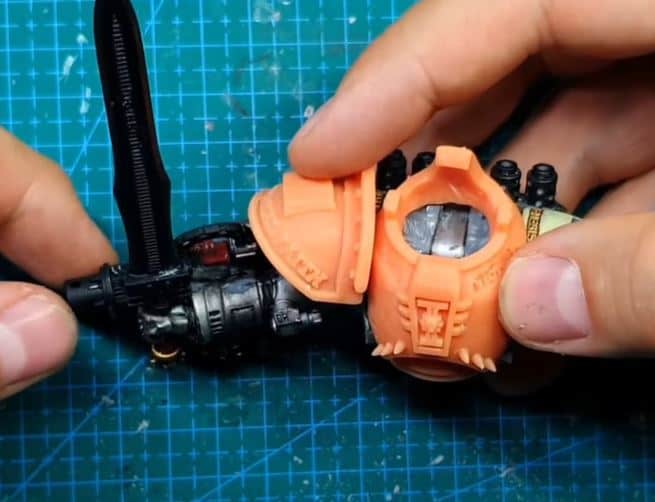
Once you put the first body section on, he then puts the old shoulder pads back on, which will cover some gaping underneath. Then, lay the new shoulder pads down on top of that and they should fit a standard plastic kit.
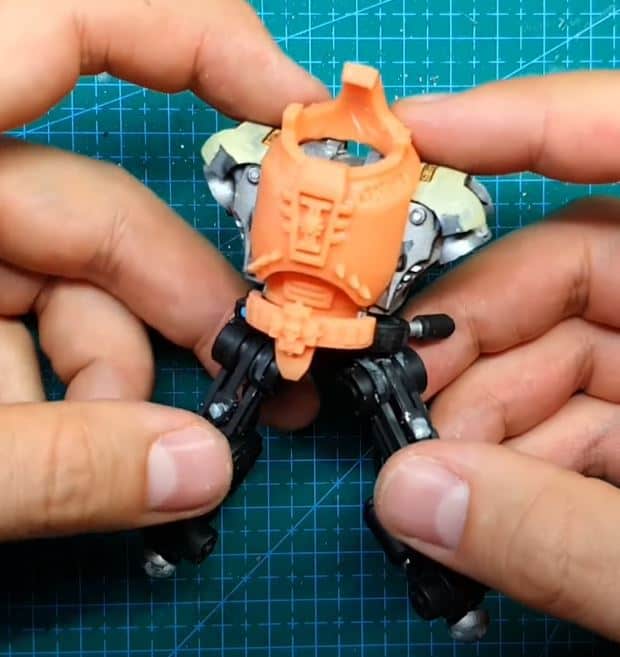 Now, he will start on the legs first, but the belt on the front of the legs is where you cut off the driver. Next, go back to the body and put on the stomach piece. Before you go any further, be sure to test fit, and it should look like his above.
 Note that if you’ve already painted your old minis, you’ll want to strip the paint from the old pieces. Once that is cleaned, he goes back to dry and fits them on the legs. If you want to magnetize your weapons here, you can.
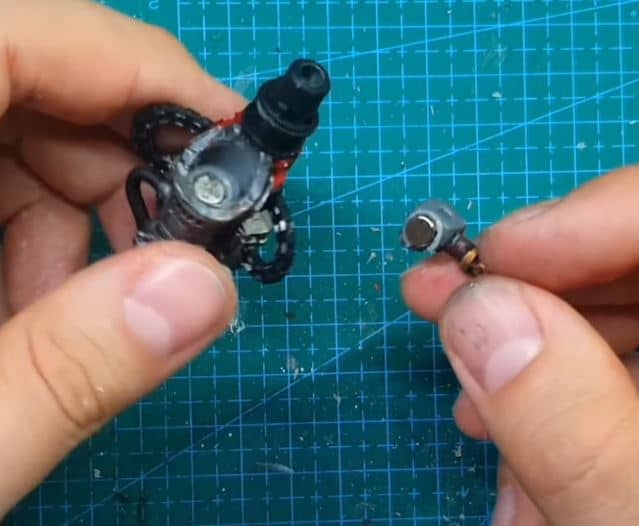
He takes a drill, bores out the diameter of his magnet (he uses 5mm for his), and puts it into his weapon hand. Then do the same for the weapon itself. This is optional, but we do recommend doing this. For the melee weapon, he uses a pin vice instead of a drill.
Final Stages
 To really take things to the next level, he fills all the gaps with Green Stuff, which is nothing fancy; it’s just a great way to tie the whole thing together. On the backside, though, he made a nice little square platform to put the iron halo on.
Final Thoughts on the Project
 Lastly, he primes everything black to get it ready for painting and leaves the head off to paint separately. There you have it, an awesome conversion without a ton of work! Get your Dreadknight Conversion kit here.
Follow Galharen on Instagram or YouTube
Do you like the look of this Warhammer 40k-compatible Dreadknight Conversion Kit? Will you be printing or buying one to eliminate the baby carrier?