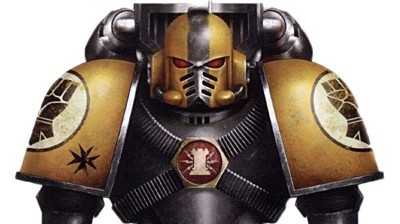
I was finally able to play my first game using my new 30k Templar themed army versus an 40k Ork horde .
NOTE – My army is still very much a work in progress and nothing has been painted as yet besides the landraider which was borrowed from an existing army.
Here’s my army list…
Templars (Onslaught FOC):
= HQ =
Sigismund
Centurion – Primae Medicae
Cataphracti Terminator Armor – Chainfist – Storm Shield – Narcethium – Needle Pistol – Teleport Transponder
= Elites =
4x Legion Terminator (Cataphracti) – Pair of Lightning Claws – 2x Storm Shield – 2x Power Fist – 2x Chainfist – Assault Cannon – Combi-Bolter – Teleport Transponder
Sergeant – Storm Shield – Chainfist
= Troops =
4x Templar Brethren – 4x Combat Shield
Champion – Mastered Crafted Solarite Gauntlet
Landraider Phobos – Dozer Blade – Extra Armor – Armored Ceramite
= Heavy Support =
Leviathan Dreadnaught – Storm Cannon – Heavy Flamers – Armored Ceramite – Extra Armor
Dreadnaught Drop Pod
Imperialis Militia (Allied Detachment):
= HQ =
Force Commander – Carapace Armor – Refractor Field – Charnabal Sabre – Laspistol
= Troops =
9x Grenadier – Carapace Armor – 7x Las Rifle – 2x Flamer
Sergeant – Carapace Armor – Close Combat Weapon – Laspistol
My opponent was running his Orks. I don’t have his army list so here’s a close approximation of his army:
= HQ =
Big Mekk – Boss Pole
= Elites =
Pain Boy
6x Mega Armored Nob
Battlewagon – Kannon – Big Shootaz
= Troops =
Boyz Blob (20+) w. Sluggaz – 2x Big Shoota
Boyz Blob (20+) w. Sluggaz – 2x Big Shoota
= Heavy Support =
15x Loota
15x Loota
= Fast Attack =
14x Warbiker
Nob – Power Klaw
5x Deffkopta – Twin Linked Rokkitz
Neither of us got a Warlord Trait worth noting.
Primary Mission:
Big Guns Never Tire (Eternal War)
Secondary Objectives:
First Blood – Slay the Warlord – Line Breaker
Deployment:
Vanguard Strike
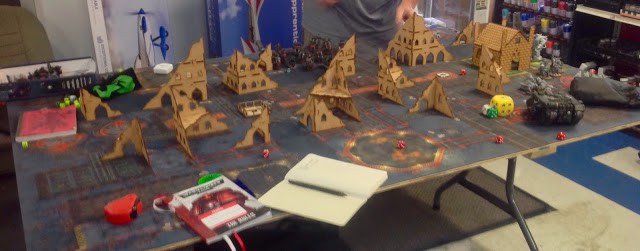
Here’s a picture of the battlefield prior to deployment:
All the terrain was ruins with no almost real line of sight blocking.
I won the roll to decide who got to place the first objective of which there was five. Two were placed along the center line, one each towards either short table edge. One objective was placed in one table corner in a ruin while the other two were over on the other side of the table both in ruins.
I won the roll to choose deployment zone and go first, electing to let my opponent go first… He ended up choosing the deployment zone with the two objectives over to one side of the table.
Deployment
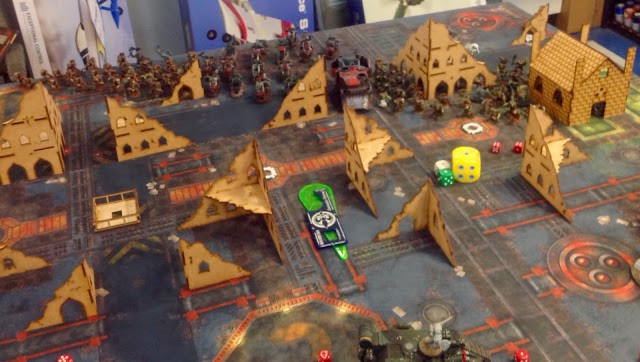
Here is my opponent’s deployment – note he elected to hold his Deffkoptaz in reserve:
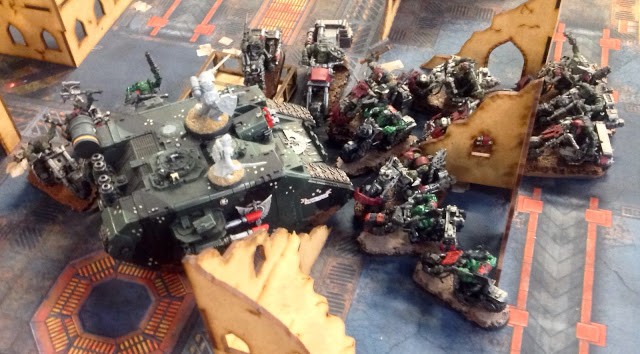
He placed the two squads of Lootaz inside ruins beside each other (one camping on an objective). One blob of Boyz were deployed beside the Lootaz. He deployed the other blob of Boyz with the Big Mekk and Pain Boy back along his table edge centrally located. The Warbikes and MANZ he centrally deployed forward beside each other.
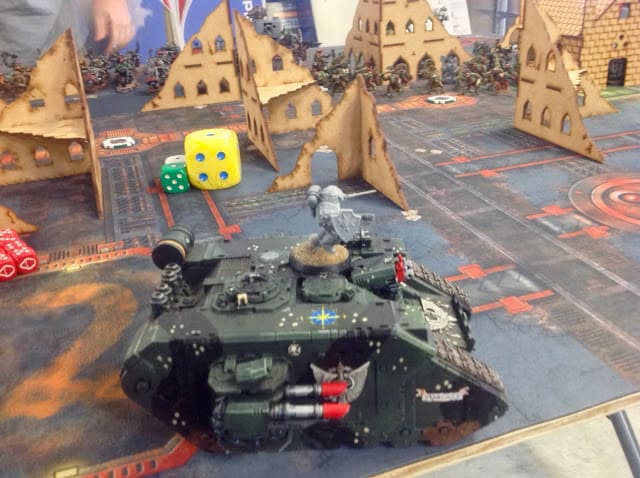
Here’s my deployment:
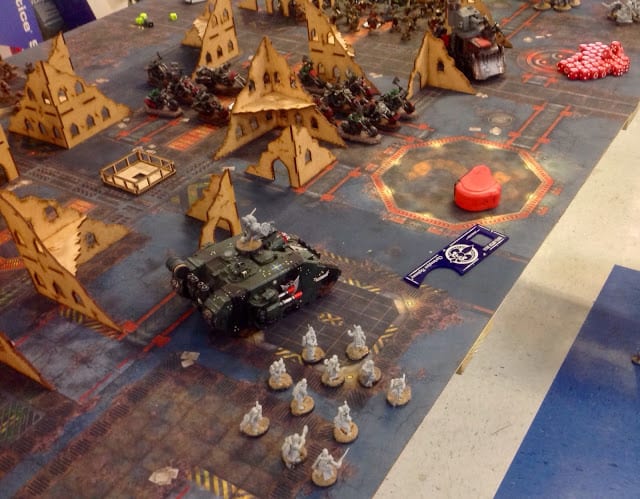
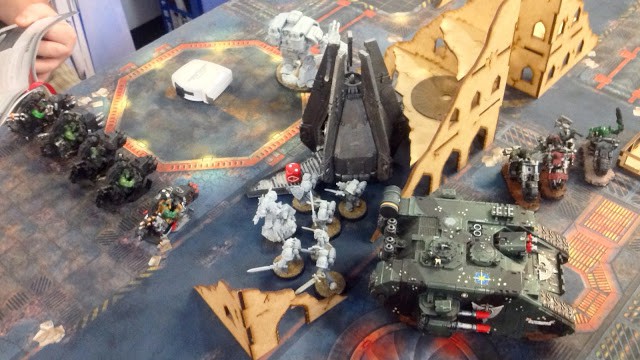
I opted to deploy only the Templar Brethren with Sigismund in their Landraider Phobos holding everything else in reserve. The landraider is outside range for a lucky first turn charge, placed in position to lure the MANZ forward in their Battlewagon. The Leviathan would arrive via drop pod first turn. The Centurion joined his Legion terminators who would deep strike. Finally the Force Commander joined to his Grenadiers would come in from their table edge.
Story Line
A Templar strike force lead by Sigismund have been tasked with retrieving a Militia Force Commander stranded on a lost Crusade world up against a vast horde of Yellow Moonz. The Force Commander’s army has been whittled down to only one brave squad of Grenadiers by the time aid finally arrives… Better late than never ! The two forces have fought together before and Sigismund considers the Force Commander a good friend.
NOTE – There are no actual victory points associated with the story; it was just there to add a little flavor and make the game more fun.
Pre Game Analysis
Space Marines versus Orks is always a good time ! Gosh there’s lots and lots of Orks though…
Initially at least the first two turns my opponent can’t really do much damage with his ranged weapons other than the Kannon on the Battlewagon which at best can only glance my landraider.
I see the first half of the game as cat and mouse… If I can lure the MANZ away from his blobs then hopefully the terminators and dreadnaught can deal with the horde. My army is very elite (small model count) so I can’t afford to waste any of my heavy hitting units.
Close combat with the MANZ would be co-mutual suicide at best and gut my army. If I can manage to stop the Battlewagon that will make things a lot easier for me ! I’m not too worried about the Warbikes except for their twin linked dakkaguns along with the Lootaz which can mulch my infantry just on weight of fire alone.
The Centurion and his Legion terminators have their work cut out for them !
1st Turn – Yellow Moonz
The Warbikes and Battlewagon both move forward as predicted but maintain a cautious distance from my landraider to avoid a first turn counter assault. The rest of the horde holds their line. The Kannon fires at my landraider and misses.
1st Turn – Templars
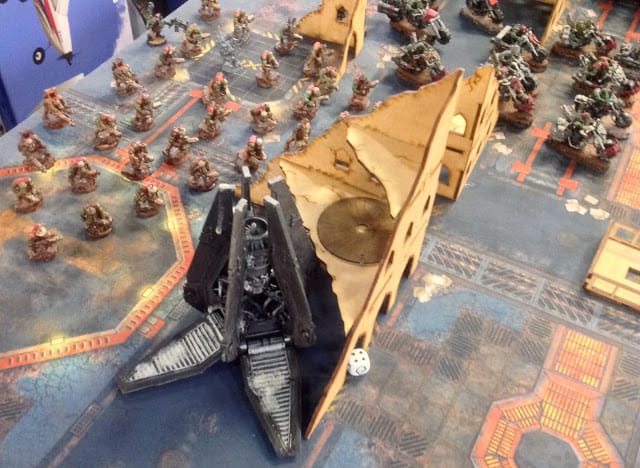
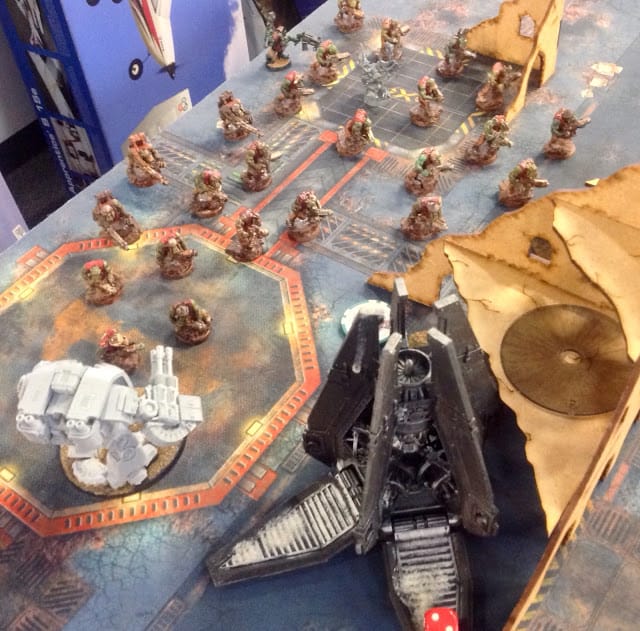
The Leviathan crashes into a ruin on top of an objective scattering a bit must remains inside the terrain and the drop pod loses one hull point due to dangerous terrain.
The Leviathan opts to remain within his shrouded transport while the landraider backs away from the Battlewagon to keep it at a safe distance.
The Leviathan then opens fire on the Boyz only killing six which is just not quite enough to force a morale check… Feel No Pain from the Pain Boy was hot. The landraider follows up with a penetrating hit but only manages to shake the Battlewagon for one hull point.
2nd Turn – Yellow Moonz
The Deffkoptaz fail to arrive.
The Boyz over beside my dreadnaught move away while the Battlewagon lurches forward again still maintaining a safe distance. The Warbikes backup a bit and the rest of the horde continue to hold their ground.
Both Loota squads target the drop pod but can’t manage to even scratch the paint. The Kannon snap fires at my landraider and predictably misses. The Boyz beside the drop pod then run but only get one inch… Heh !
2nd Turn – Templars
Unfortunately the Centurion and his terminators fail to arrive but in comes the Force Commander with his Grenadiers… Would have been nice if that was reversed !
I bring the militia in over to my left side of the board and move the landraider to shield them with its lascannons trained on the side armor of the Battlewagon.
The Leviathan emerges from its drop pod ready for some carnage.
The Leviathan then opens fire on the Boyz and manages to drop seven this turn… They fail their break check but then pass due to the Boss Pole. The landraider targets the Battlewagon for a penetrating hit which is ignored due to cover.
The Leviathan then attempts to charge the Boyz but flubs it terribly (snake eyes)… Oh well.
3rd Turn – Yellow Moonz
Again the Deffkoptaz fail to arrive.
Yet again the Battlewagon moves forward along with the Warbikes, both moving a safe distance from the Leviathan. The Warbikes feel a bit saucey with the Battlewagon full of MANZ nearby moving into position close to my landraider to target the Grenadiers.
One squad of Lootaz are in range of the stranded dreadnaught and manage to strip two hull points – I failed both saves. The Warbikes let loose with their dakkaguns and wipe out eight of the Grenadiers but the remainder along with the Force Commander just pass their morale check. Finally the Boyz being chased by the Leviathan manage to run six inches this turn. : (
3rd Turn – Templars
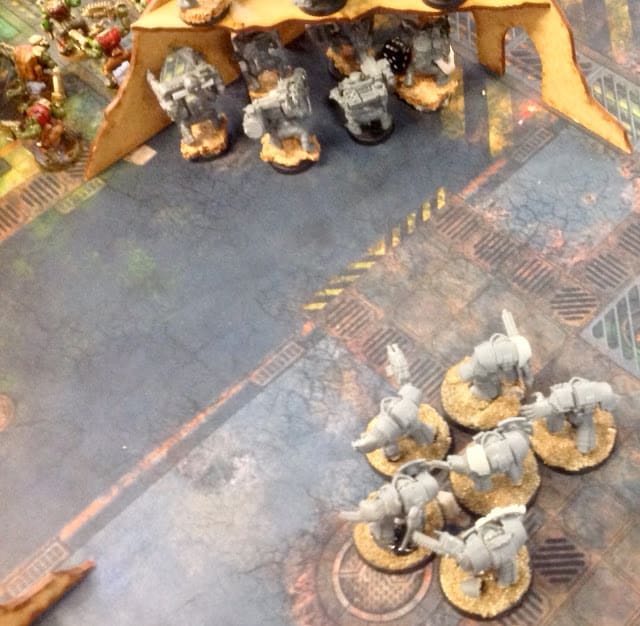
The Centurion and his terminators arrive this turn. I place them behind a ruin close enough to one squad of Lootaz so they’ll be able to charge the next turn – they do no scatter… Hello Yellow Moonz !
The Leviathan chugs over towards the Boyz but is most likely outside of maximum charge range. The Force Commander wisely abandons his two last Grenadiers to embark inside the safety of the landraider.
NOTE – This was actually illegal because in 30k battle brothers cannot share their transports. Fortunately it had no real impact on the game.
The Grenadiers bravely yet foolishly move towards an objective selling their lives in the process.The landraider reverses direction back toward the enemy deployment zone leaving the Battlewagon well out of position now.
First the terminators open fire on the Lootaz but fail to get past their cover saves. I then fire into the fleeing Boyz with the Leviathan but their Feel No Pain saves are red hot and don’t inflict enough damage to force another break check. The landraider does manage a glancing hit on the Battlewagon bringing it down to just two hull points. That’s all I can muster this turn. The dreadnaught is out of position in the open and my terminators are going to have to soak up a lot of shooting next turn.
4th Turn – Yellow Moonz
The Deffkoptaz automatically arrive from reserve scooting in behind the Leviathan for some juicy shots on its rear armor. Again the Warbikes are feeling it and surround the front of the landraider in hopes their Nob can bring it down with his power klaw. The Battlewagon moves in position so the MANZ can target the Grenadiers and the Kannon can target the landraider. The Boyz fleeing from the dreadnaught continue to hoof it away moving into the left side of their table edge.
Ork shooting then commences… The Deffkoptaz manage to inflict two shots into the rear of the Leviathan and I fail both 4++ invulnerable saves netting First Blood for the Yellow Moonz. The MANZ then wipe out the last of the Grenadiers. Onto the big target – my Centurion and terminators… Fortunately for me there is one squad of Lootaz in a ruin that doesn’t have line of sight… Really my first break in the game. The other Lootaz along with both blobs of Boyz all light them up but fail to inflict a single wound ! Wow that was huge !!!
Finally the Warbikes crash into the landraider but the power klaw bounces harmlessly off the hardened plates of thick armor.
So I lost my Leviathan which didn’t really contribute much the entire game but the Templar Brethren and terminators are both in excellent position to finally assault… The game of cat and mouse is over now.
4th Turn – Templars
The landraider reverses again dropping off Sigismund and his retinue right beside the Deffkoptaz then pivots to cut off an advance next turn from the Warbikes.
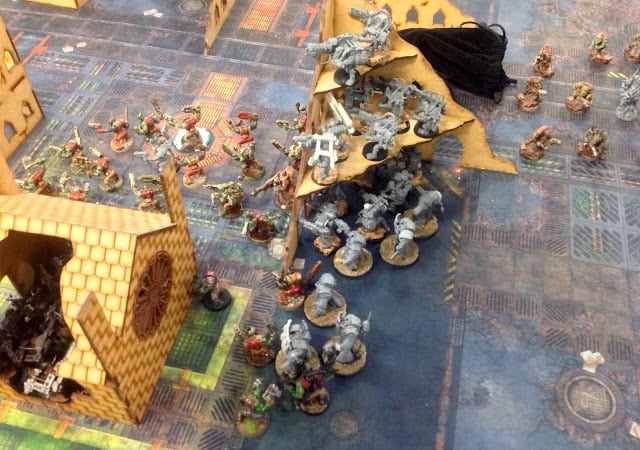
The Centurion and his retinue of terminators advance eye to eye with one squad of Lootaz and a Boyz blob beside them… It’s time to strike some blows !
The Templars pistol the Deffkoptaz but fail to inflict any damage while the terminators target the Boyz killing a few.
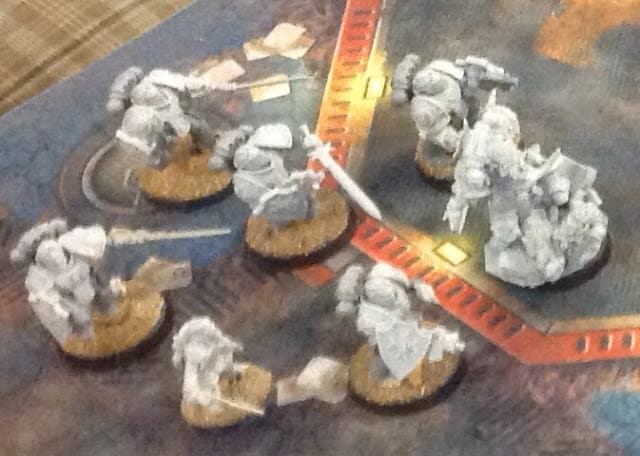
Sigismund and his posse then charge the Deffkoptaz killing all but one which then breaks off the table. The Templars consolidate six inches back towards the landraider showing utter disdain to the Warbikes. The terminators then multi assault focusing the majority of their attacks into the Lootaz. The Centurion issues a challenge dispatching the nob from the Boyz. Several Lootaz along with a few Boyz are smashed to death, taking no damage in return, but both Ork units hold due to passing their mob checks.
5th Turn – Yellow Moonz
This will be the final turn as my opponent had a prior engagement scheduled and will have to leave.
The Warbikes decide they don’t want to rumble with the Templars and move outside of charge range… Only a few have line of sight with their dakkaguns due to the proximity of the landraider. The MANZ are way out of position. The other blob of Boyz move then run towards an objective but fall just short of claiming it. Note that the Warbikes are holding one objective now. The Battlewagon is holding another objective as well.
It’s back to the assault between the Lootaz, Boyz and terminators. Again I focus most of my attacks into the Lootaz. The Orks just manage to inflict one wound into the Centurion then I cut down the rest of the Lootaz and the Boyz pass their mob check again.
5th Turn – Templars
This will be the final turn so it’s for all the marbles ! The Templars move over to claim Line Breaker.
The landraider moves and then flats out to contest an objective held by the Battlewagon and my drop pod is holding one objective.
The slug fest then continues and comes to a conclusion… Again the Boyz fail to inflict even a single wound. My attacks bring the Boyz down to just ten left which is just enough for a mob check which they pass. Both units are left on top of an objective denying each other those critical victory points.
Primary Objectives – Tied
Big Gunz Never Tire – Tied
First Blood – Yellow Moonz
Slay the Warlord – Neither
Line Breaker – Templars
Final Result – Drawn Combat
Post Game Analysis
Well it turned out to be a very close game with not much significant action the first half of the game then things got really interesting.
While my Leviathan didn’t pull his weight on the table he did act as a deterrent and forced my opponent to make some decisions. Honestly I wish the dreadnaught could have had a bigger impact… If he hadn’t failed the easy charge that would have probably netted me Slay the Warlord and have put a lot more pressure on my opponent. The only real weakness of the Leviathan is it is slow. Next game I will change up his load out so he is hopefully more effective. It’s hard to say if I should have dropped him close to the two squads of Lootaz without any real support – I opted for the safer path this time. It didn’t help that the dreadnaught failed all four saves… Fate just wasn’t on his side this game.
The Centurion easily paid for himself this game – I kept track of the number of Feel No Pain saves I made… Without them I would have lost both him and all the terminators. I will however add more terminators when my army list reaches 2000 points.
I think my opponent really failed to capitalize with his MANZ. That said the Battlewagon passed everything single cover save except for the two lascannon shots that got through but never even really slowed it down. This offset the poor performance of my Leviathan.
The militia didn’t really contribute anything but were there mostly for the story behind the game. They will be replaced by some artillery when the army list reaches 1850 points.
In conclusion I am okay with the draw and feel the army is on the right track.
Sigismund embraces the Force Commander in a bear hug. “Safe at last my friend!”
