Don’t miss this new Horus Heresy Starter Set unboxing as we build and magnetize all the Space Marine models inside- check it out!
Rob is back unboxing the new Horus Heresy box and, most importantly, sees how to future-proof them. He’ll see what it takes to get the minis ready for the tabletop, show the size of the models, and tell you the GOTCHAS to be aware of when building them!
We are going to show you everything, including the sprues, bits, and of course, the size. That way, you can decide if this is worth your hard-earned hobby dollars.
Horus Heresy Starter Set: Unboxing, Build & Magnetizing
Click here to get yours for less from these retailers: | Amazon | Dicehead Games | Gold Goblin Games | Frontline Gaming
 This is the box we’re taking a look at today and while the price was a little more than we had hoped, it’s quite a giant box with a lot of value inside (in GW money). Let’s start with the value, then get into the box.
Horus Heresy Starter Value $299
 There are two big things to note first. We don’t know the prices of the individual kits 100%, so this is as close as we can get for now. Also just to note, these are all going to be priced in plastic, with estimated pricing compared to the latest price increases.
- 40 Mark VI Space Marines $220 ($55 for 10)
- 10 Cataphractii Terminators $140 ($70 for 5)
- Contemptor Dreadnought $70 (based on the Redemptor kit)
- Characters $55 (based on the Space Marine Characters pack)
- Spartan $110 (drop from resin based on the Repulsor Executioner price)
- Rulebook and other potential accessories $50 (Probably a little more)
Total MSRP: $645 not counting accessories Confirmed Box Price: $299
Total Values versus box price: $346 in value
Unboxing
 There is actually an insane amount of sprues inside, so the box itself is quite heavy. You also get the old-school 3rd Edition Warhammer 40k templates that are trademarked in 1998.
 Then underneath, you get the rulebook, the instructions, transfer sheet, bases, dice, etc.
Instructions
 The instructions for this are much more Necromunda-style than 40k as there is so much inside. The Praetors are pretty static in terms of posing but are still dynamic.
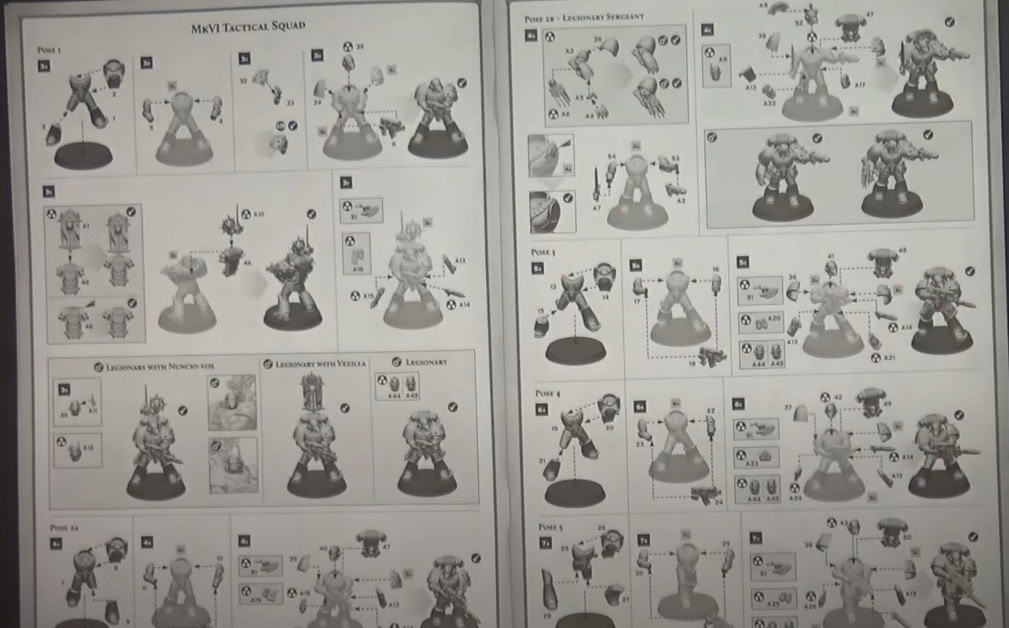 There are 5 main poses for the marines, but you should sort of learn all 5 poses as there are a ton of marines and you have to pretty much get them all into those 5 poses.
They look pretty easy to build, however, the one thing that looks strange is some of the shoulder pads are 2 pieces. Rob would also recommend using the Tamiya Extra Thin Cement, to cut down on gapping later on.
 The dread looks very similar to the resin one, so nothing too crazy, just be sure to pay attention as there are a ton of parts. Rob will see if you can magnetize the fist weapons, but he’s not sure it’s really worth the time. However, he will try to magnetize the top weapons.
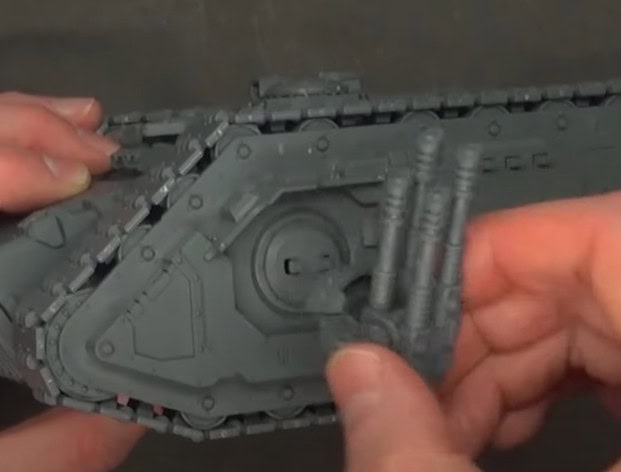
 We’ve also seen that there is only one sprue actually named Spartan, so if you see the Proteus Land Raider with basically the same sprue, don’t be too surprised. The resin kit was never perfectly square, so let’s hope they shored that up with the plastic kit.
We’ll also show you the sprue where you can magnetize the weapons.
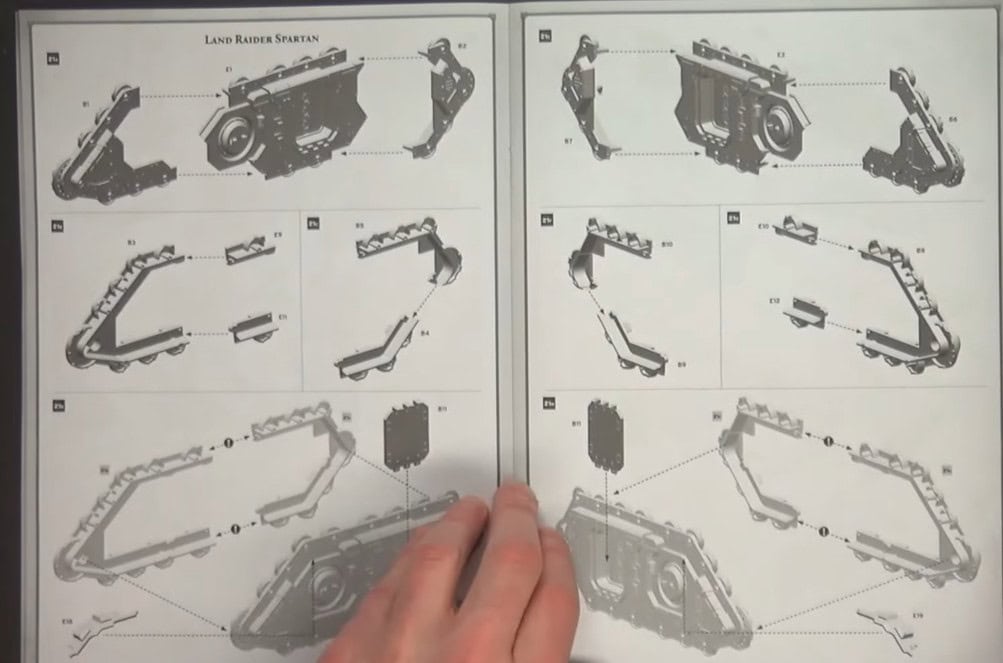
 The old treads were a nightmare to get on, so let’s hope again, that this is fixed with plastic.
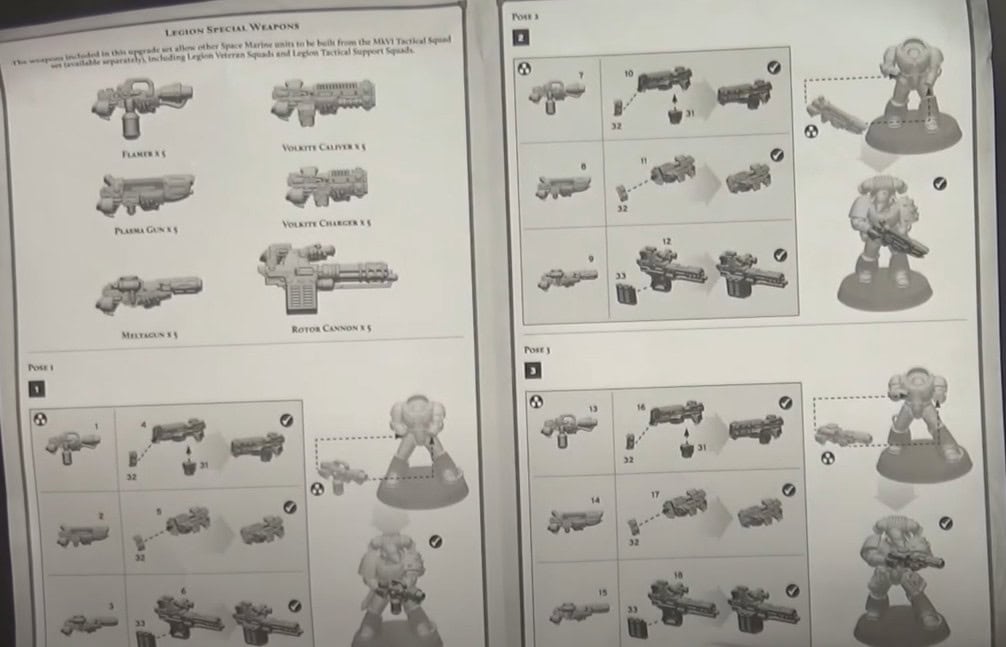 This also comes with all the special weapons, and as you can see, they show you how to attach to each of the 5 poses. So again, pay attention to what pose is what!
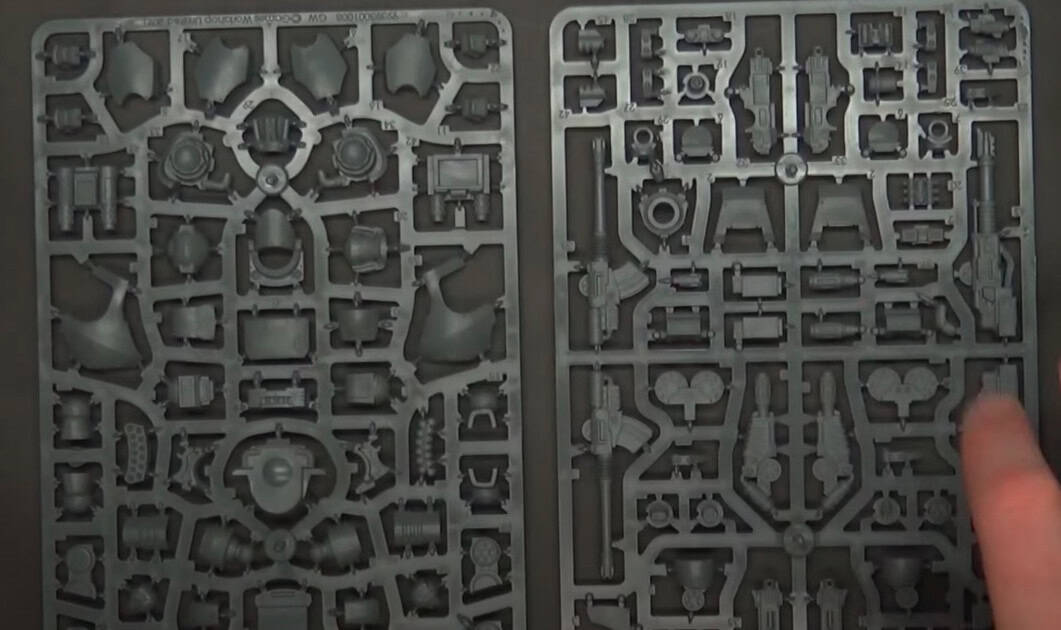
Sprues
 As we said, there is some variation on the sprue, but it mainly goes into 5 different poses.
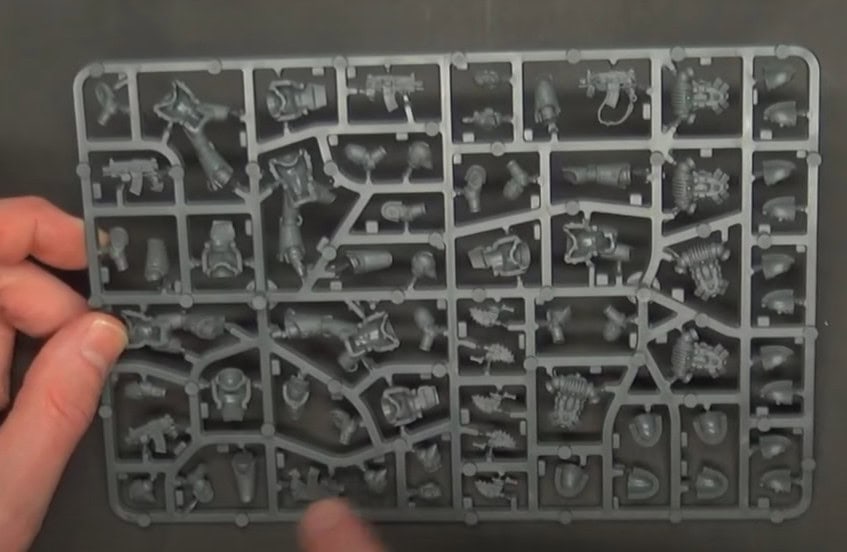
 The Praetor sprue is super detailed, but as we said, there isn’t much variation. There is a lot of possible gapping on this, so be sure to use that Tamiya Extra thin Cement.
 This is the one sprue actually marked Spartan, and actually, everything looks quite straight. So Rob is letting his hopes get up a little that this won’t be super hard to build.
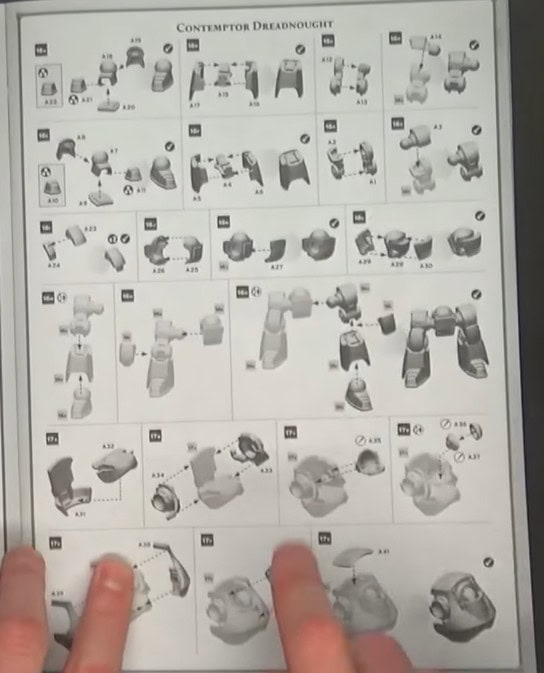
 The Contemptor has a ton of bits, so just be sure to really pay attention and dry-fit before gluing anything down.
Built Minis
 The Spartan is actually incredibly light when built. It’s nice and crisp and really felt easy to build. You could magnetize with 1/8 magnets for the front weapons, but Rob didn’t for this one.
 The weapons actually work great with the tongue and groove system, so it actually lets you switch them out and swivel. The ramp also works well and you can open and close it without much issue. Luckily, it went together far easier than the resin one.
The only thing Rob didn’t like about the build was the treads, as they take a long time to get on, but not to bad overall- especially when compared to the resin version- yuck.
 It’s quite large and makes this poor IG tank look tiny.
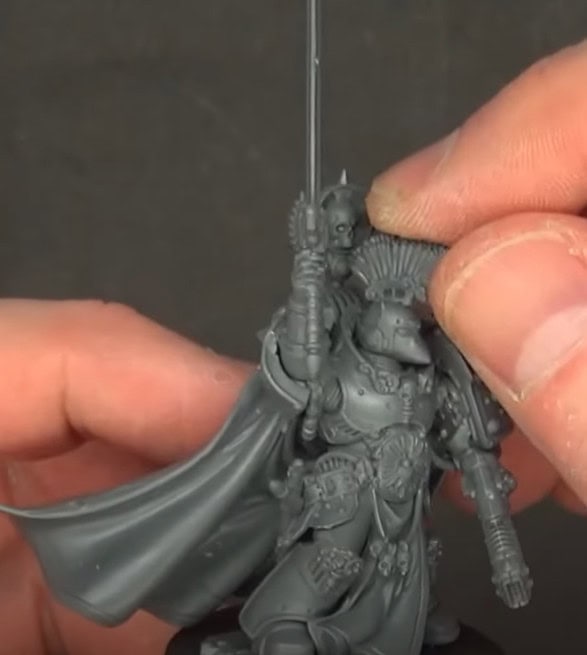
 The Praetor is incredibly detailed, but there aren’t really any other poses you can go with.
 You could definitely use these in 40k as they are Primarised sized.
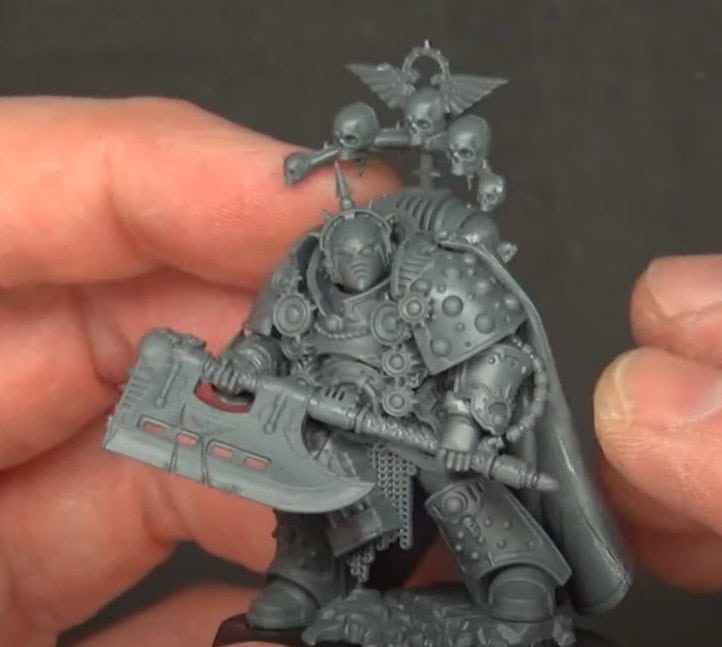
 The marines themselves look super dope, but you can see a little gap in the 2-part shoulder pad. Rob purposely didn’t use the Tamiya glue on this one to show what it will look like if you just use normal glue.
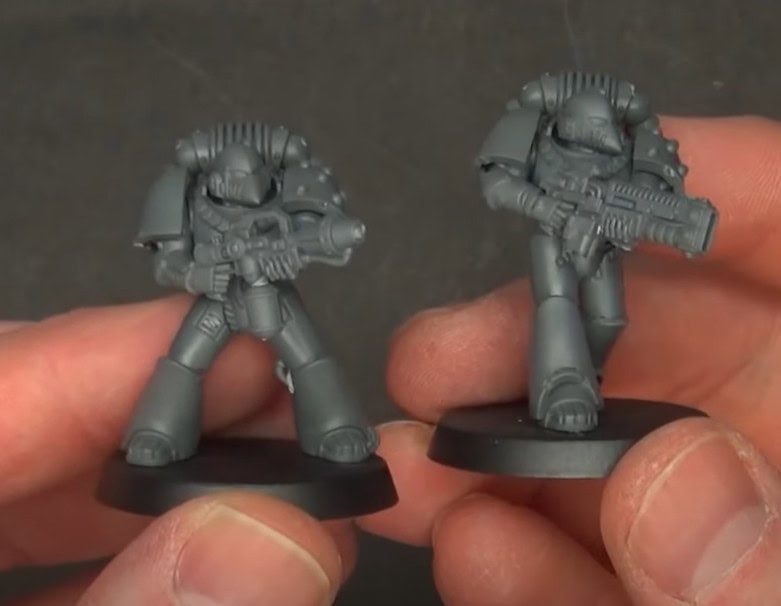 The special weapons also go together very easily (if you get the right pose with the right weapon) and they look awesome. So pay attention to all the instructions, they are laid out well, and will save you a ton of time!
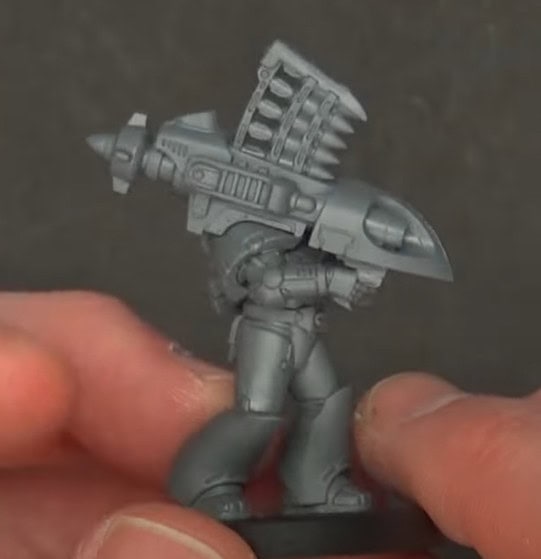
 It’s also really cool to see the throwback missile launcher!
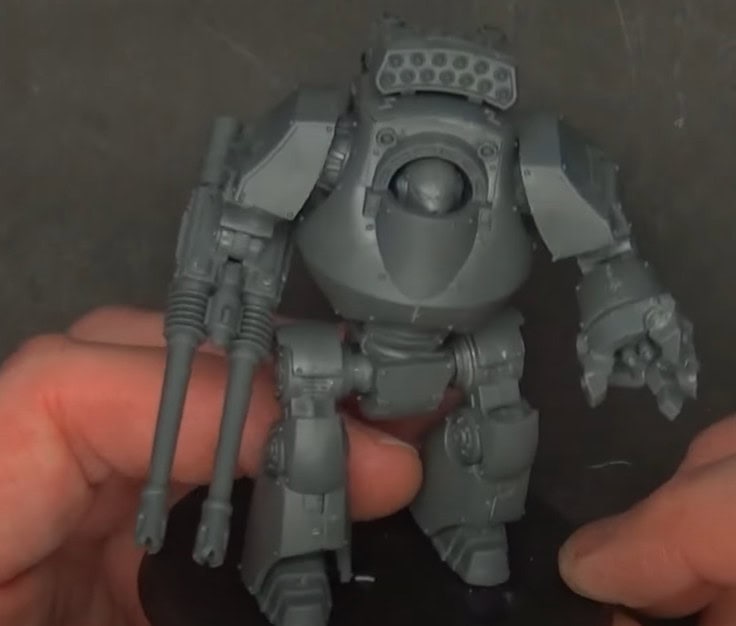 The dread looks awesome, but we’ll also see how to magnetize it.
Contemptor Magnetizing
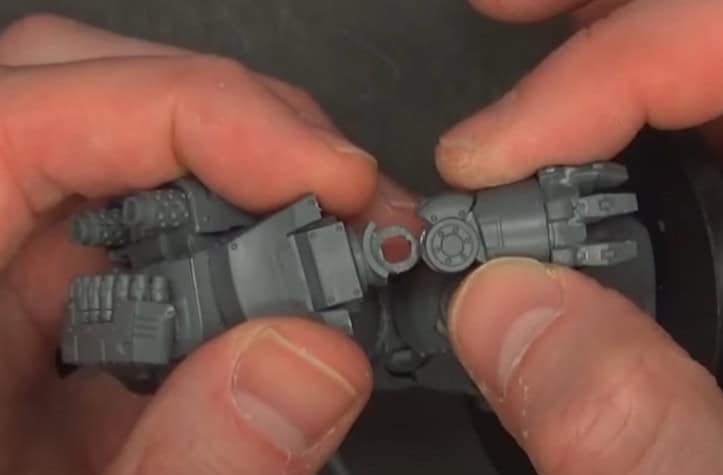
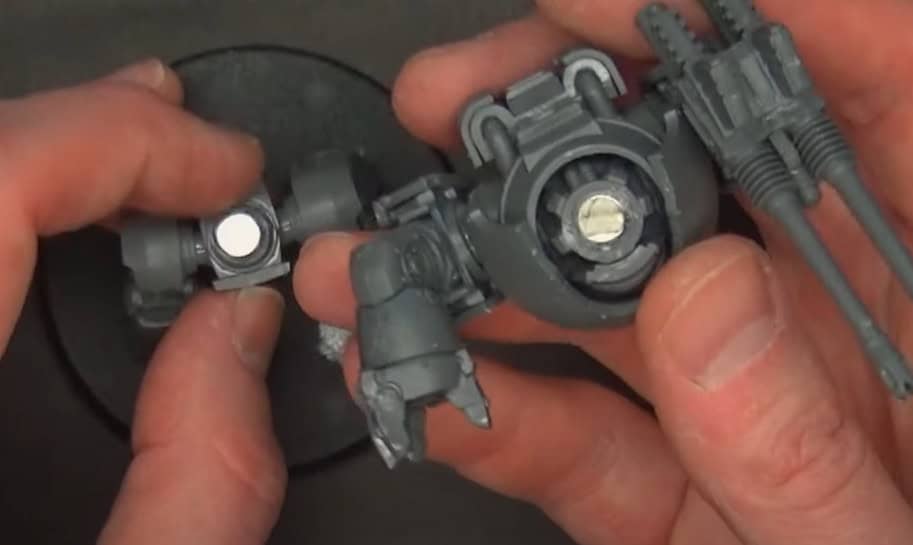 You want to start by getting the feet level, drilling out a 1/4 magnet hole, and putting the magnet in there. Then, you put a magnet on the top of the body as well. You can use a little random sprue cut down to brace the magnet it both parts, but depending on how you drill it out, it may just sit fine.
 The top piece can also be magnetized with the same size and it will pull through the plastic. Watch the video for more on how to place this one.
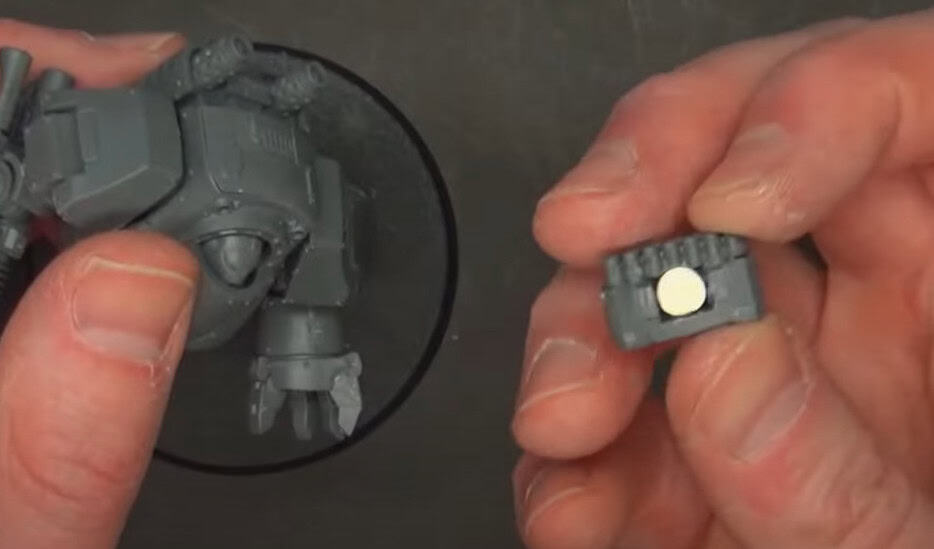
 You actually don’t need a single magnet to switch out the arms! Rob just did 3 coats of the Tamiya cement over the arm, let it dry, and that made that O-ring bit thick enough to just stick the arms on. Just make sure to flair out the arms a little bit at the shoulders otherwise they will catch on the knees.
Final Thoughts
 Overall, if you want to play HH, then you should pick one up. It is pricey ($300), however, in “GW money” it makes sense. It makes the models inside about $6 each (making the vehicles a great deal, but the regular dudes not so much).
It’s not an auto-buy for Rob, but if you want to get into the game, you do want to look at it. Just remember, to buy from your local hobby shop as it will save you money and cut their profit margins roughly in half.
Click Here To Get Your HH Starter Box!
After seeing this Horus Heresy Starter set unboxing and review, will you be picking it up?
Let us know in the comments of our Facebook Hobby Group, or our new Discord server, and make sure you enter the latest monthly giveaway for FREE today!
Get ad-free access to our hobby videos, a monthly drop of miniatures, and support some of the best creators out there for as little as $6 a month on Patreon!

This post contains affiliate links, as an Amazon and eBay Associate Spikey Bits earns from qualifying purchases.