Welcome back for a little mid-week conversion fun, and a big milestone.
This article is the 100th conversion article on Spikey Bits. Woot!
The blog itself will be coming up on its three year birthday this April as well!
Believe it or not I was blogging two whole years about the hobby before I starting selling bits again.
Wow time flies, I feel like I’ve done so much in the past three years, but also like there is so much yet to be done. Weird feeling….
Anyways I had a chance over the weekend to relax and work on this sweet Rhino Driver compartment conversion.
It’s actually pretty simple as far as conversions go, and can really put any rhino chassis-ed tank over the top!

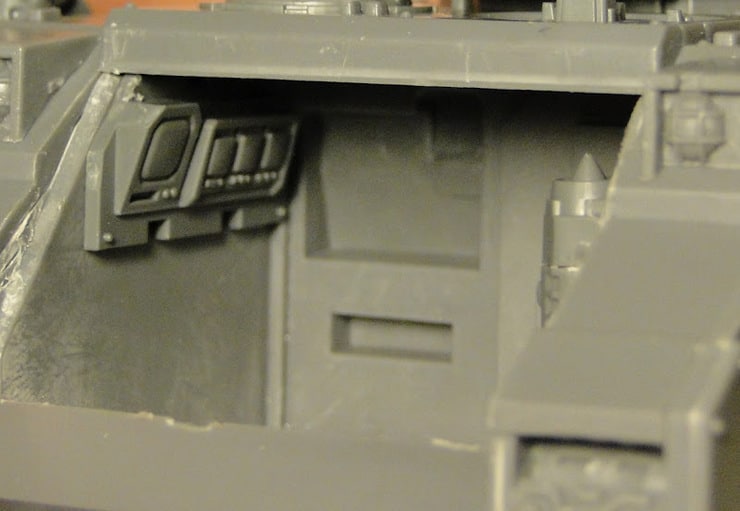
Control Panels from the Stormraven
2.5mm Slatted Plastic Card
The drawback is that that the attack bike sprue is kinda expensive if you intend on converting all of your tanks, but the Stormraven control panels are optional on that kit, as some people just paint over the cockpit entirely.
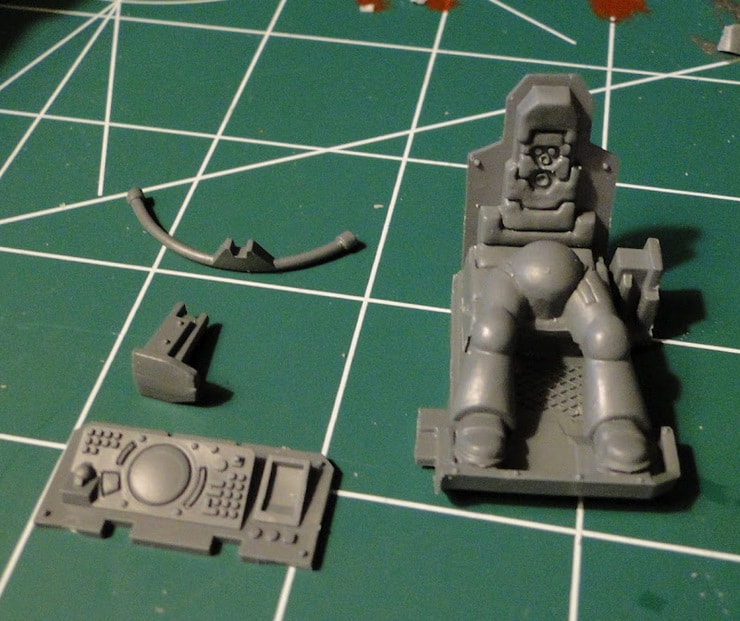
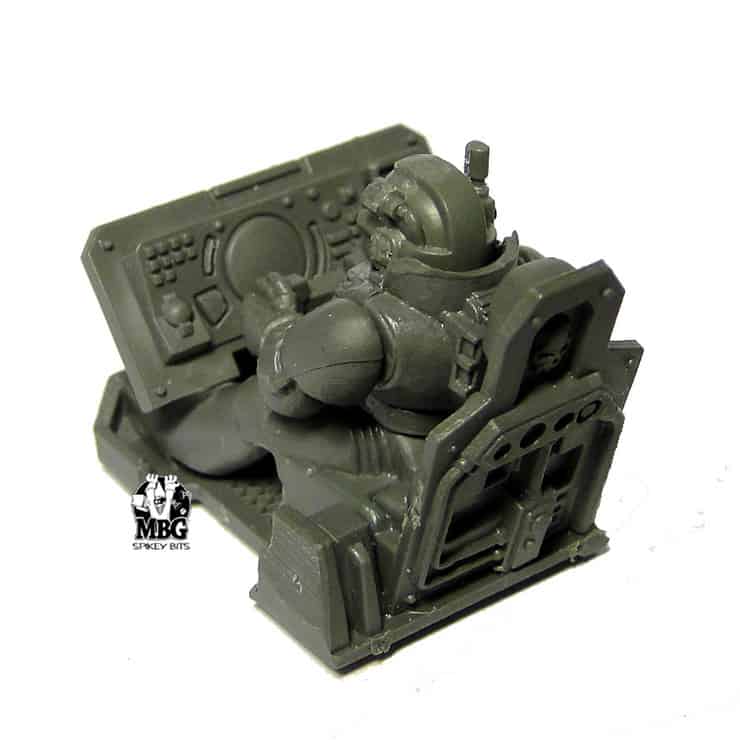
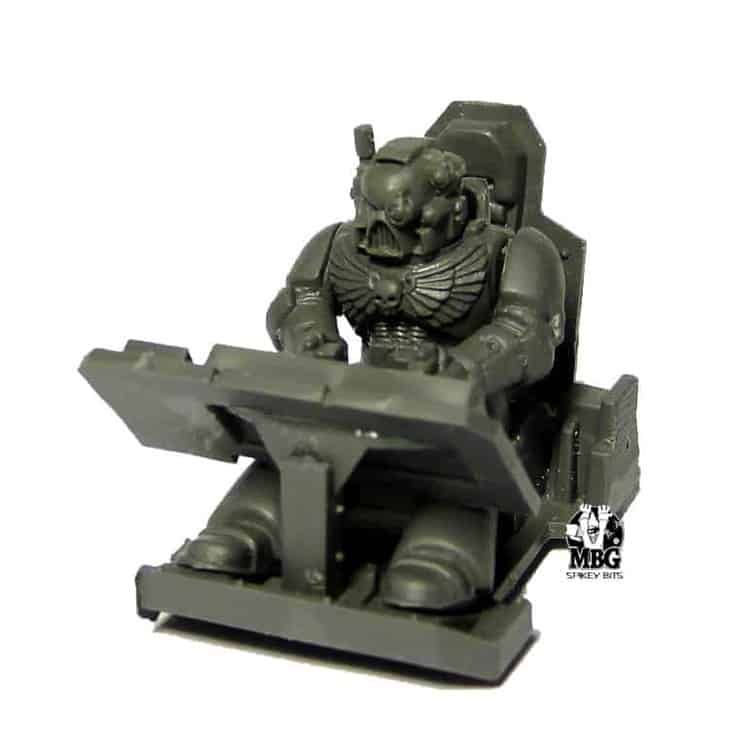
Okay so this conversion is pretty straight forward, first off I trimmed down the seat from the attack bike so it would fit flush to the left of the door (when viewed from the front of the vehicle).
Then I put the seat and marine together so I could start to work on the control panels. For the main panel itself I just used the weapon rail from the Attack Bike, and cut it down so it fit the recess on the back of the panel, and then glue it down at about a 45 degree angle.
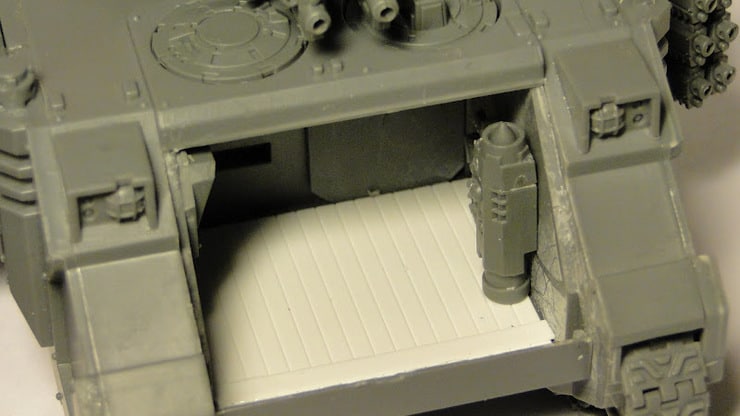
With that done, I just started on the compartment itself. First I fitted in the slatted plastic card to match the flooring in the passenger compartment, and then I glue down a small strip across that for the “mounting bracket” for the seat assembly (and for looks). I also mounted a H/K missile in there for easy access hatch firing, and behind it is the holstered bolter from the Attack Bike.
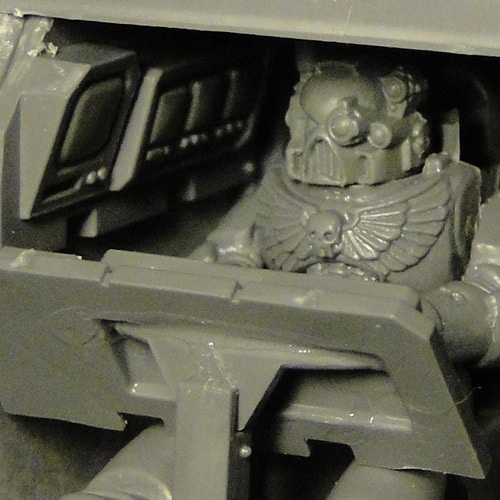
Then I attached the monitors in the corner that will be above the driver’s head. As you can see I had to cut a notch in the bit slightly to allow the front armor plate to still fit over the compartment.
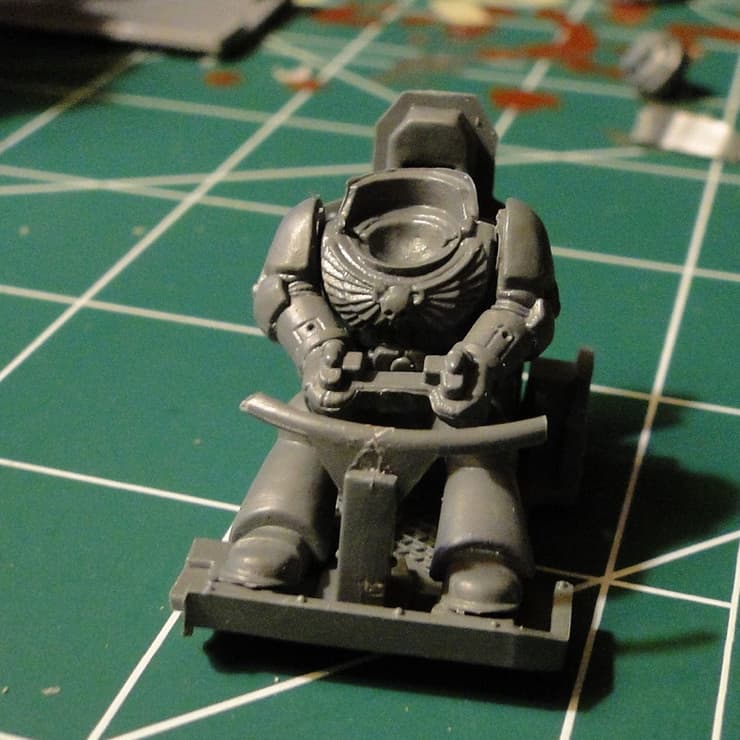
Below you can see the finished driver assembly, and with control panel.
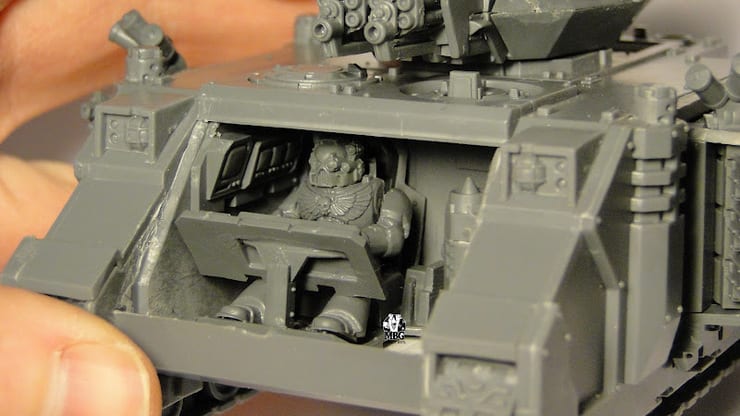
Here is a close up of how it looks mounted inside (apparently his arms came unglued slightly, please overlook this slight offense). 😀
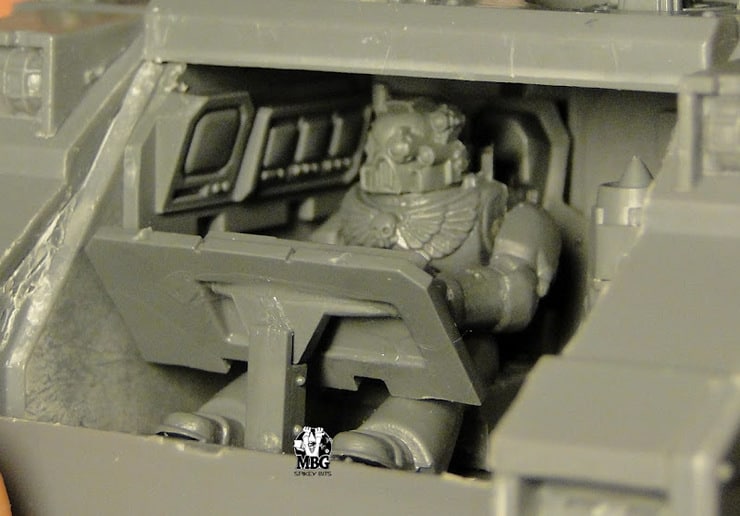
I didn’t mount pads on him yet either as I am not sure what chapter he will claim, but the good news is that there is plenty of space for him to wear them, although I am not sure how he will fit out the door with them on…..
Overall three-sixty below.

I had a ton of fun making this, and I’m hoping for a little inspiration to make a detailed Predator command compartment in the future. I’m pretty sure I’ll end up removing the bulkhead between the front and back entirely for that one.
Anyways more on that later…