Everyone and their battle-brother wants to load up on Gravity guns these days. Here is how to do on on a budget without buying bits from a third party vendor. Yes, there are some great bits out there, but this is a DIY article.
Hey guys, Caleb with White Metal Games here. Gravity Guns seem to be the new hotness out there, and why shouldn’t they be? They’re amazing. Capt’n Dee and his recent win at Feast of Blades featured 8 grav guns and 4 combi grav guns FTW!
You know what’s not amazing .. . the price. These bits go for upwards of $10 bucks a pop on ebay. That’ll never do.
I couldn’t find a great tutorial out there for a Poor Man’s Gravity Gun conversion, so I set out to make my own substitute. Bear in mind, from the get go, this gravity gun will NOT end up looking exactly like the GW model . . . or even remotely like it. If you want the GW gravity gun, be my guest and buy them through bits vendors. There are plenty of them out there.
However, when I did this tutorial I was going for something:
1. Cheap, and easy to build
2. Fast to convert
3. Techy enough/stand out enough to be easily distinguishable from a melta/plasma/flamer on the table
So with that being said, here’s all you need:
- 1x Necron Deathmark Disintegrators. These are about .60 cents each on ebay.
- 1x plasma pistol (I used a SW PP below, but any PP would work). You can find these for about 40 cents each on ebay!
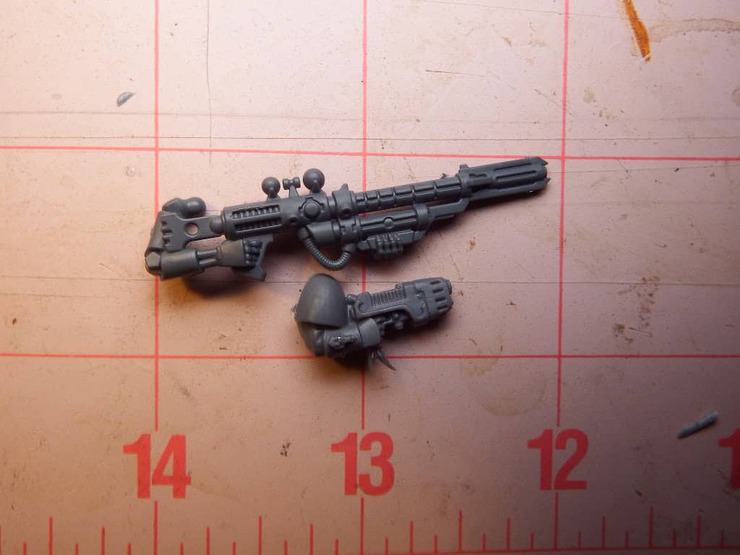
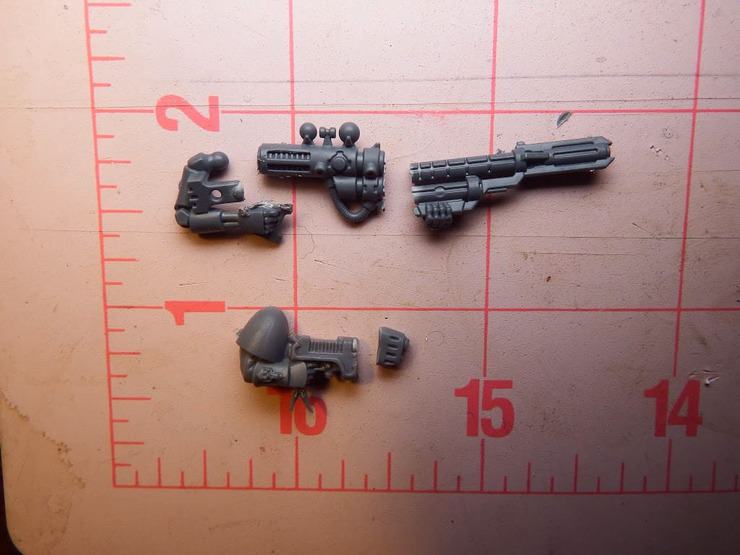
A Gravity Gun for a $1.00? How is that possible? Well, here we go . . . to start, careful remove the barrel end from the plasma pistol and the disintegrator. You’ll also need to to carefully remove the hand and stock from the disintegrator. Use a nice, new blade on your hobby knife. DON’T USE CLIPPERS, you’ll just crush and mar the fine details.
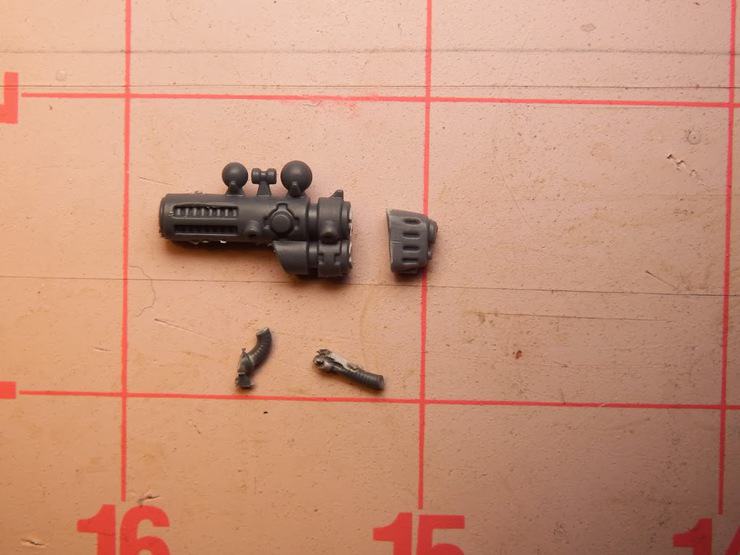
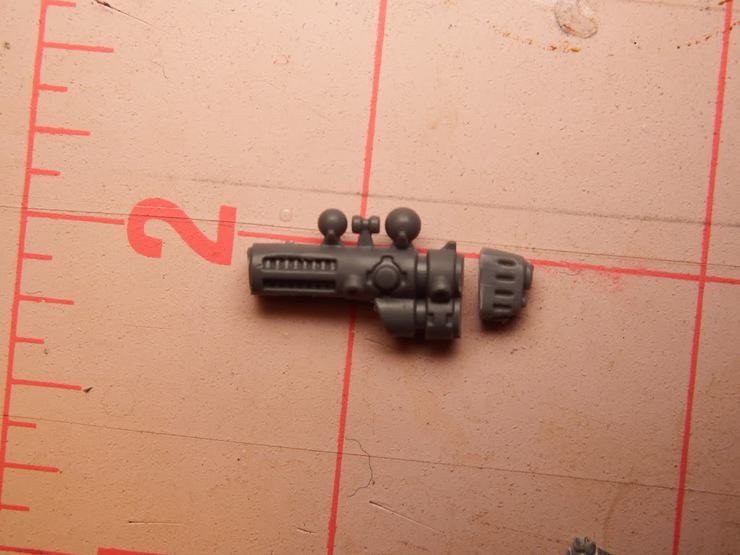
You can tell below that I mis cut the plasma pistol muzzle a little. That’s okay, because we’re going to clean it up in the next step. So now we have the basis for the weapon. Remove the hosing from the disintegrator as well, also using a hobby knife. Although I like the hosing, it gets in the way of the model holding the gun.
Time for a little clean up. Using the hobby knife to clean up all the bits. Trim as needed to get a nice, smooth surface. Be careful, since hobby knives are known for being extra sharp. If you prefer, a file can be used to the same effect and much safer in the long run.
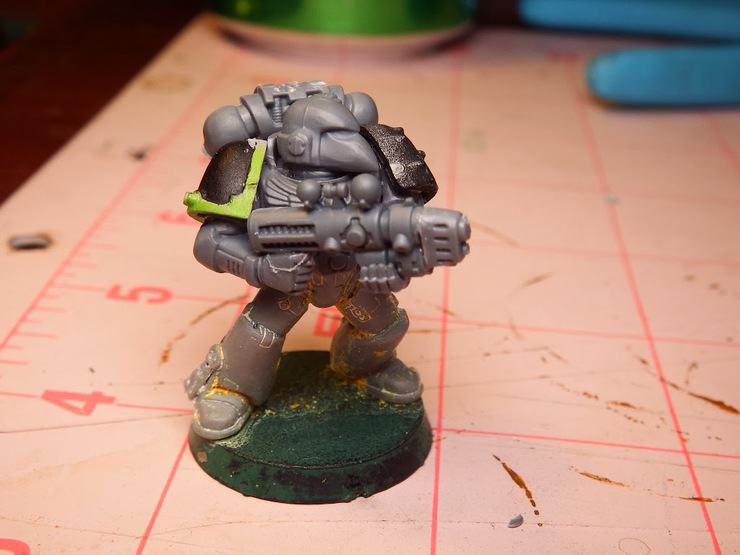
Use a little plastic cement to weld the bits together. Voila, now you have your gun. Simply mount the gun to the model the same way you would a bolter. And there you have it.
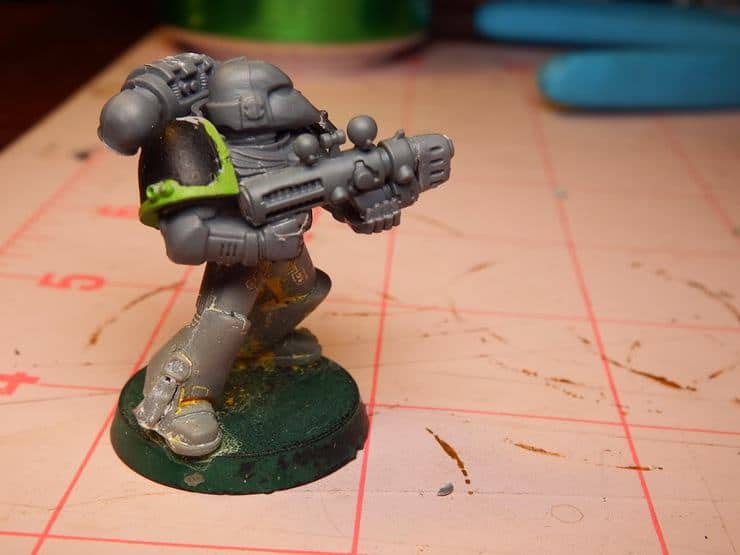
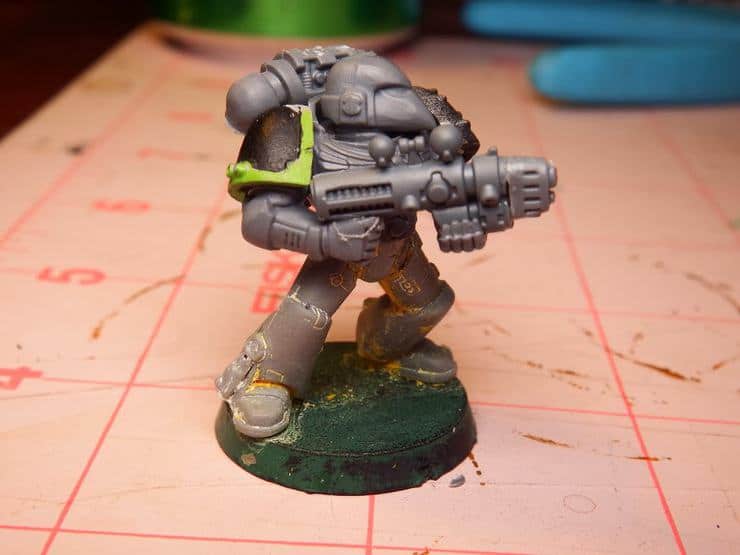
This conversion takes less than five minutes, and IMHO, looks pretty snazzy. It looks different enough from a melta or plasma gun to stand apart, but also have a distinctly marine bulk to it. I especially like the little globes at the top of the gun. Not sure what they do, but they remind me of a super soaker, which harkens back to my child hood, which is always fun. Ah memories . . .
Side profile. If only I have a runway he could strut down.
If you liked this conversion, check out a recent Eldar Farseer on jetbike conversion we did for another client!
These are just a sampling of the models we build every day at White Metal Games. Peruse our gallery for more examples. Repeat as needed.
So??? What do you think my fellow Marine players?
