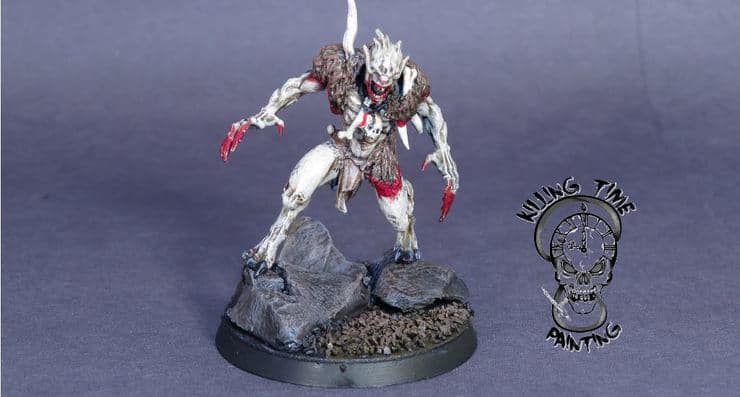
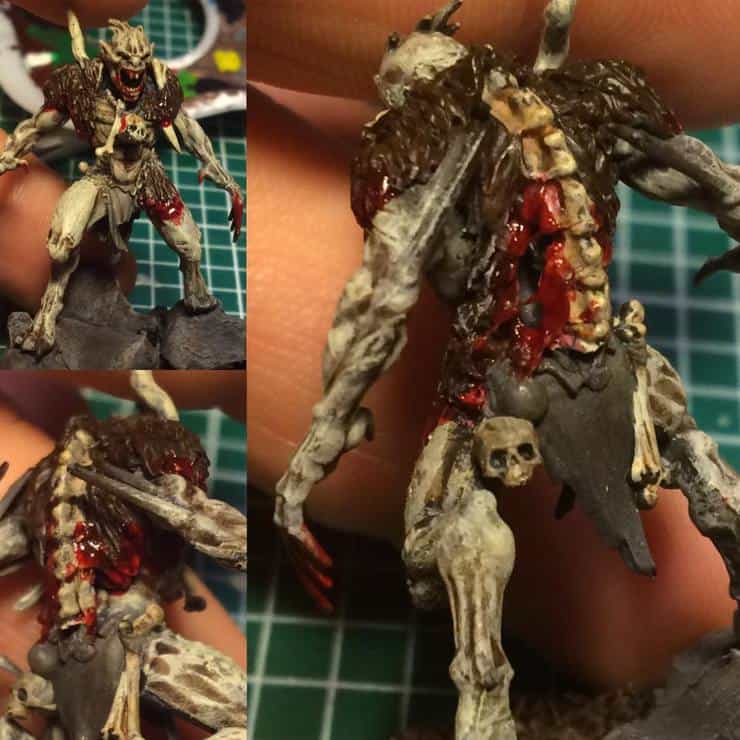
A lot of conversion work went into this Ghoul King. Come see what the artist himself has to say about this epic miniature!
Today on The Hobbyist Spotlight we are taking a look at a converted Ghoul King for a Flesh-Eaters Courts mini and seeing what the artist has to say about it!
Via hobbyist Killing Time Painting
Tools:
- Green stuff
- Loc-tite Gel superglue
- Sharp hobby knife
- Sprue clippers
- Dentist tools
Bits used
- Ghoul King
- Bloodletter legs
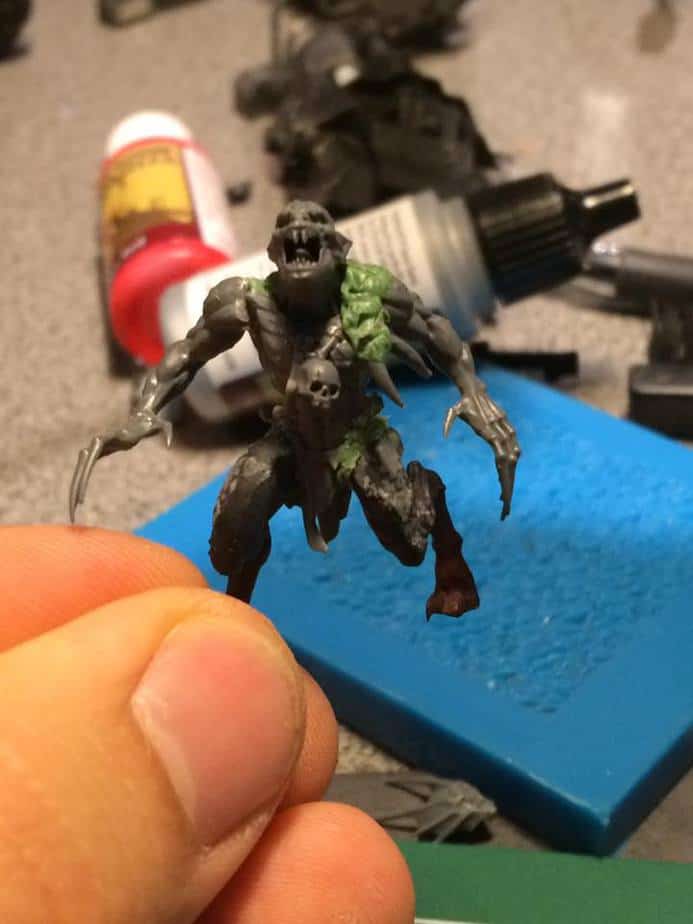
I started the Conversion by removing the right arm and re positioning it so that it was down rather than
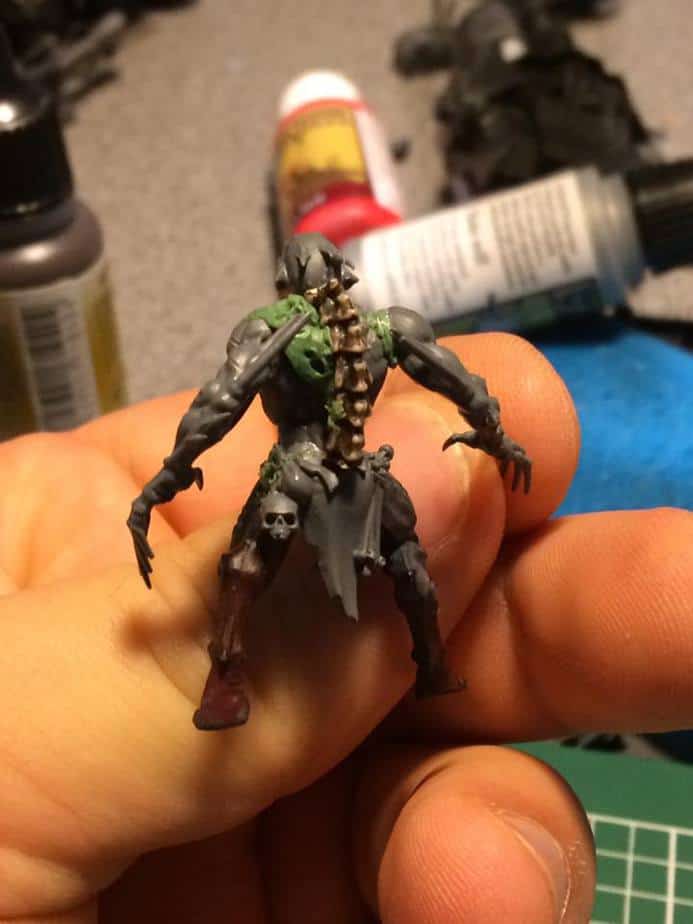
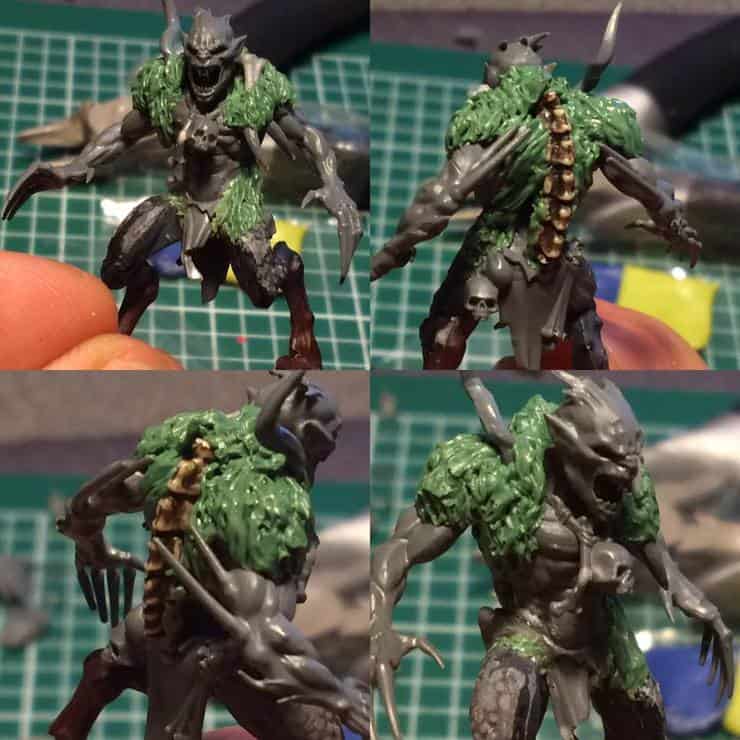
pointing up. Then started building up the green stuff over the shoulders to build up the idea that I had about him
wearing a fresh kill pelt. I added some bone bits in the green stuff fur to look like claws and bones.
I re-positioned the head so that it would tilt down more rather than look like he was howling and looking
up. I used Greenstuff to fill in the neck.
I had an old Skeleton horse neck that I used for the spine of the cloak.
Initially I thought about just re positioning the legs from the knee down but that turned out to just be a
mess. Instead I used a pair of Bloodletter legs that I was going to use for a Fury conversion. The legs
were the same size but needed to be shaved down around the hips and groin area. I removed the ghoul
kings legs and discarded them. I trimmed down the blood letter legs using Sprue clippers to get a better
fit. Filled in the gap that was in the groin area with green stuff.
After the initial Green stuff was laid down I started to build up the pelt. I wanted it to look fresh so I
used a dental pick to form the Greenstuff, pull and rip it. The Dental tool was also used to feather in the
fur into the Green stuff. After I let the Greenstuff harden I used a .5mm Pin vice and put pins in the bottom of the feet to
magnetize him to the base. I used paper clips in the feet as Pins and 2mm x 2mm x 1.5mm rare earth
magnets in the base.
The Base is a 40mm round GW base. I tore pieces of Styrofoam (R-2 construction grade) for the rocks
that he is standing on. I cored out holes to glue the magnets into. I used a basic coarse grain sand for
the rest of the base. The Gore on his fingers and his back. I made it look like torn flesh by actually using hair and white glue.
I glued the hair on the back and between the fingers then brushed on white glue to build it up. It’s a
little unorthodox but has a great outcome.
Painting:
I used Army Painter paints mostly with my airbrush. Based it all with Matt Black. For the Base I started
building up with Uniform Grey on the rocks then highlighted with Ash Grey. For the ground I used
Vallejo Burnt umber and highlighted with Fur brown. Washed it all with Chestnut Ink (old school GW
wash) then highlighted again with the brighter Grey and brown.
For the Ghoul king started with Matt Black then a few thin layers of Army painter Necrotic Flesh.
Washed it with Agrax Earthshade. Drybrushed with GW Screaming skull then another earthshade wash.
The Fur is Vallejo burnt Umber, Layered up with Fur and Leather brown from the Army painter line
The gore was Blood For the Blood God GW technical paint. I blended using Vallejo Gloss medium then
knocked the gloss back with the Anti-Shine Matte clear coat from The Army painter.
If you want to check out some more awesome conversions head over to Killing Time Painting‘s Facebook page! While you are there drop him a line and see if he can do some custom conversion work for you! You can also catch him live on Twitch!
