Don’t miss our unboxing and build of the Warhammer 40k Orks Kill Rig as we show you how to make both in one kit!
We’re back unboxing the new big release for the Orks and how to build both versions of the kit out of one box! Rob sees what it takes to get it ready for the tabletop, shows the size of the model, and tells you the GOTCHAS to be aware of when building it!
We are going to show you everything including the sprues, bits, and of course, the size. That way you can decide if this is worth your hard-earned hobby dollars.
40k Orks Kill Rig: Unboxing & Build
Get yours for less on Amazon, Dicehead Games, or eBay
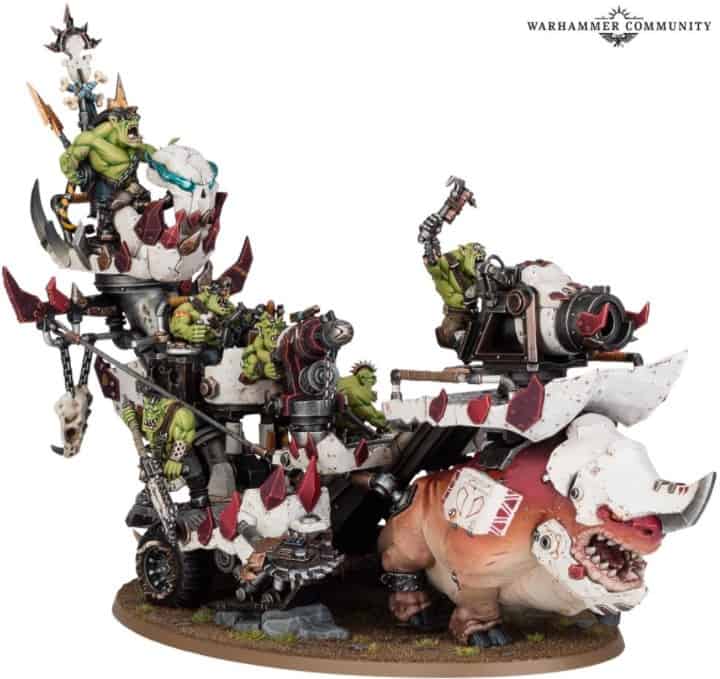
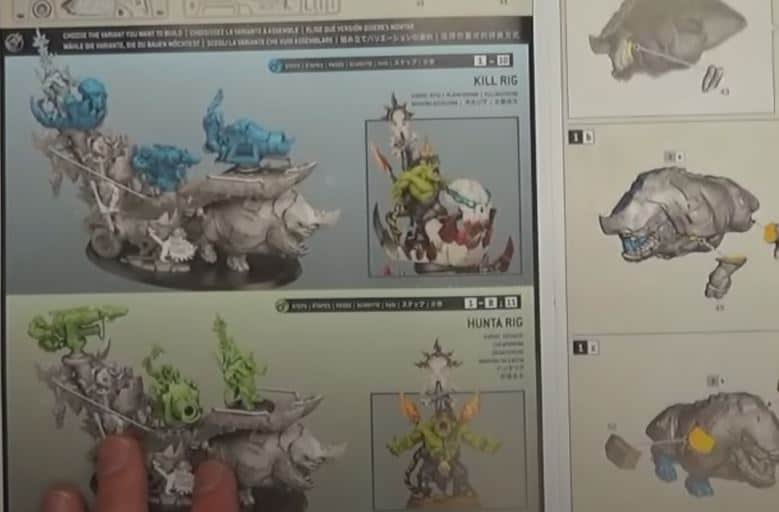
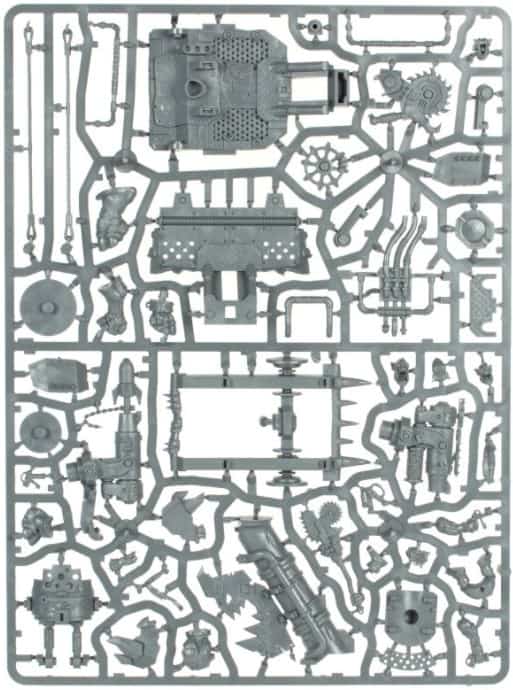
This multipart plastic kit is comprised of 111 pieces, allowing you to build one Kill Rig. The multiple emplacements on the rig can be mounted in a number of different places. This kit also comes with a 170mm Citadel Oval base. Alternatively, this kit can be built as a Hunta Rig with a separate Wurrboy.
This comes in at $125, which is pretty expensive and the price point for this is just in a weird place. It comes with the Wurrboy on its own base, which is a $35 mini. So in a way, this is like a $90 vehicle? Just a curious price point overall because it’s not like the Knight pricing, but also not like the normal vehicle pricing either.
Instructions & Sprues
 Today Rob is going to see if you can build both variants out of this and future proof the mini. It doesn’t look too hard as there are three main pieces that are different. The back piece, the middle gun, and the Boy on the front.
 The directions get a little confusing, because they constantly rotate the way they are looking at the parts, but never actually show the direction you should be looking at it from. So just keep that in mind. Rob recommends not gluing down the main parts together either, that way you can dry fit once you have it all in place.
 This is basically the stage you want to get to before we start looking at making both models out of this one kit. Just be sure to not glue down the Ork in the cockpit area before painting.
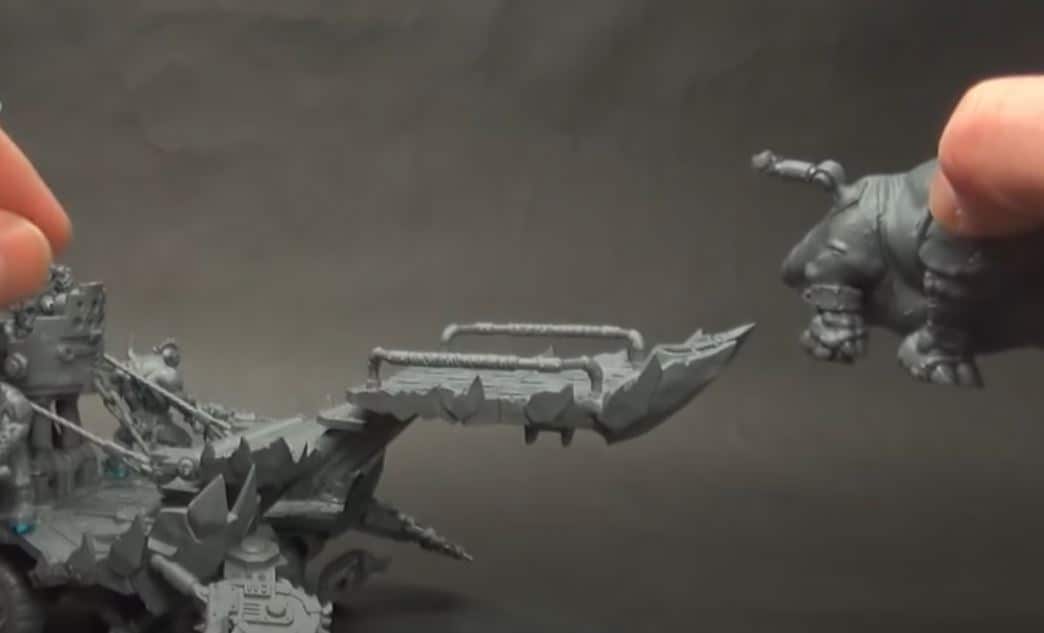
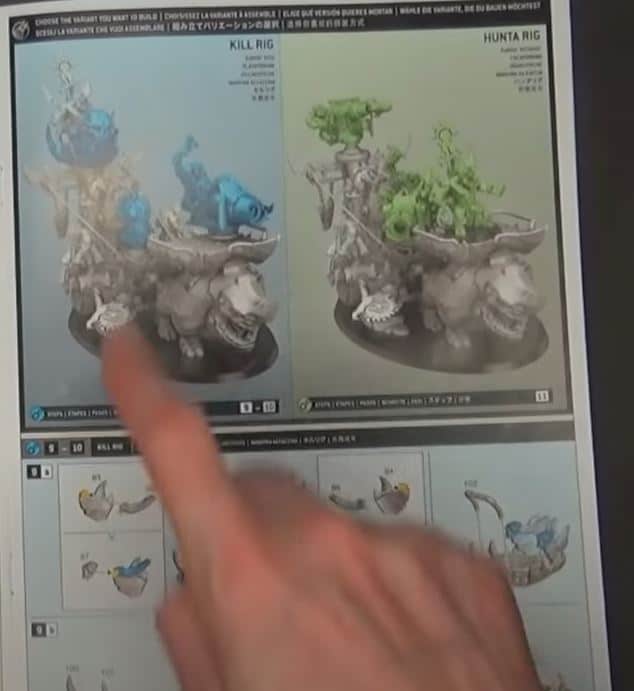 With how the kit works, it’s basically the same three sub-assemblies, just glued down in different places. So, instead of gluing anything down and the key to making it modular, is just not gluing any of the guns or the Wurrboy down. It’s actually that simple!
You could always magnetize it, but it does look like they’ll just pop right in there when needed. After he builds it Rob will determine how well it all stays on without glue.
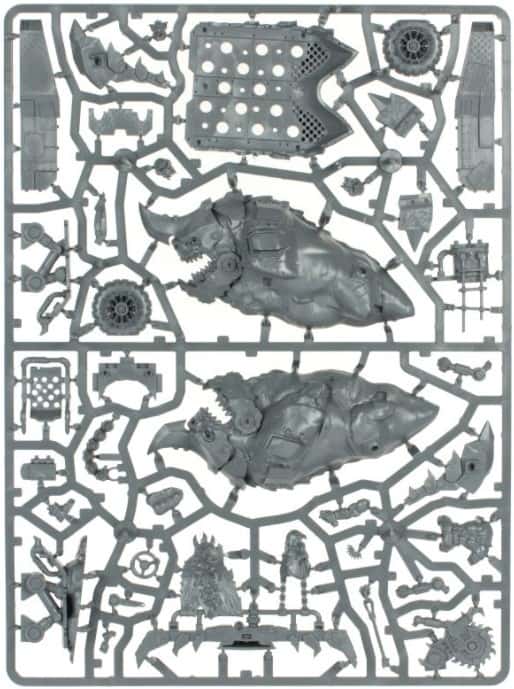
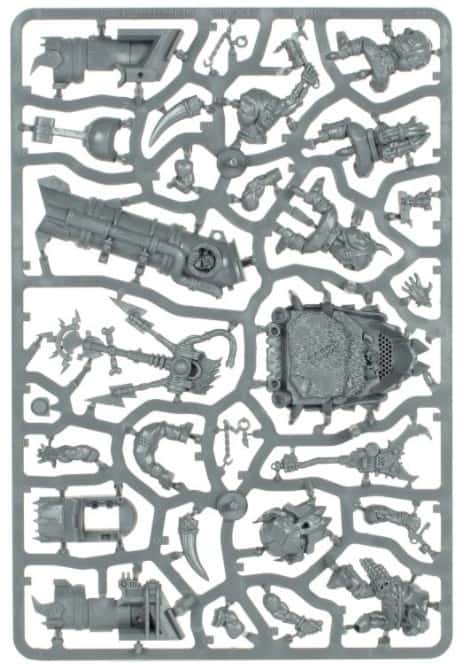
Just like with all the sprues we’ve seen recently, the detail is really strong in here and nothing looks too hard to build right off the bat.
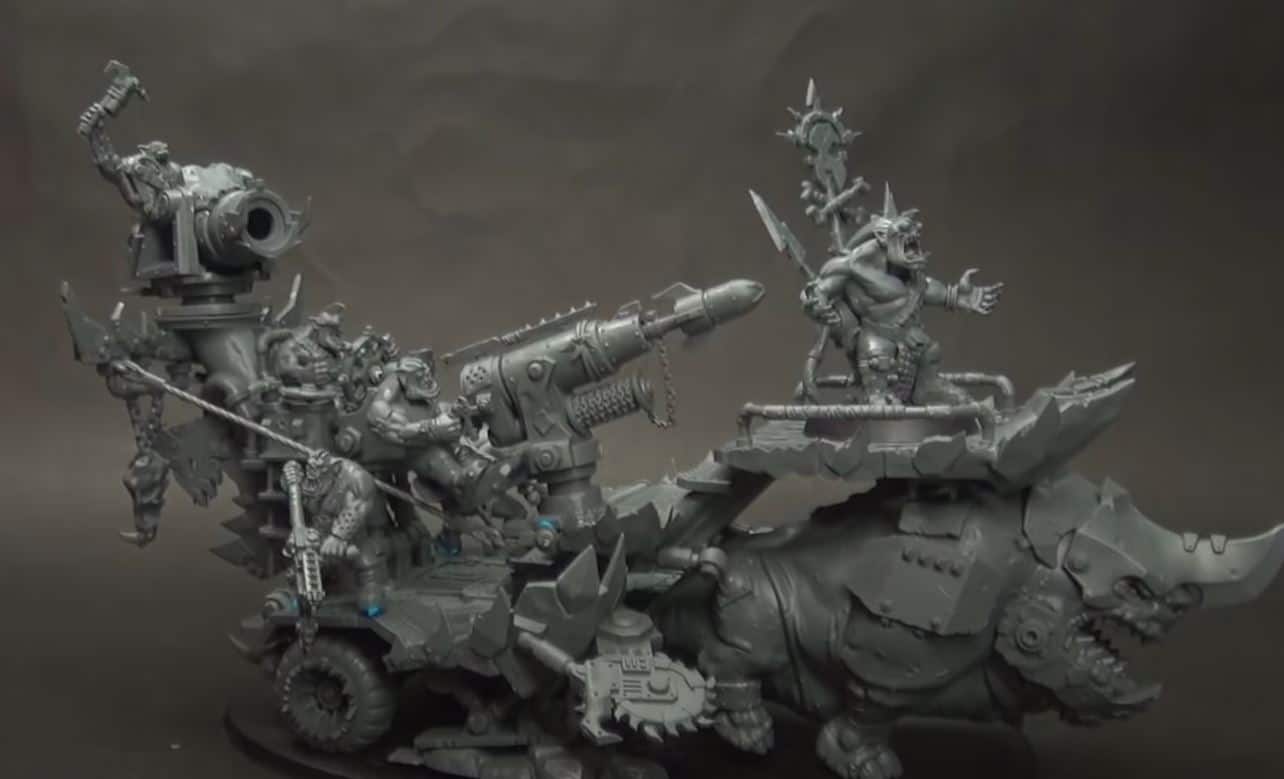
Assembled Model
 So, this was a little longer than Rob expected and the build took about three hours. Overall though, it’s just time-consuming, nothing was overly hard.
 Then, with how modular they made everything, you can just switch the positions of the minis, and boom, you have the over variant. They even give you pretty decent knobs, so Rob thinks you could get away without magnetizing anything, but you may want to blue-tac it if you’re playing a game.
The Wurrboy sort of fits on the top howdah with his base so might as well throw him on the base so you can then use him on foot later if you want.
 Just dry fit everything so the rig stands on its own without the squig, that way you can paint it all separately and then just glue the squig on once he’s painted.
 It’s a little harder to build it in the modular fashion, but might as well when you’re spending this much on a kit.
Get The Kill Rig Here!
Do you like this mini? Have you picked one up?
Let us know in the comments of our Facebook Hobby Group, or our new Discord server, and make sure you enter the latest monthly giveaway for FREE today!
Get ad-free access to the site, a monthly drop of miniatures, and support some of the best creators out there for as little as $6 a month on Patreon!

This post contains affiliate links, as an Amazon and eBay Associate Spikey Bits earns from qualifying purchases.

About the Author: Travis Pasch
Travis Pasch
Job Title: Head Writer & Editor
Socials: @paschbass
About Travis Pasch: Travis has been a Warhammer 40k hobbyist since the 1990s, playing the game since Third Edition. Through extensive traveling, he’s seen a lot of the miniatures hobby from across the world, giving him a unique perspective on the latest gaming topics and trends.
Travis’s brother even owns a commission painting studio, where he’s picked up a lot of good advice and techniques for painting Warhammer and tabletop miniatures over the years, as well. Travis joined the Spikey Bits team in 2019 and has been the lead writer since 2020.
Currently, he’s working on converting all his 40k Adeptus Mechanicus models and becoming a true tech enjoyer, complete with both sad and happy robot noises!