Next Level Painting is bringing you some more exclusive hobby tips on how to fill in the gaps on your models and miniatures with Vallejo Plastic Putty!
Updated on April 24th, 2025, by Rob Baer with the latest information, techniques, and links.
So, you’ve got your plastic miniatures assembled, but now they look like they’ve been stitched together by an Ork with a glue addiction. Gaps, seams, and those awkward joins can make even the best models look rough. No worries—Next Level Painting has you covered with a tried-and-true method to fix those eyesores using Vallejo Plastic Putty.
When applied correctly, this stuff works like magic, blending seams like they were never there. No more distracting gaps—just smooth, professional-looking miniatures ready for action! Grab an old brush and some water, and here how to get those models looking seamless and ready for paint.
Mastering the Art of Filling Gaps on Your Models & Miniatures
Kenny Boucher is here to walk you through the best way to handle those stubborn cracks in plastic and resin miniatures. Let’s get straight to it because no one wants their painstakingly crafted figure to look like it’s held together with hopes and dreams.
The Right Tool for the Job
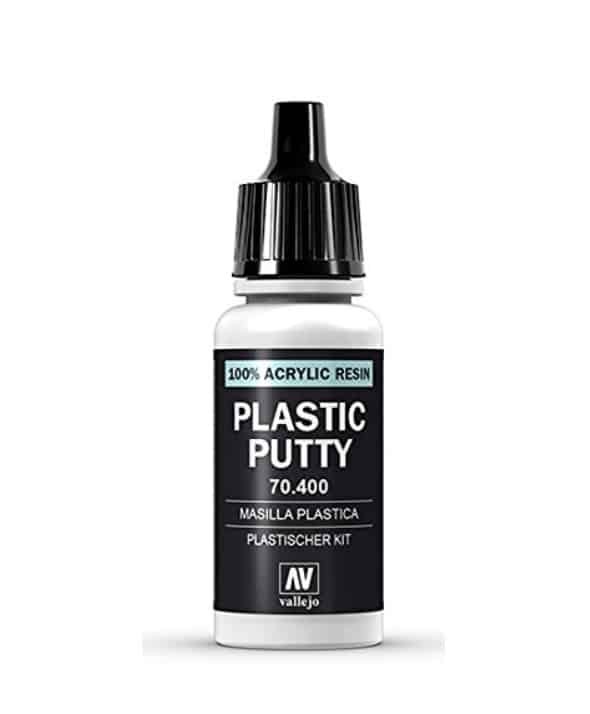 When it comes to filling in gaps in models and miniatures, the tool of choice is Vallejo Plastic Putty (affiliate link– thanks). This stuff is a game-changer, and comes in a dropper bottle or a small “toothpaste” tube. It spreads easily, dries fast, and sands down to a smooth finish. Before you start, grab an old brush—one you don’t mind ruining. Plastic Putty can be a little rough on bristles, so this is not the time to break out your high-end Kolinsky sable brush.
Getting Started
 Squeeze a little putty onto your palette and mix in a drop of water. This thins it out just enough to make the application smoother. Using your old brush, start working the putty into the gaps, pressing it in so that it fills every little crevice. The goal here is to build up a solid base that you can refine later.
 If you’re dealing with large seams, don’t try to fix everything in one pass. Apply a little, let it dry, and then go in for round two if needed. The biggest mistake people make is trying to slap on too much at once. That just leads to a mess that takes longer to clean up.
Blending It In
 The real magic happens when you feather out the edges. Dampen your brush slightly and work the putty outward so that it blends smoothly into the surface of the miniature. This step is crucial—ridges or uneven patches will stand out like a sore thumb once the paint goes on. If you take the time to smooth things out now, you’ll save yourself the headache of fixing it later.
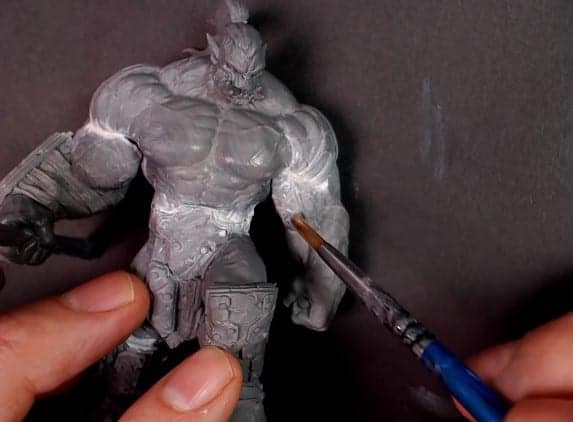 Patience is key here. If the Vallejo Plastic Putty starts to clump up, let it dry and sand it down lightly with fine-grit sandpaper or a hobby file. This will give you that flawless transition between materials, making your miniature look like it came straight from the factory with zero imperfections.
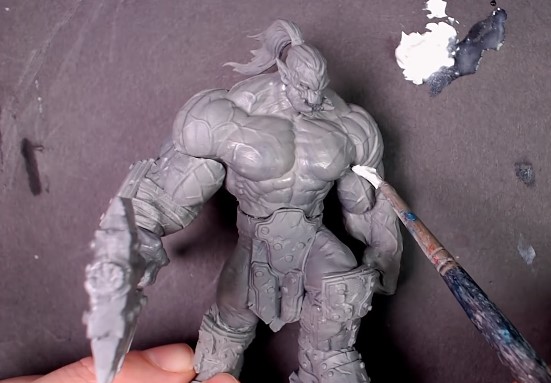
The Orc Warlord Challenge
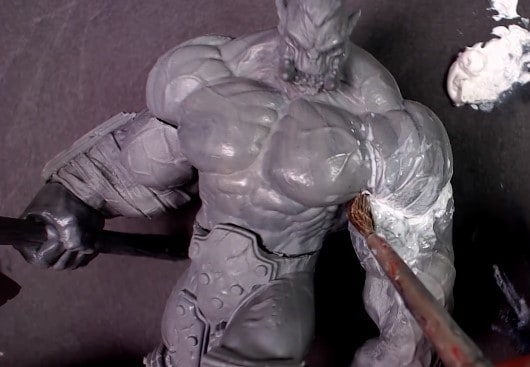
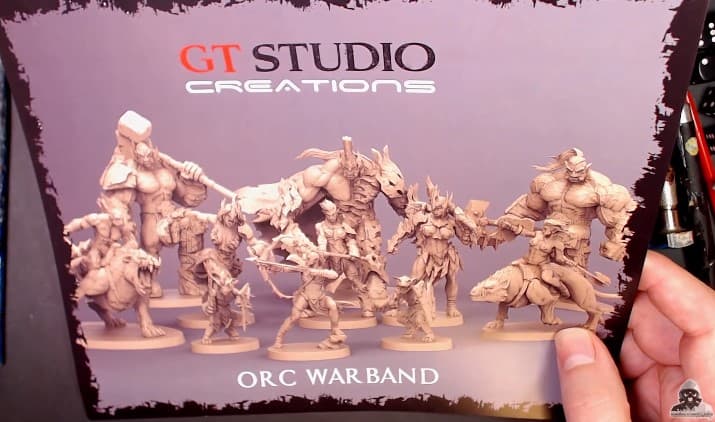 To put this technique to the test, he got his hands on GT Studios’ Orc Warlord, a monster of a miniature with details so sharp they could cut glass. The resin cast is impressive, but like any large piece, it comes with a few problem areas. The arms and torso connection left some noticeable gaps, which meant it was time for some putty work.
After applying the Plastic Putty and working it into the seams, the key was letting it dry completely before refining the surface. A light sanding pass and another quick application of diluted putty helped smooth everything out. The result? A seamless look that will paint up beautifully.
Final Thoughts on Gap Filling for Miniatures
If you’ve ever looked at your miniatures and felt frustrated by glaring seams, Vallejo Plastic Putty is your new best friend. The key to success is layering, smoothing, and sanding. Taking your time at this stage will pay off when you get to painting, ensuring that every detail pops without distractions from unsightly gaps.
So next time you’re assembling a large model, don’t let those seams ruin your work. With the right technique and a bit of patience, you’ll get a result that looks professional, polished, and ready for the battlefield. Happy painting!
Get Your Vallejo Plastic Putty Here!
Will you be using Vallejo Plastic Putty the next time you try to fill your gaps?