Looking to take your commission painting game to the next level, or get more efficient with it? Take a look at these quick tricks to upping your game!
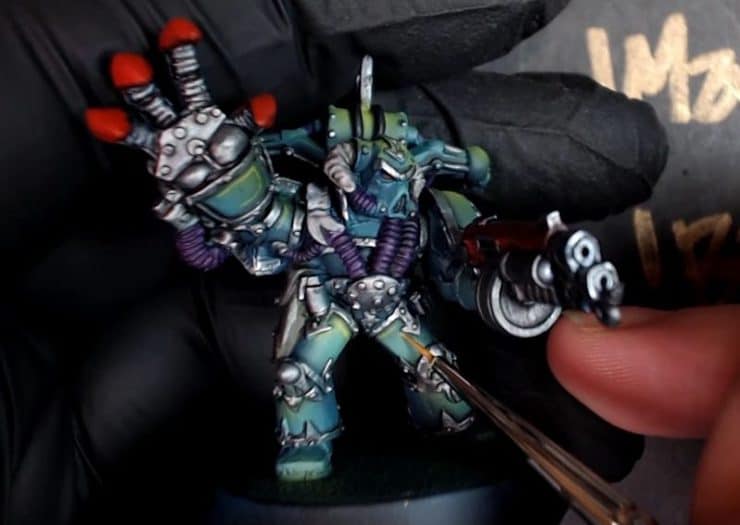
The Renegade Champion with Power Fist is a fantastic model with lots of great opportunities for techniques. Take a look at this great guide to painting one up for a commission that will save time but still look amazing. Be sure to watch the entire tutorial video below for all the tips and tricks!
Commission Painting Hacks: Get More For Less
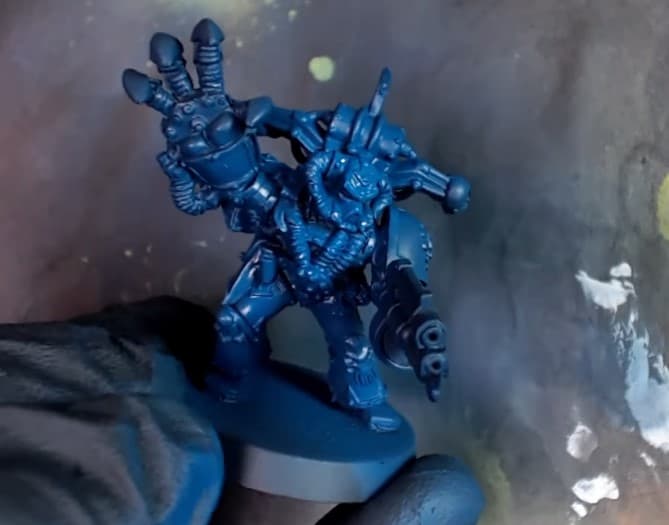
With the model primed black, airbrush a strong basecoat over the entire model. For Alpha Legion, basecoat of blue is key. The biggest tip here is to make a second pass with the basecoat! This way, the blue is in every part of the model, creating a sharp and clean look.
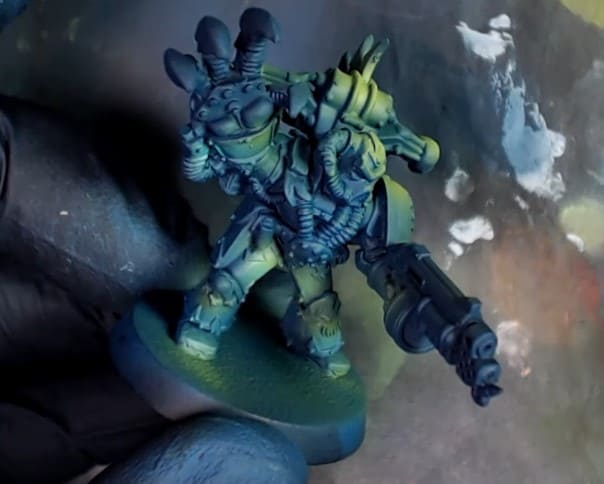
Second, be brave and mix your colors! With Alpha Legion, mix in green to the blue to spray over the base coat and create an exciting transition. This blending technique helps when aiming for a final highlight, in this case, green. It also helps prevent too sudden or mottled transitions.
For the highlights, go brighter than you think they need to be at this point! Always take colors to an 11 as you will be washing them back down to a 10 later. Next with the green, mix in some yellow and pop the edges! This will look aggressive, but, this is just the start before the details are blocked in.
Sometimes we will have to go back and feather in the previous colors again. This is ok! Colors look different when layered and going back over some areas will help you achieve the look you want. Taking light blue back over the greens and blues help make the colors pop even more.
Make sure your previous paints have set and dried before going back in for details and trim. You may need to put the project down and come back tomorrow! How should the details look? Do your research! If a client says “it is up to you”…google what it should look like! Doing your research on how items look will help in the long run! Go as slowly as you need on this part to avoid getting paint on the airbrush work.
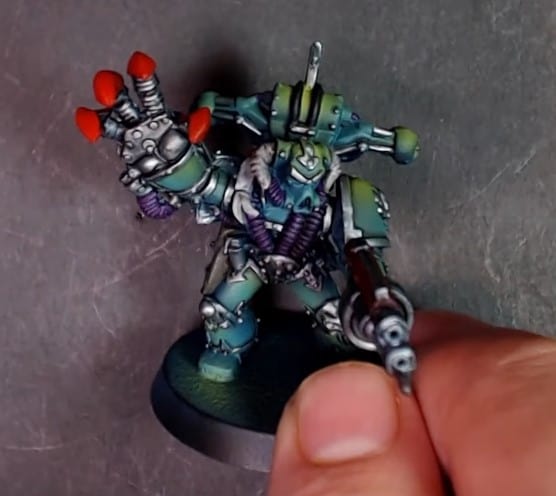
Lock in the details with glazes once all the details are dry. Glaze in colors to create transitions on details, such as the claws and horns. Using the glaze technique creates a transition and brings up bright colors. Once everything is glazed up, wash everything down to create contrast! Creating contrast with a good wash knocks down the bright colors a little but brings out all the details and pulls everything together.
Edge highlights are a final touch that is not necessarily needed but can easily set you apart from other commission painters. Edge highlights create interesting transitions and bring out a bit of a bevel to armor panels. Use these techniques to have your services stand out from the other commission artists. Practice makes perfect for these techniques.
Remember, do not be afraid to go back and forth here between edging and washing. That attention to detail will make things stand out.
Bases are easy and important! You can easily use acrylic textures such as Vallejo Earth Texture or pumice to build up a base from scratch. Add details such as barbed wire, grass, rocks, and other details, using the pumice to help glue details to the base, which will also make the base look realistic since the details will be set within the dirt and not floating on top. Then…
Let it dry!
Once dry, wash the base to create a more realistic effect. Paint the rim of the base black as well, creating a nice, clean look as well.
There you have it, easy way of building up this model to look fantastic for any army or client. Be sure to check out the video below for the entire rundown of tips and tricks!
