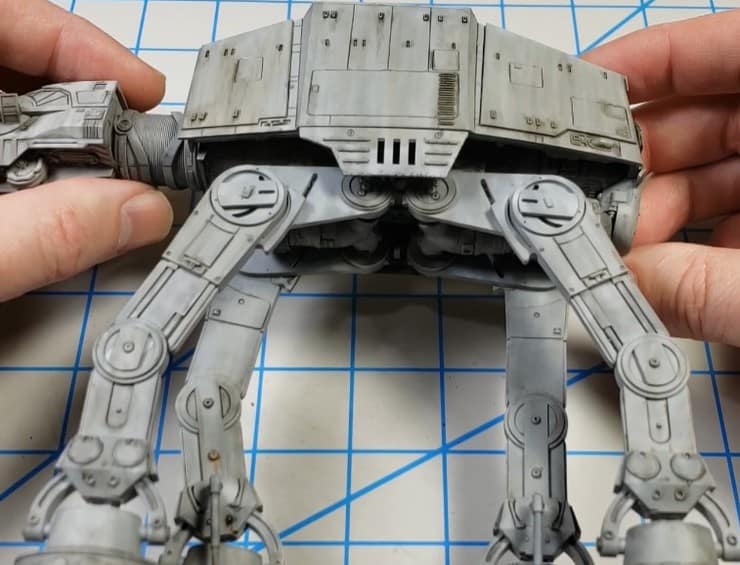
 JonBius has been putting out some great beginner-friendly hobby videos and today he’s weathering an AT-AT model step-by-step!
He recently did an entire series on building the Bandai AT-AT Model to the best he can get it, and now he shows us just how easy it is to weather it.
Watch the full video now for all the tips and tricks! We could all really learn some helpful stuff from him, even though this is pretty focussed on new hobbyists.
Weathering a Star Wars AT-AT Walker: Step-By-Step
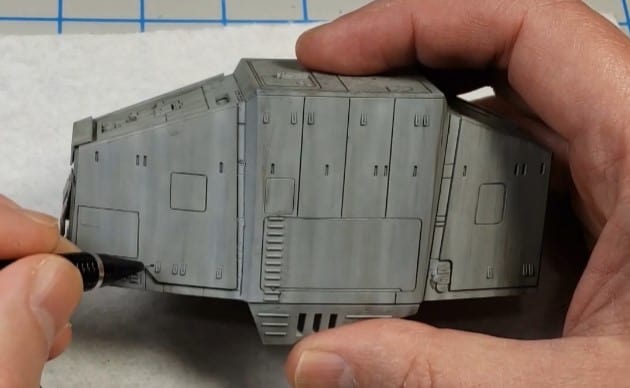 With each of the sections painted, it is time to move onto weathering. First, simply panel line the entire model with a simple pencil. You can also add micro-chips with your pencil on the ladder and similar features, just be sure to be subtle. For each of the raised areas and details, we will need to trace them with a black oil wash mixed with a drop of odorless thinner.
You’ll want the consistency to almost be a sludge. You don’t want it to run or streak very much, but you still need it relatively thin.
 Following up with some odorless thinner after the wash is dried, just apply it to the edges of the wash to blend it back into the paint. You can also use the thinner to force the wash to streak down the side if you want it to look that way.
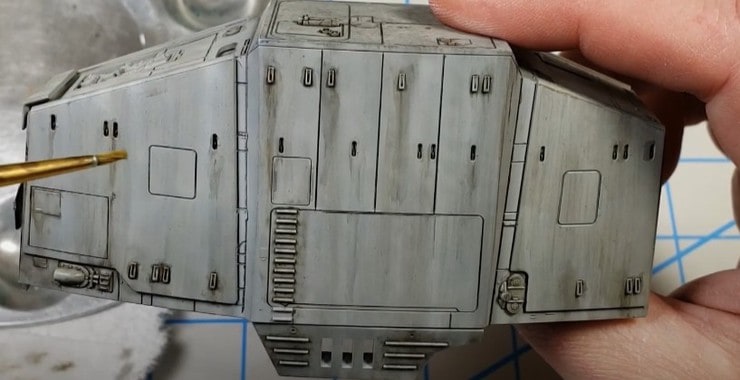
 With Vallejo Chipping Brown you can add a chipping effect to the legs and feet. Using a small sponge, lightly apply it towards the bottom-most areas. The further the area is down, or closer to the ground, the more likely it is to be chipped. That’s where you should place most of the chipping effect.
Then you can come through with a brush and begin adding streaks on top of the sponge marks and connecting them to form more substantial history and “damage.” After that, you can apply this method all over the model to the exact levels that you want.
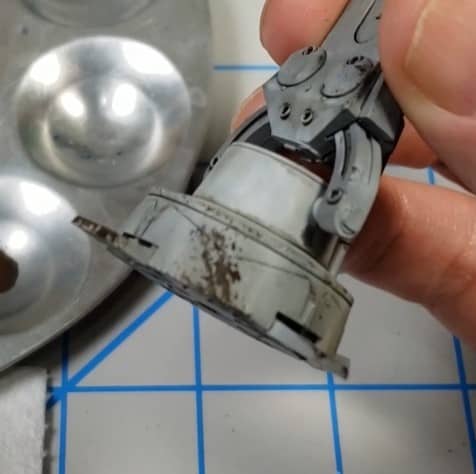
 Vallejo Model Wash Dark Rust and Vallejo Model Wash Light Rust are great options for rust effects. With both of these, go very, very lightly, and work your way up. Don’t make them too large either- this model is a very small scale, meaning a small streak would be massive on the real deal.
Also, be careful with the darker rust because if you make it too dark it may look like BBQ Sauce instead. Always work bottom-up towards the openings you want the rust to appear from. Less is more!
 With that, you are done! This model is completely painted and weathered to perfection.
Watch the video above for tips and even some extra steps that’ll make weathering your model look like a pro did it! Be sure to subscribe to his channel for more hobby tutorials on everything from Airplanes to Warhammer!

About the Author: Andrew Schrank

Andrew Schrank
Job Title: Miniatures & Warhammer Hobby Staff Writer
Socials: Facebook
About Andrew Schrank: Over the past 15 years, Andrew has played all the games, including tabletop and video games, and immersed himself in the associated lore. Andrew joined the Spikey Bits team in 2018 and covers the Warhammer hobby and tournament scene, along with the latest in tabletop miniatures, each week.
Aspiring diplomat, Lord of Fluff, and Master of Ice Hammer, He loves Star Wars, Chaos Undivided, and Gundam. During his free time, he hunts Platinum trophies on PS5 and reads international news. On weekends, Andrew plays commander and cEDH games, often with unique strategies that push the limits.
He believes each day presents a new opportunity to grow and be challenged.